
Click here for more information on how to set up your Schedule.
Creating Appointments
Click here for information on creating a new appointment.
Click on a link to hop to a specific section on this page:Moving Appointments
If you want to move an appointment on the schedule, you have a few different options.
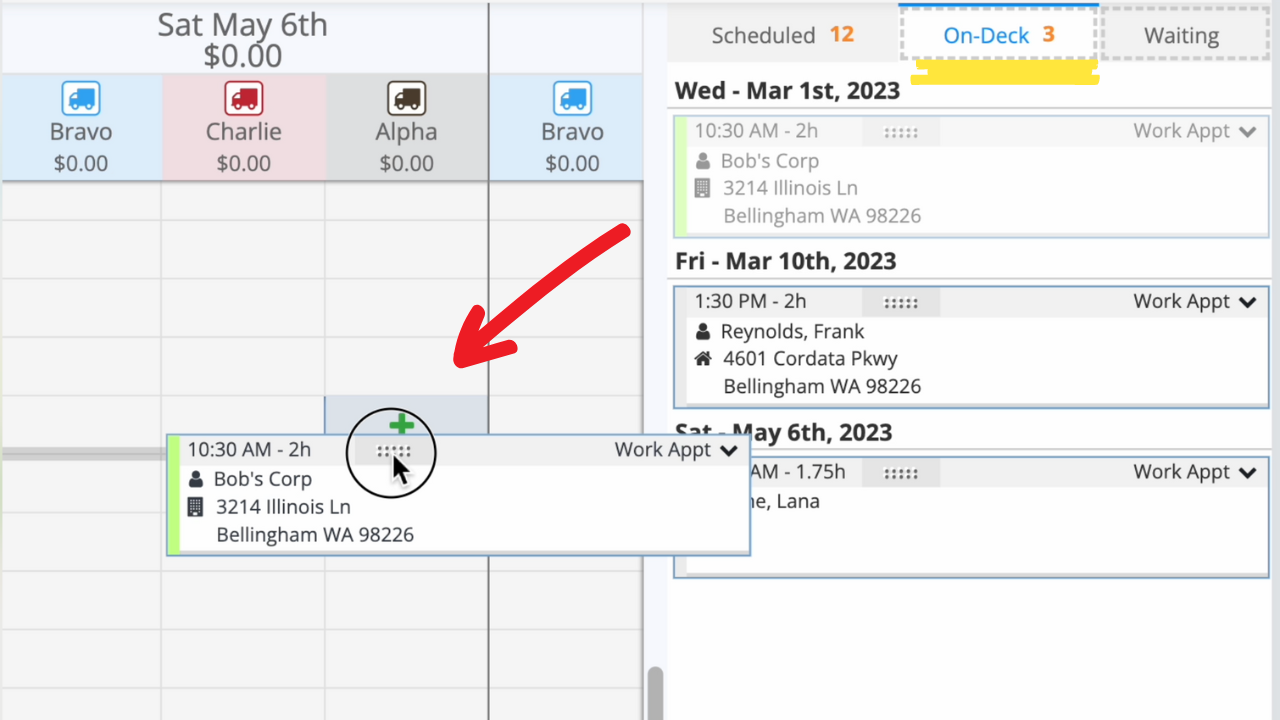
Drag And Drop
You can move an appointment by clicking and holding on the dotted grab area at the top of the appointment and moving it to where you would like it to go.
.png)
Appointment Details
You can also open the Appointment Details and make edits there. You can do so by double clicking on an appointment to open the window.
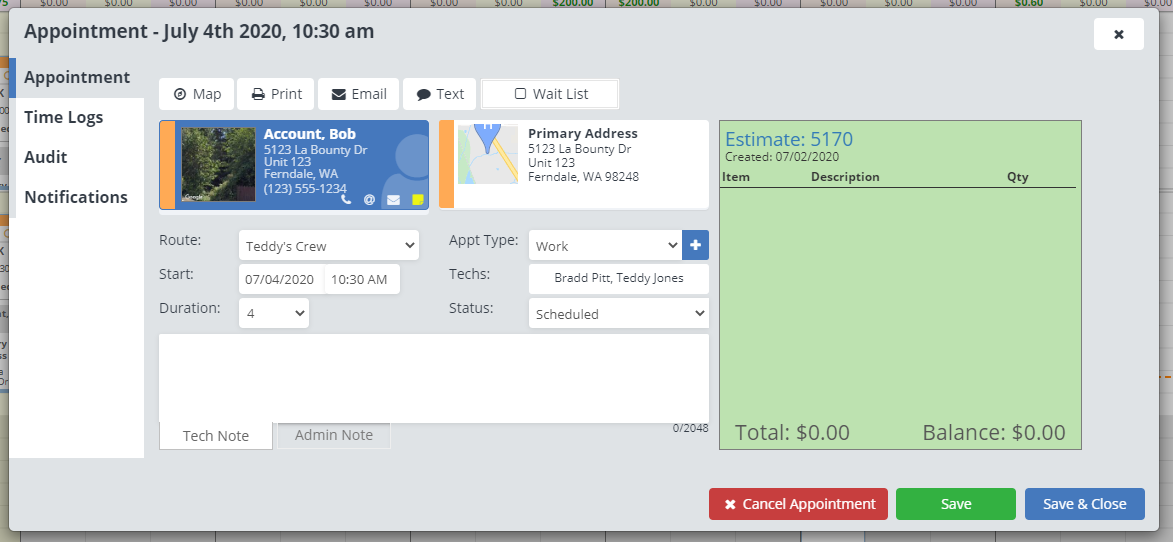
Here you can change the appointment start time by changing the date and time next to "Start".
Once you are done making edits to the appointment, click "Save & Close" and the appointment will move.
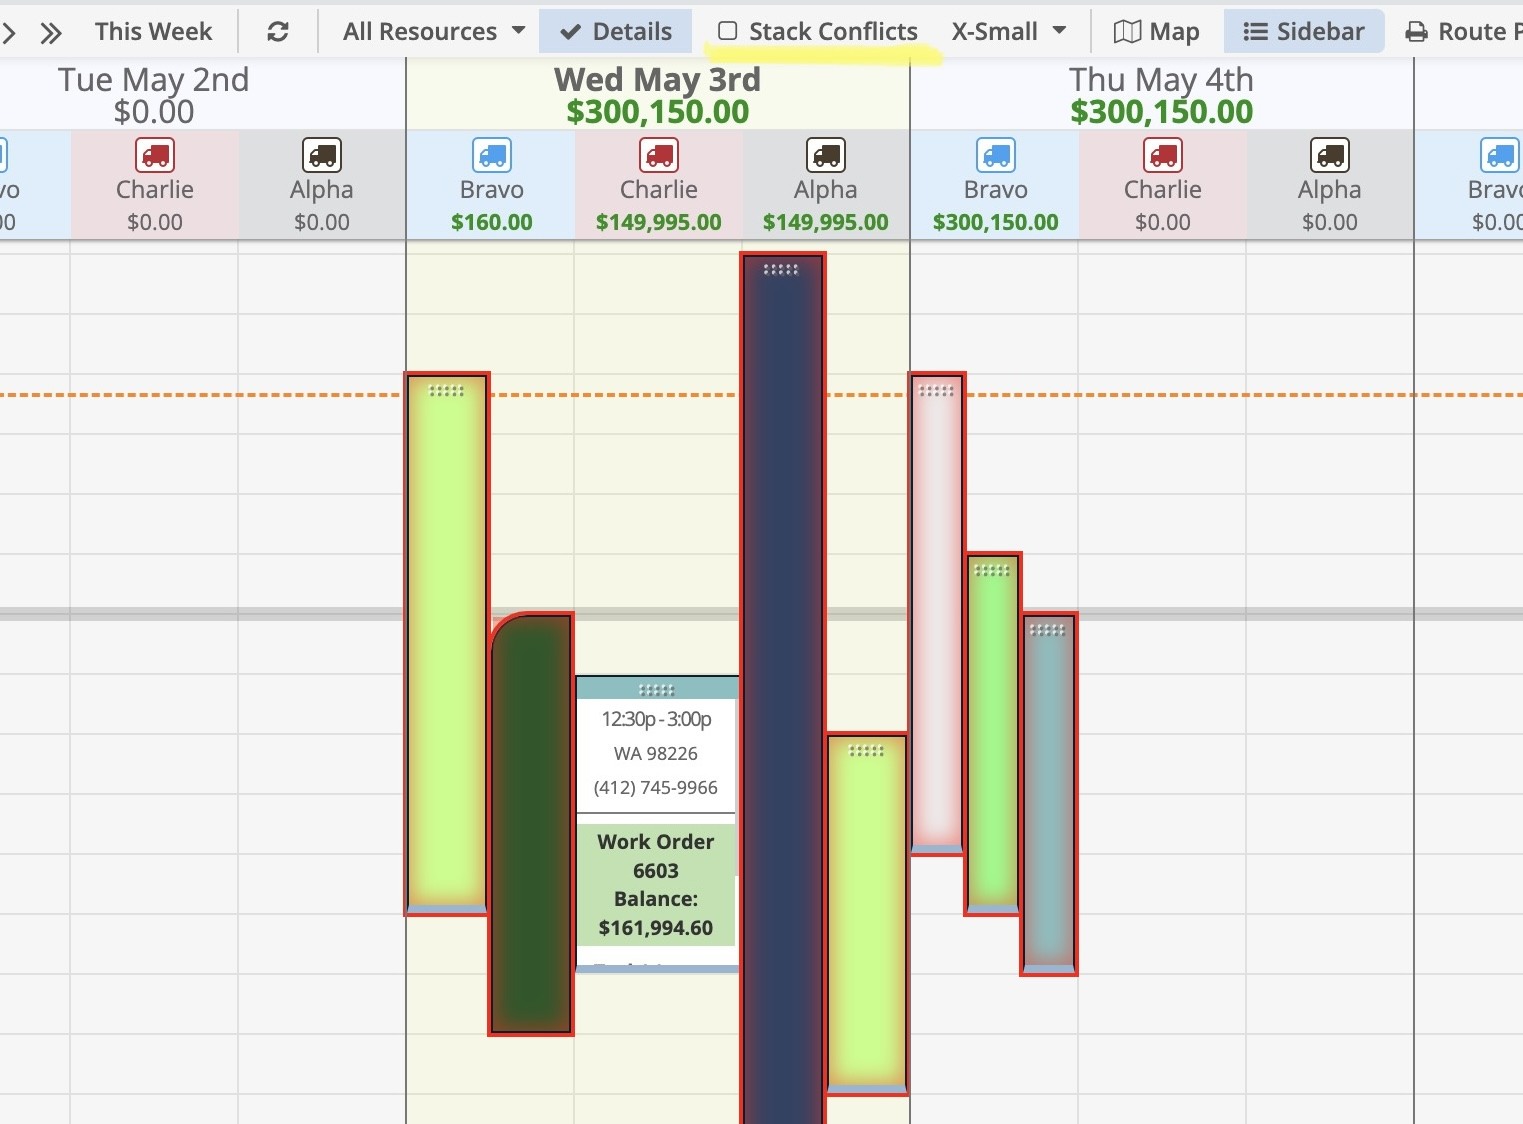
Stacking Conflicts
The Schedule also has a toggle feature for stacking conflicting appointments, found in the top Menu Bar, called "Stack Conflicts".

Unstacked conflicts will appear side-by-side and shrink to fit within the route column width as additional conflicts are added to the same time period.
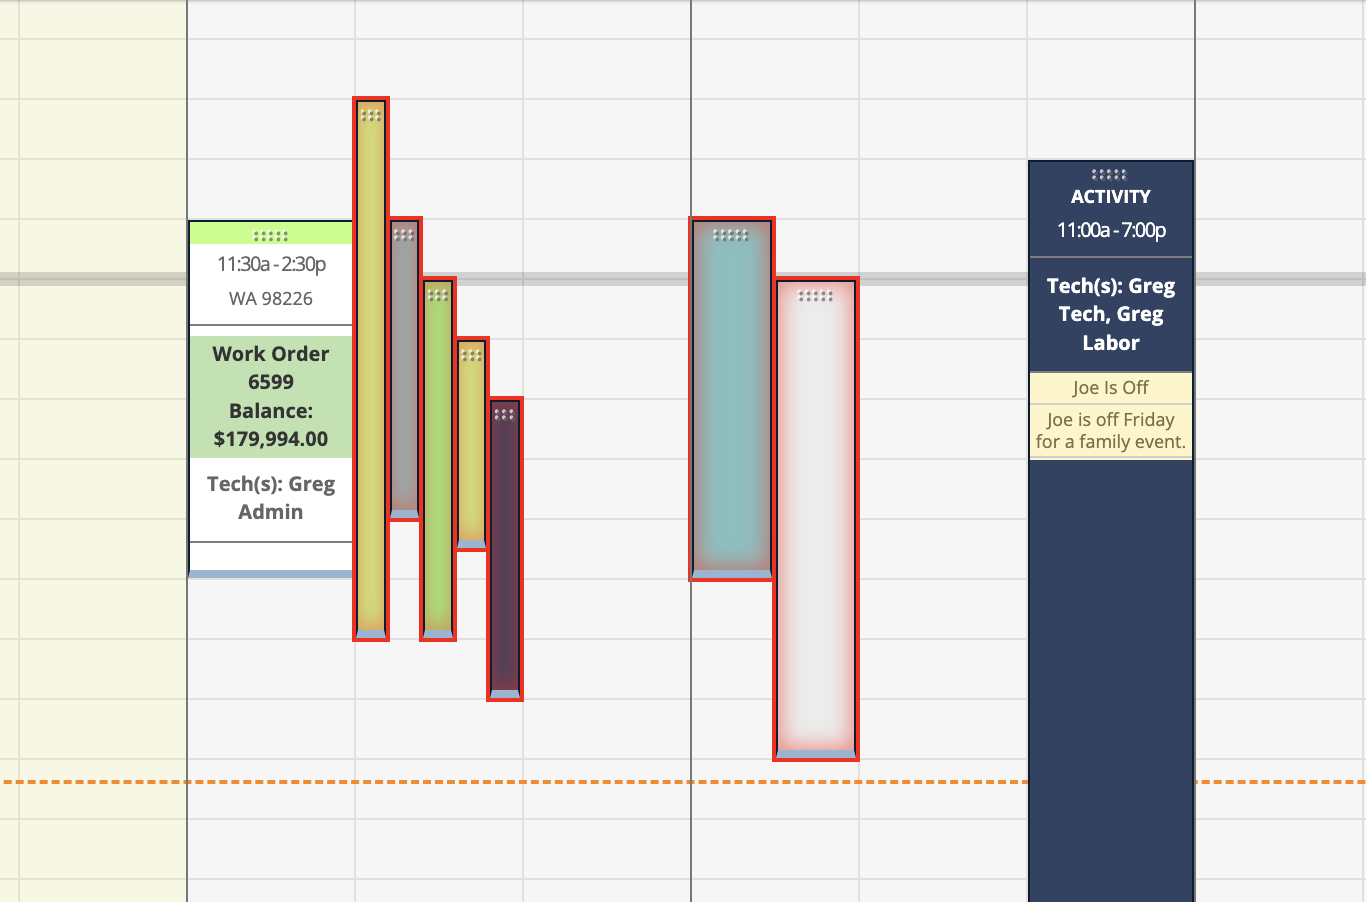
Stacked conflicts will appear stacked over each other and show the appointment details if the "Details" toggle is turned on.
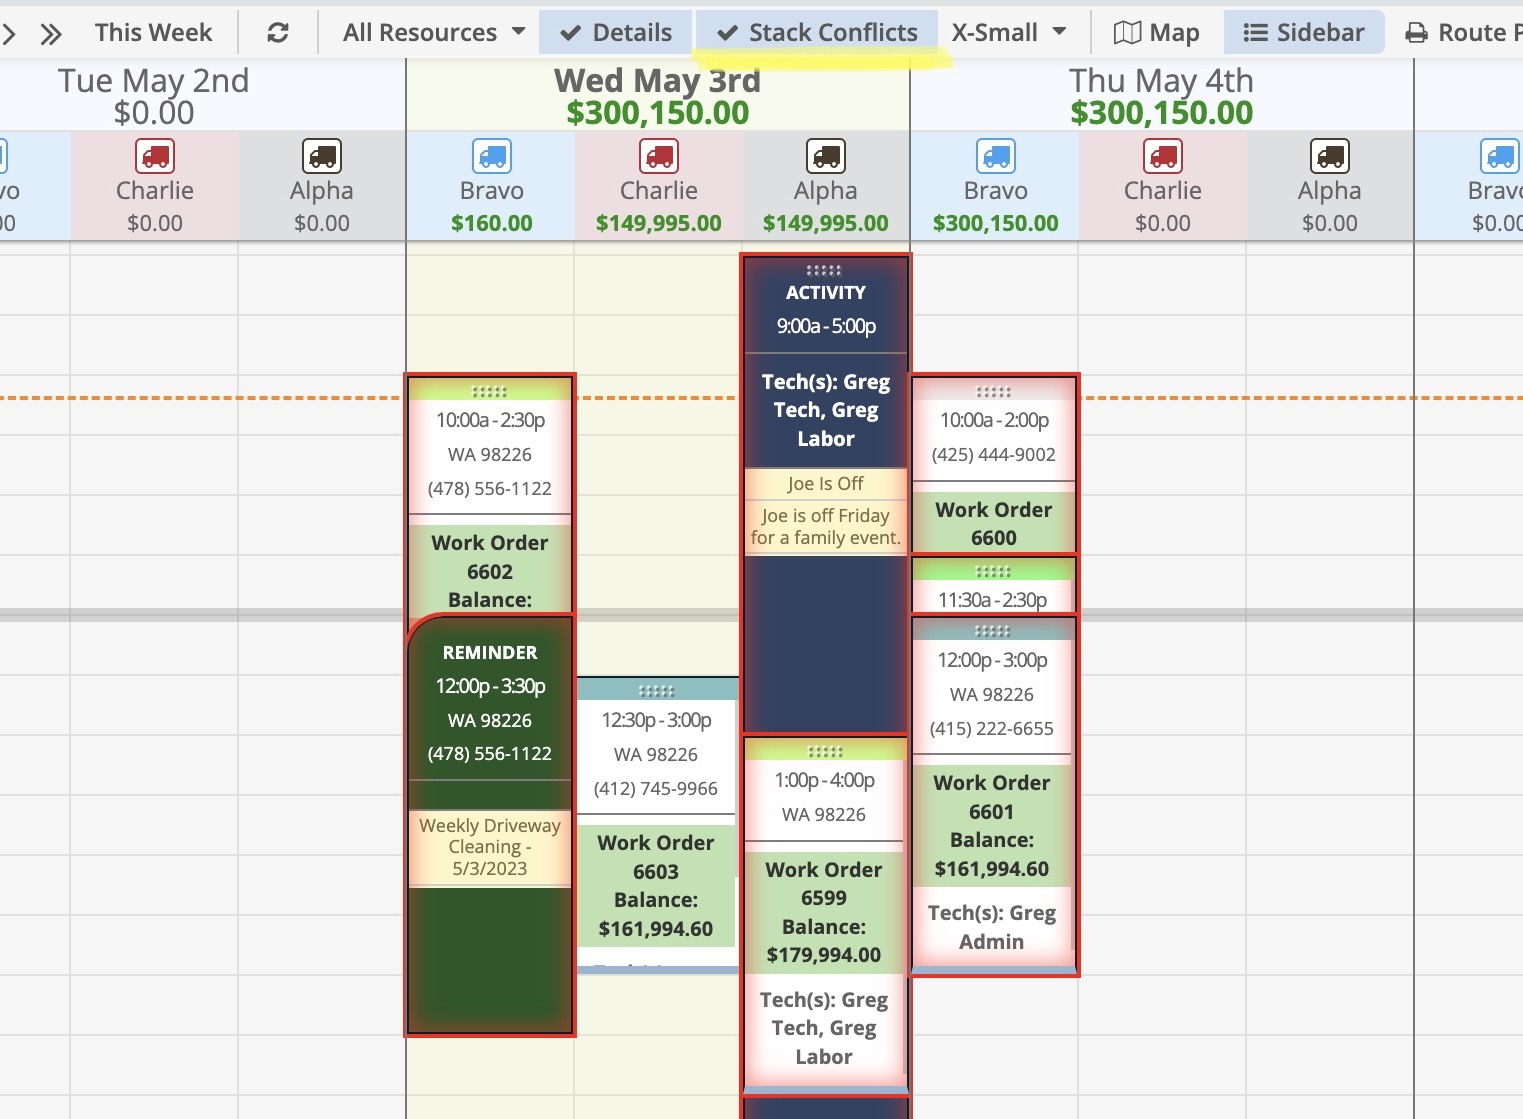
Appointment cards will eventually stop showing appointment details even with "Details" enabled once they shrink to a small enough size.
Continue adding appointments and toggle "Stack Conflicts" to switch between views.
The On-Deck Box
The "On-Deck" is a holding spot for appointments. If you need to reschedule an appointment or remove it temporarily for any reason, this is a great holding spot.
Also, if you schedule appointments from the Order Page, those appointments will show up here.
Move appointments to and from On-Deck simply by dragging and dropping them into or from the On-Deck to the Schedule.
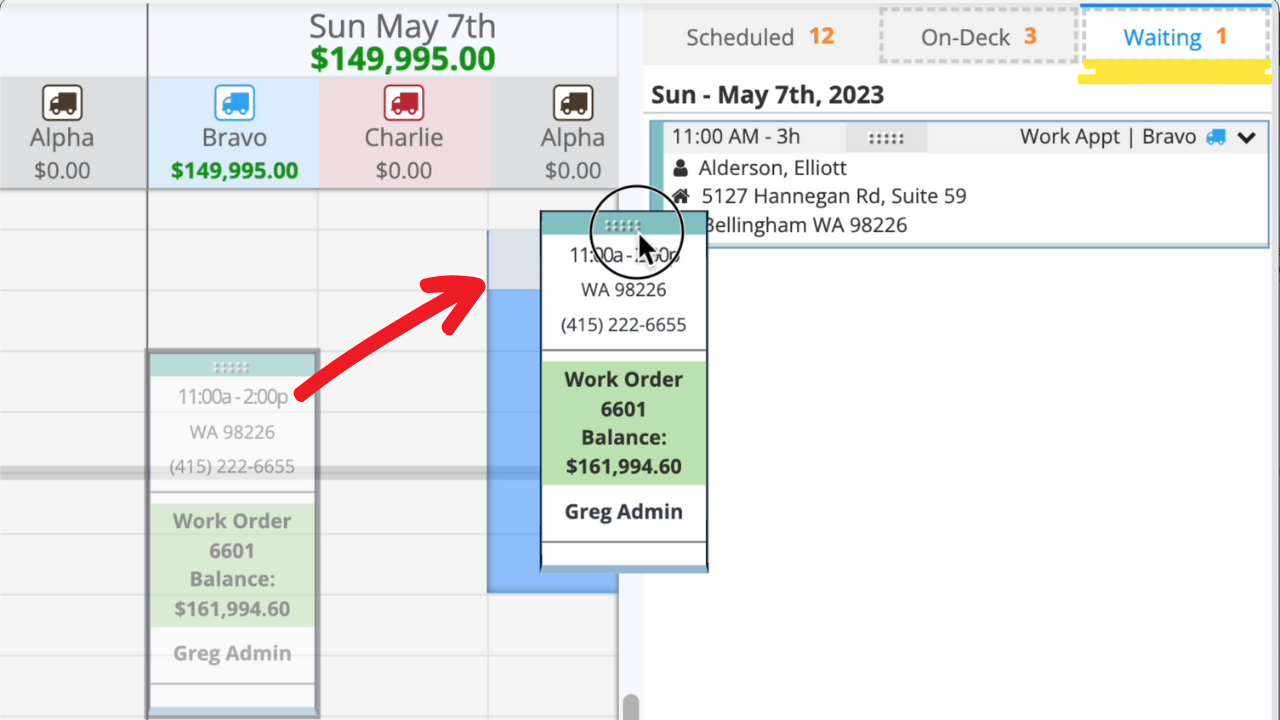
The Waiting Box
Dragging an appointment into the Waiting Box keeps it where it was scheduled, but also holds it in the Waiting Box.
This is great if you have a client who needs work done ASAP and you want to try to fit them in earlier if any spots open up.
Moving an appointment from the Waiting Box onto the Schedule will change it's appointment time.
Activities
You can add an Activity to the schedule by right-clicking on the schedule and clicking “+ New Activity”.
.png)
That will open up a window where you can enter in the details for that Activity, including what type of activity it is (Note, Call, Task, or Mail), what account it’s associated with, which techs are assigned to the Activity, it’s subject and description, and information about when it should be done.
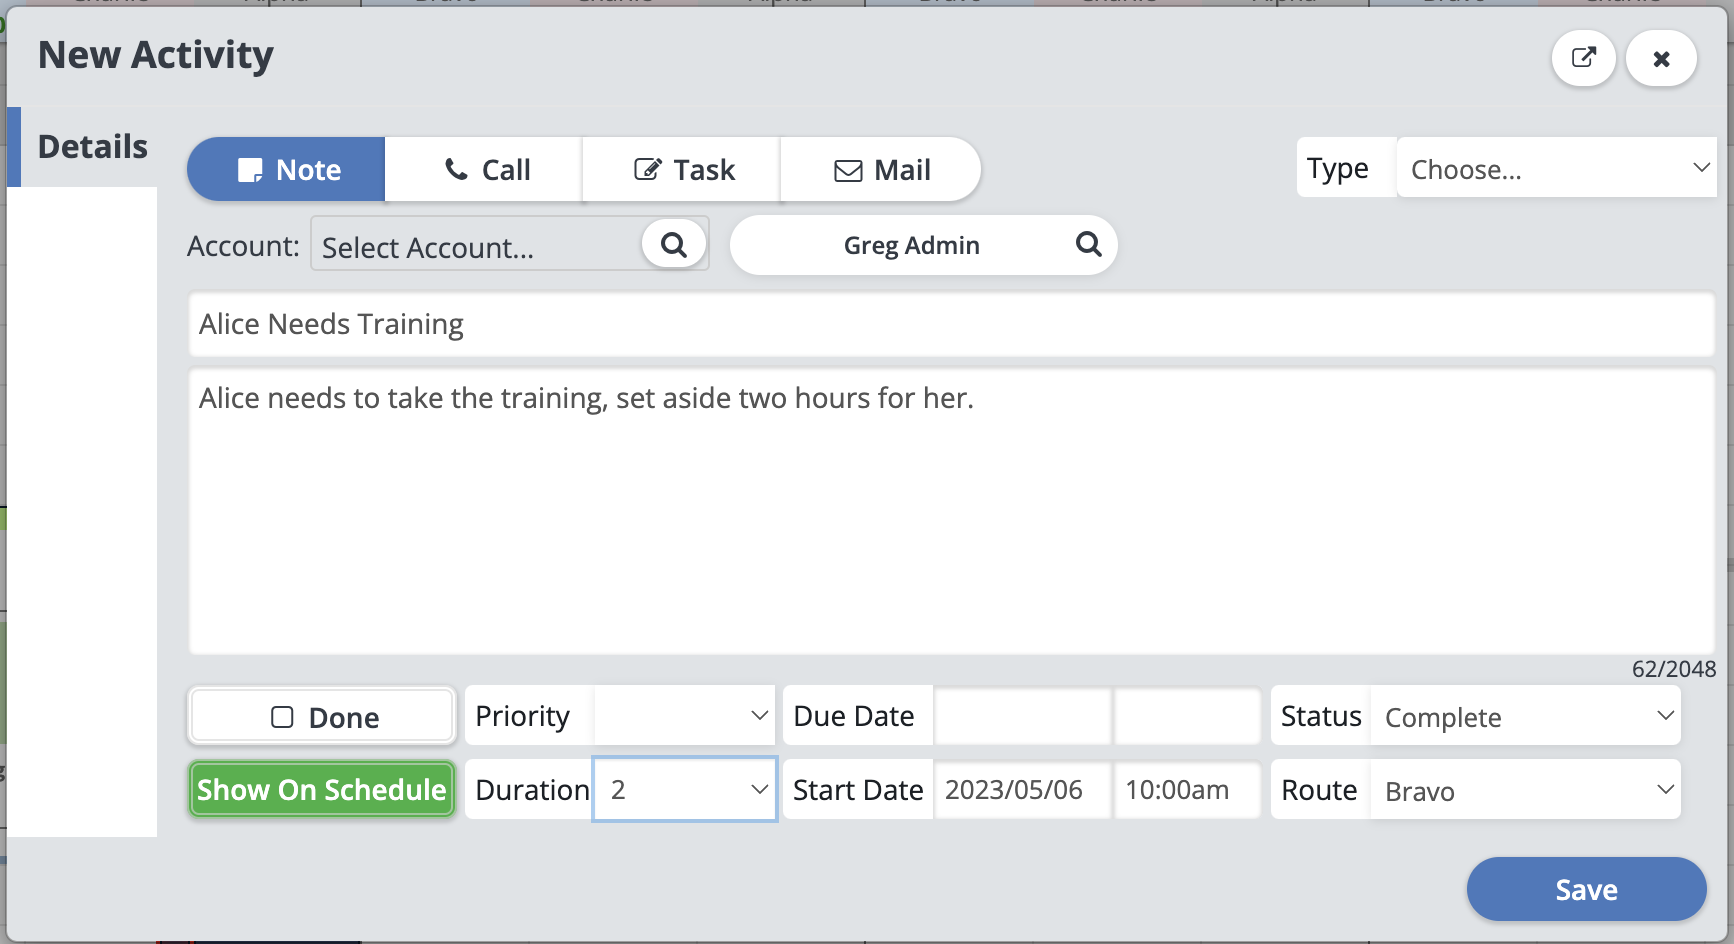
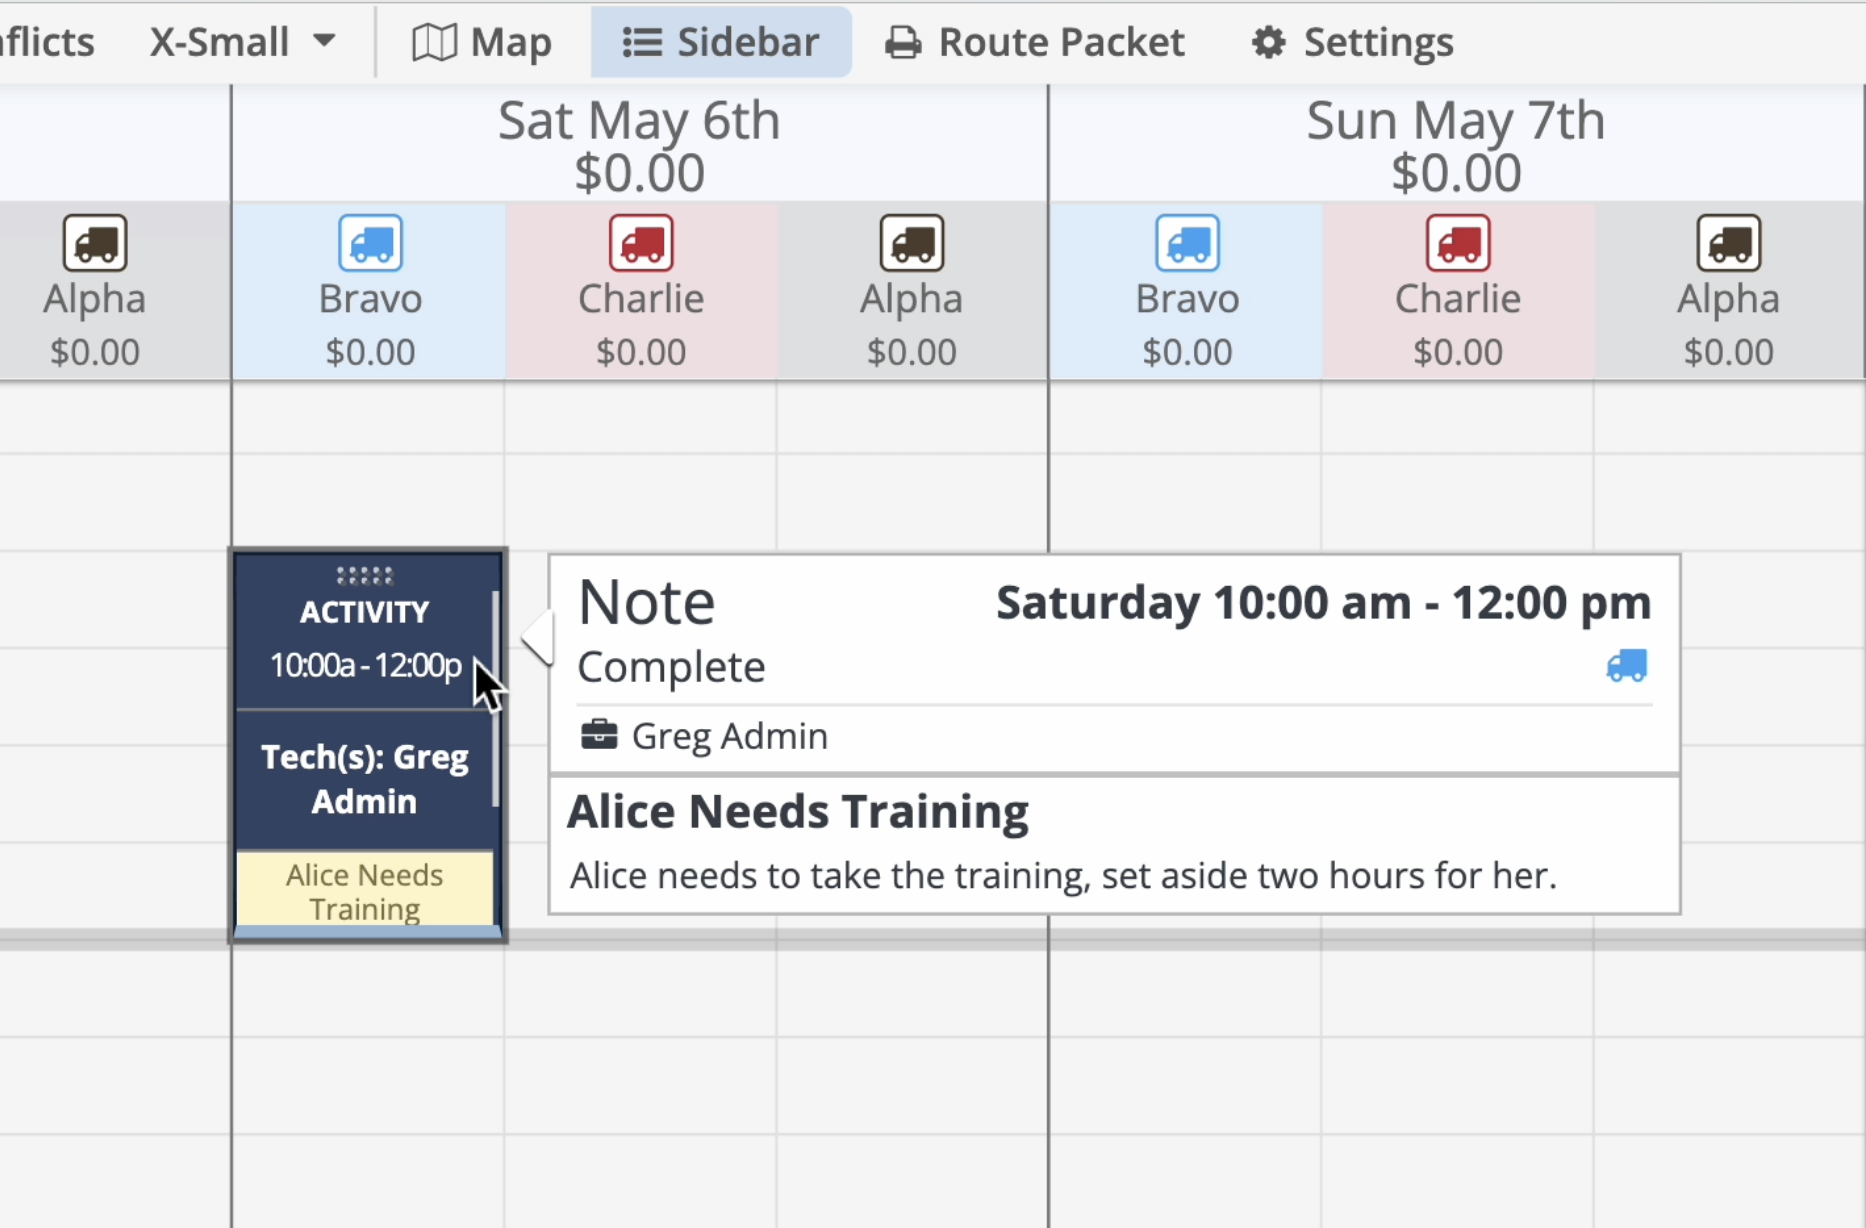
Once you click “Save” that activity will be created and will show up on the Schedule.
You can also add a new Activity by right clicking on an existing Activity and select "Copy Activity".
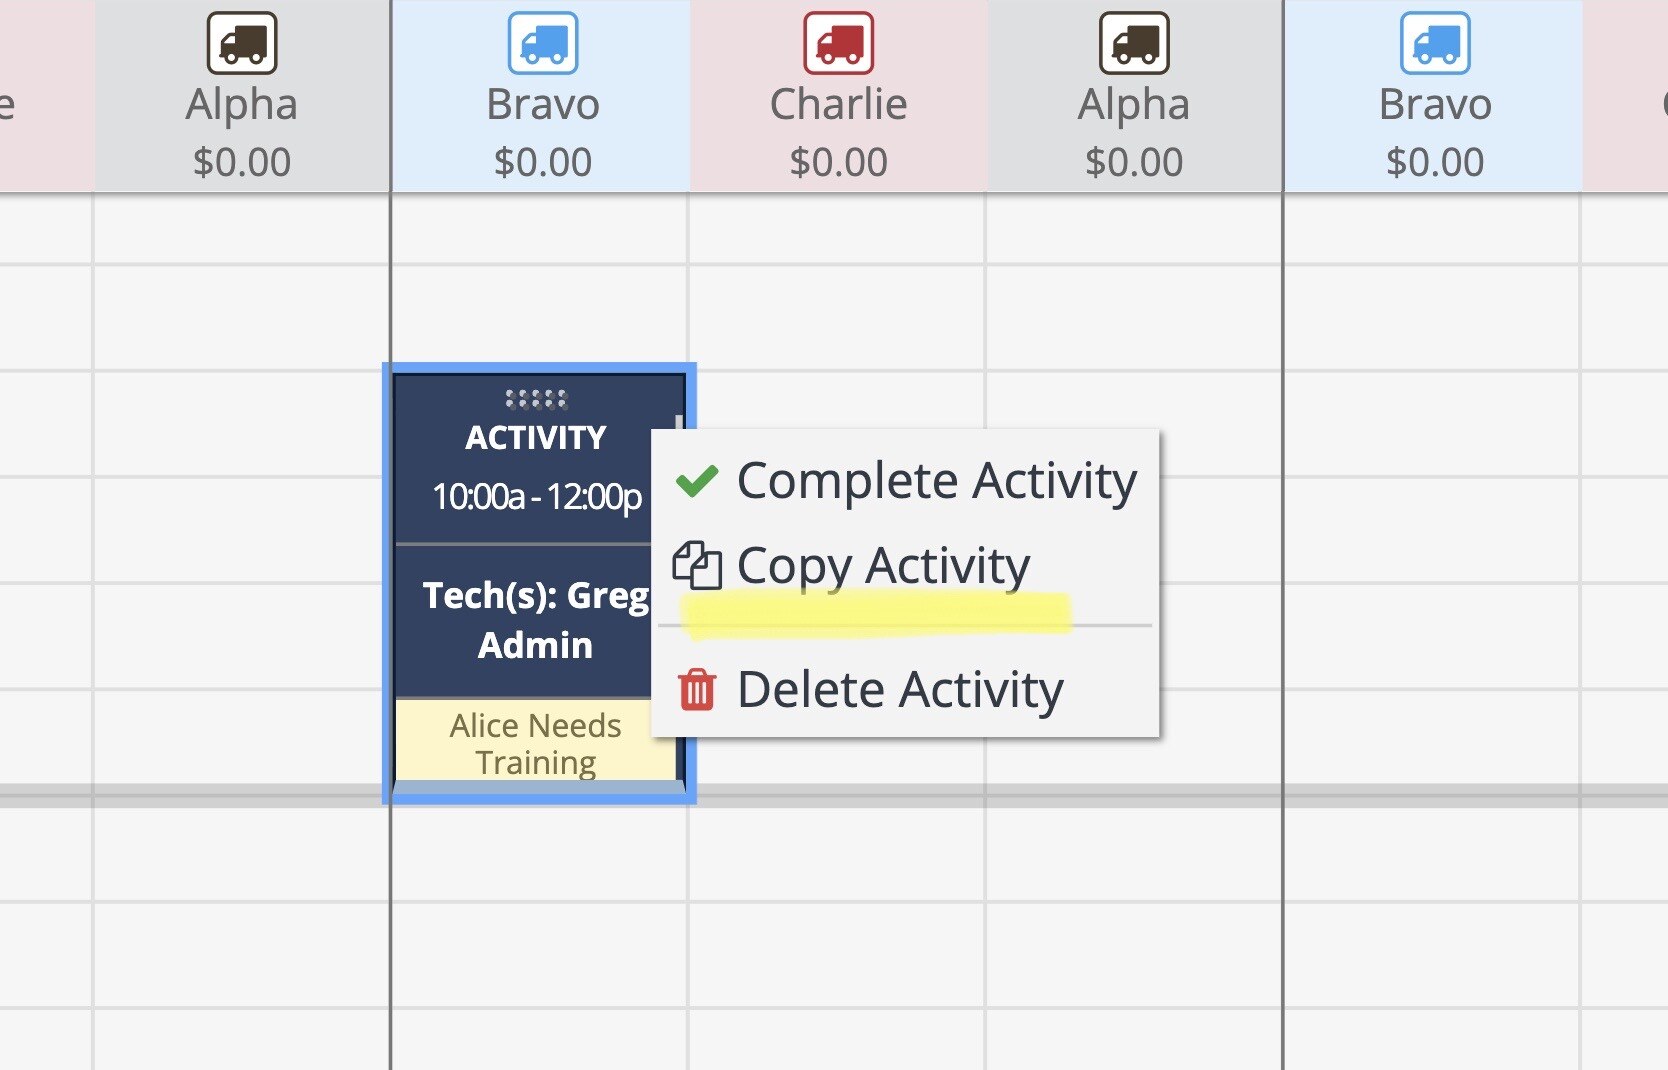
Then drag and drop the Activity copy into a new spot on the Schedule.
.png)
Double click on the Activity to edit any details in the Activity Window.
Blocking Off Time
If you ever need to block off time on the schedule, either for time-off, team meetings, etc, go ahead and create an account in the system either to represent the employee that needs time off, or just your own company in general.
Then, on the Schedule, click where you want this time off or meeting to be. This will open up the Quick Add.
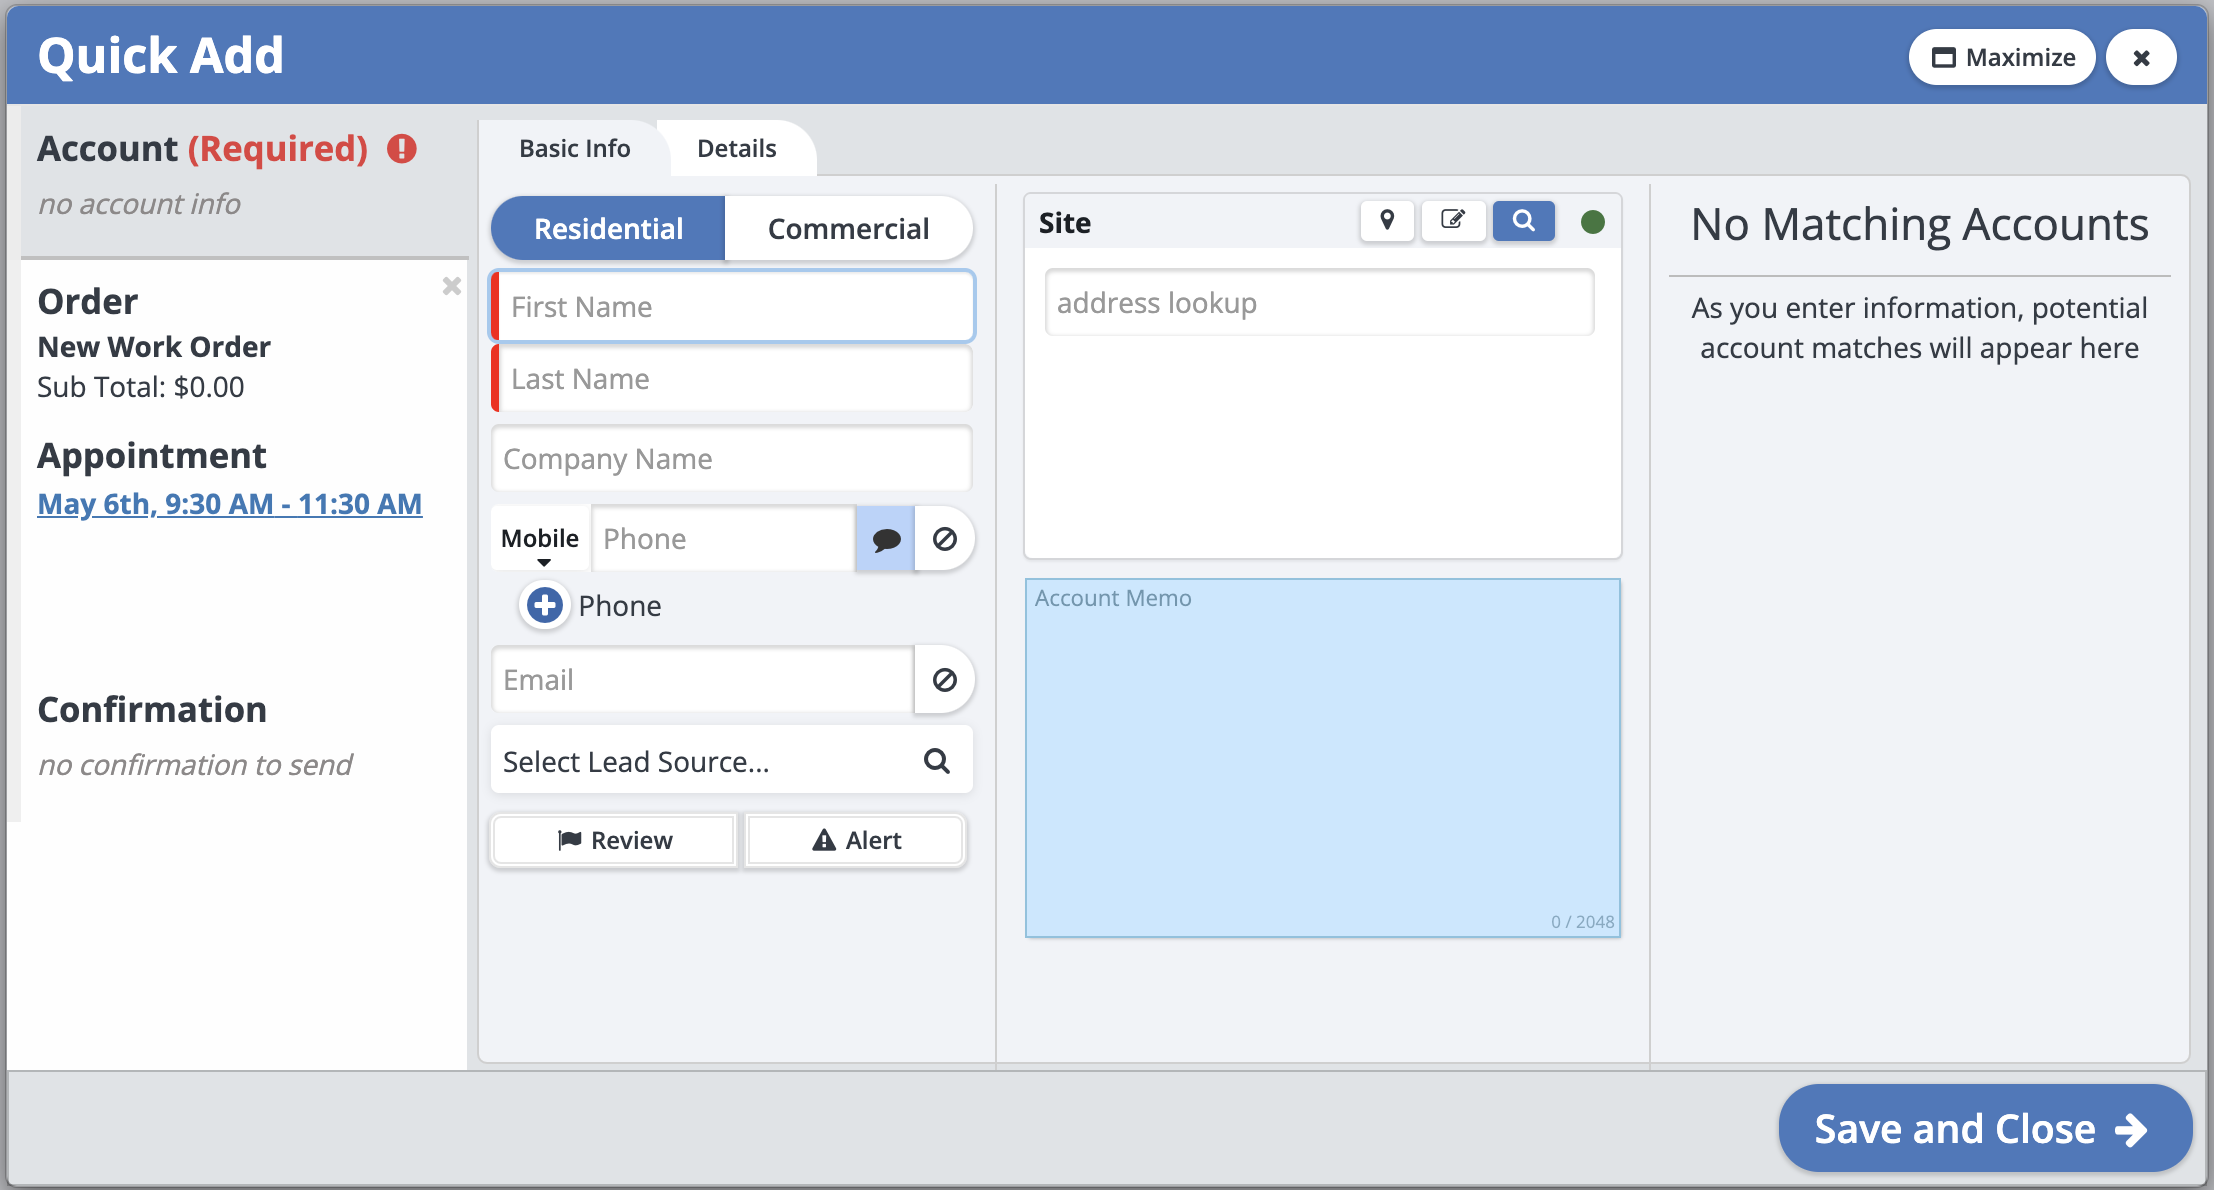
Choose the employee, or your company account.
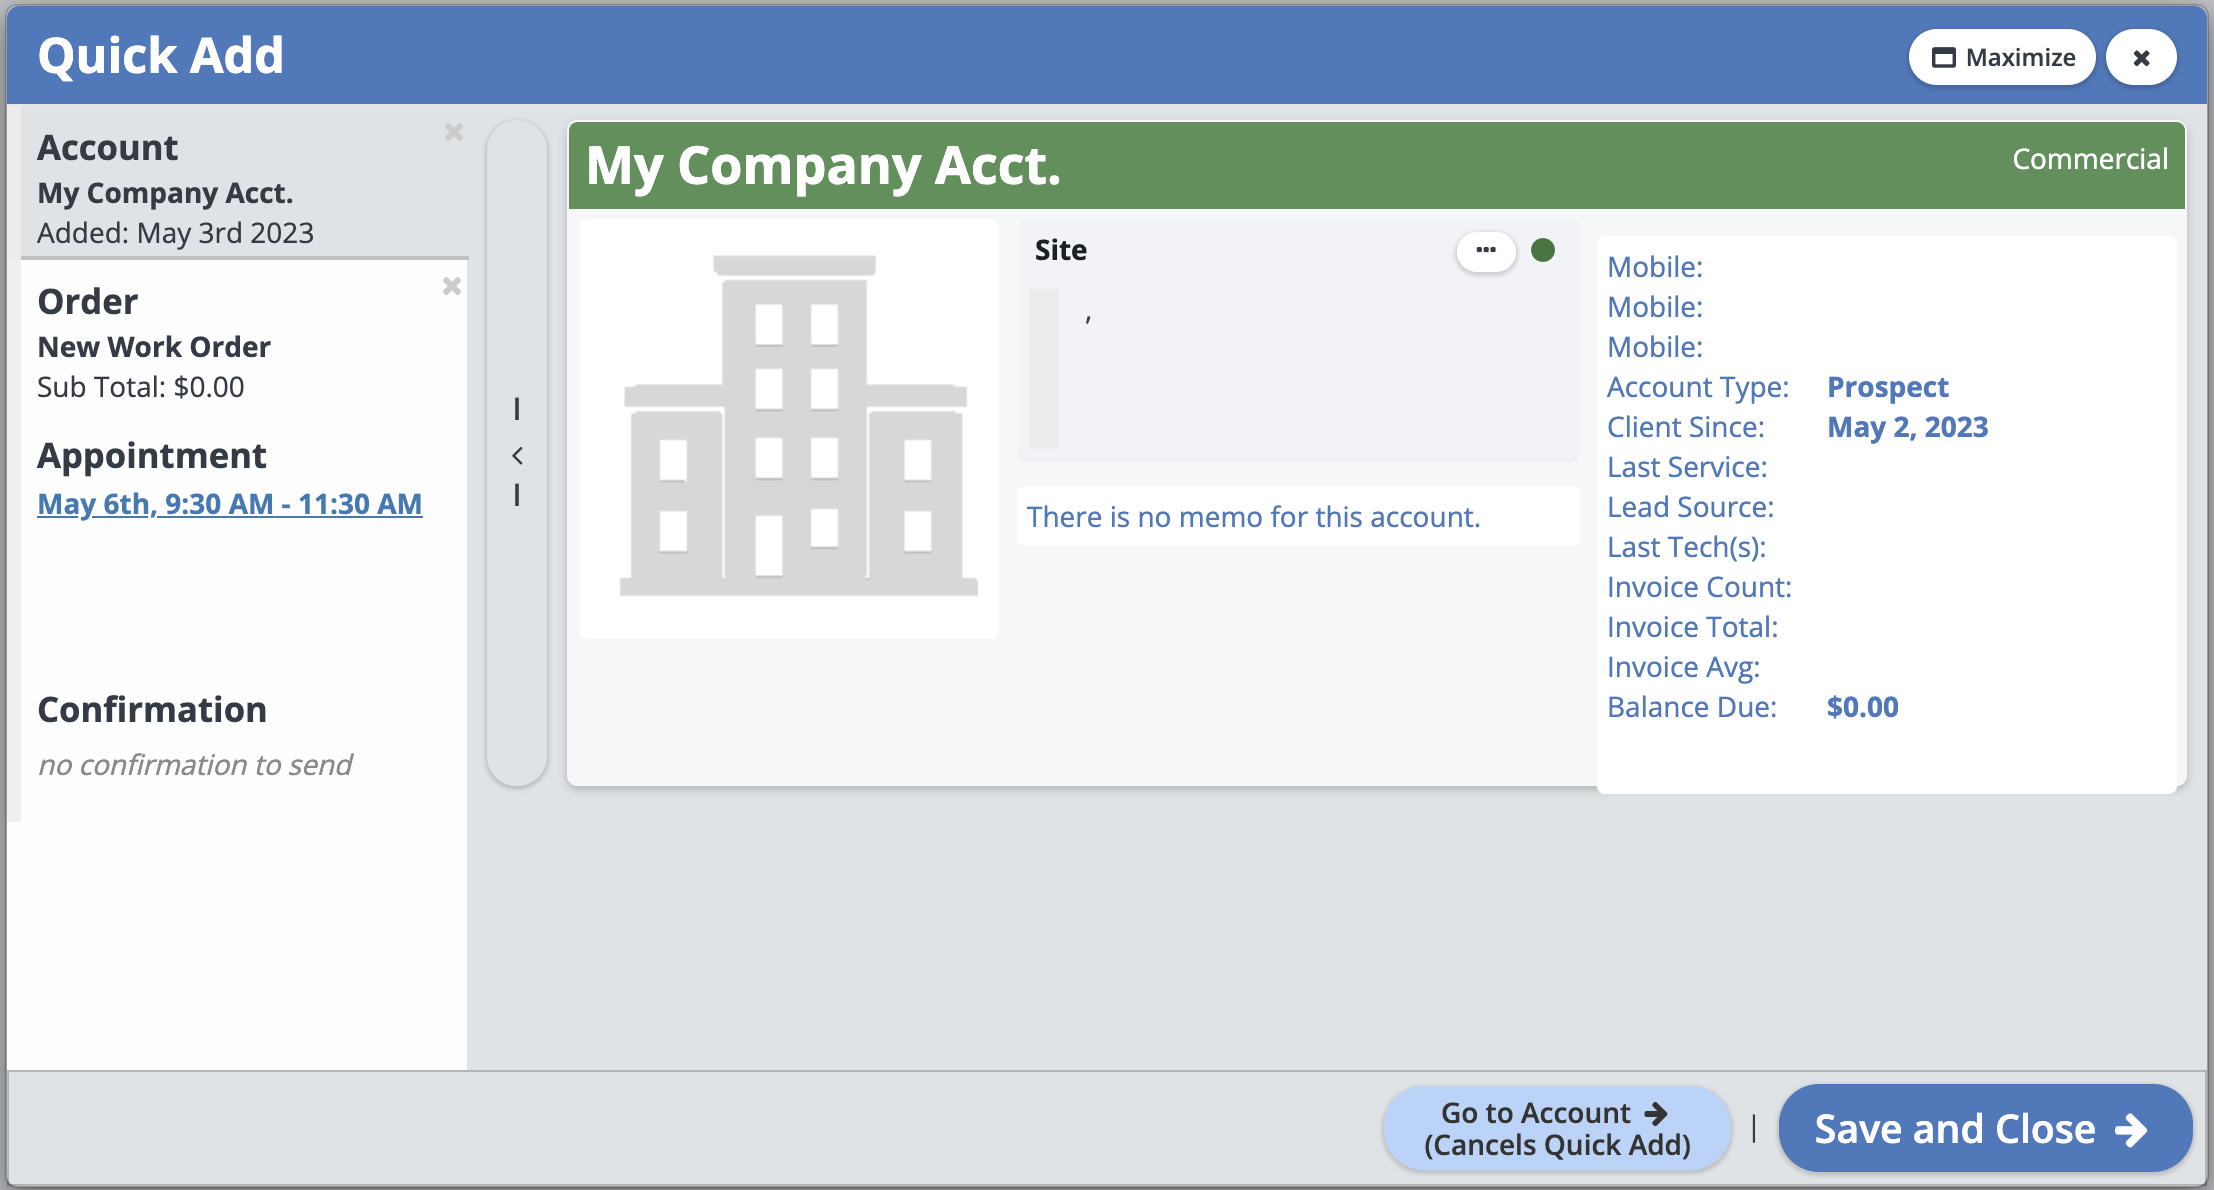
You can leave the Order as is. It will show as a blank Work Order with no line items.
Then, go into the “Appointment” tab. In the “New Appointment” box on the right, you can adjust the techs assigned, and the duration of the appointment.
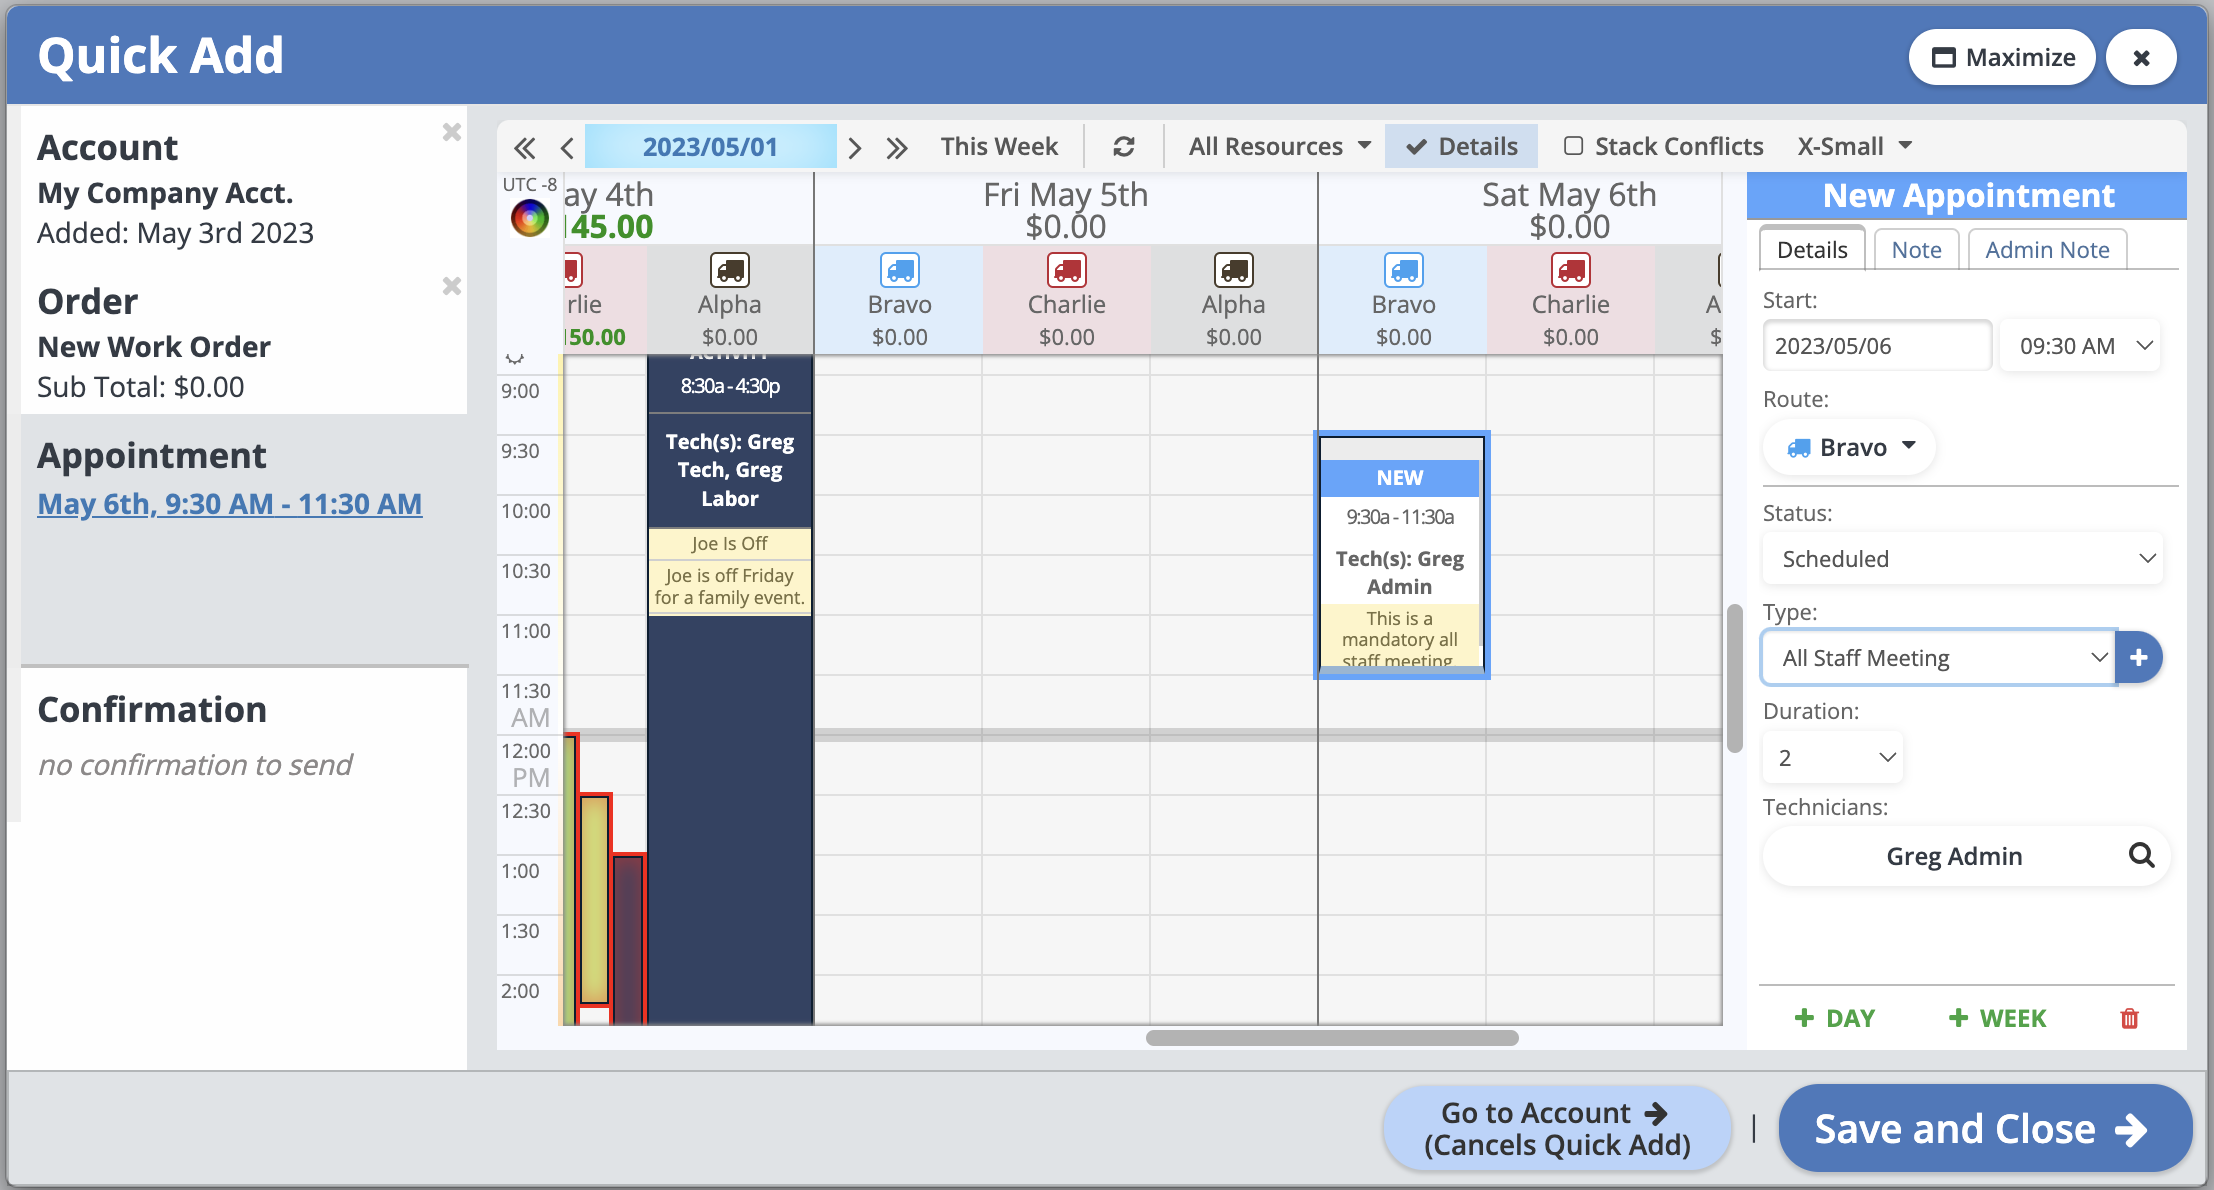
You can also add in other “Appointments” (or time blocked off on other days) by using the green "+ DAY" and "+ WEEK" buttons.
Click "Save and Close" when you are finished and the Appointment will appear on the Schedule.