
Click here for information on how to set up your Schedule.
Click on a link to hop to a specific section on this page:
On The Schedule
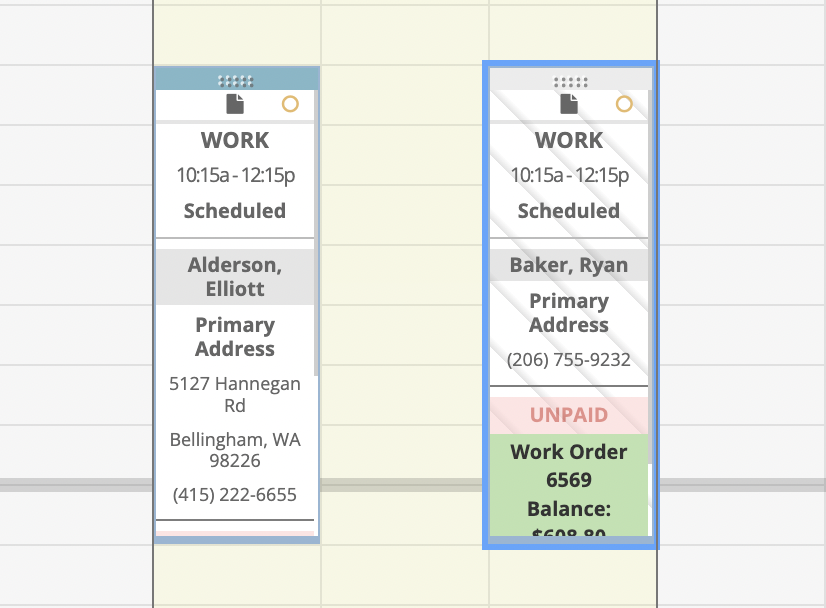
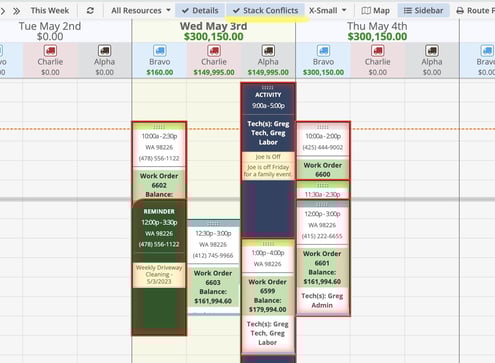
On the schedule, Appointment cards appear as a white card with details visible when "Details" is turned On, or as a solid color block with "Details" turned Off.

Single Click
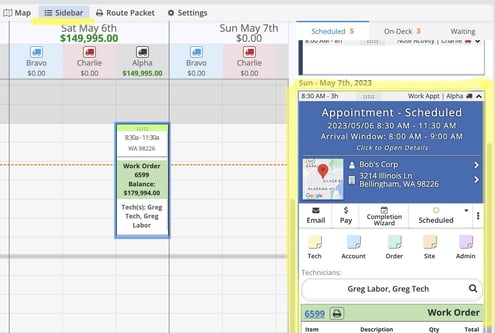
If you click on an appointment it’s details will open up in the right Sidebar (if "Sidebar" is turned on).
Double Click
If you double click on an appointment it opens up the Appointment Details window.
Right Click
If you right click on an appointment a menu opens where you can pick from the following options:
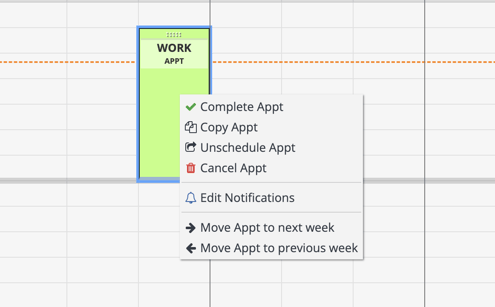
Complete Appt: This will mark the appointment as "Complete".
Copy Appt: This will make a copy of the appointment that you can easily drag and drop into a new place on the Schedule.
Unschedule Appt: This will remove the appointment from the schedule and remove it from the work order.
Cancel Appt: This will mark the appointment as “Cancelled”. It will be removed from the schedule but will still be visible on the orders “Appointment History” page.
Edit Notifications: This will open up the appointment details where you can then edit if your client will receive appointment notifications for this appointment.
Move Appt to next week: This will move the appointment forward one week at the same time and on the same route.
Move Appt to previous week: This will move the appointment back one week at the same time and on the same route.
No Technician Assigned
If an appointment does not have a technician assigned, it will appear with gray slashed stripes through the appointment card.
If you wish to not show this warning, you can update your schedule settings in the Display tab. For more information on how to setup your schedule, click here.
Stacking Conflicts
The Schedule also has a toggle feature for stacking conflicting appointments, found in the top Menu Bar, called "Stack Conflicts".
Unstacked conflicts will appear outlined in red, side-by-side and shrink to fit within the route column width as additional conflicts are added to the same time period.
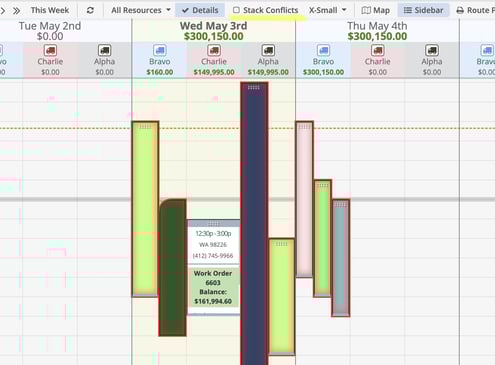
Stacked conflicts will appear outlined in red, stacked over each other and show the appointment details if the "Details" toggle is turned on.
The Sidebar
In the Sidebar to the right of the schedule, you can do a variety of tasks. Simply click on an appointment to open up the Sidebar details.
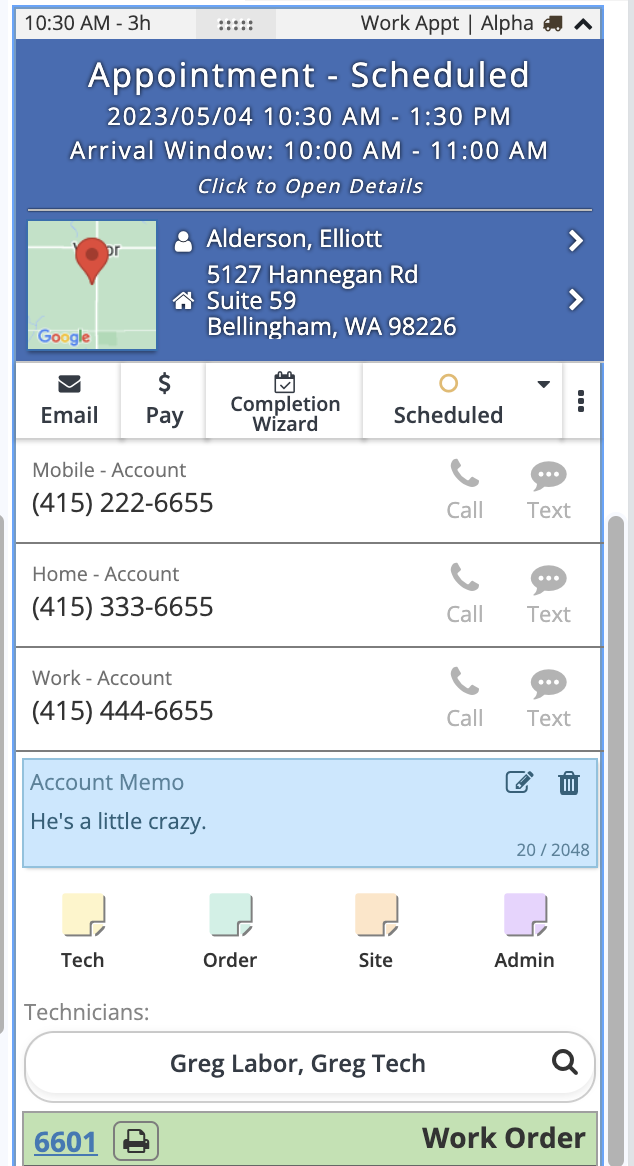
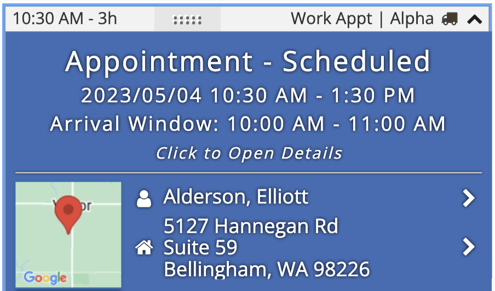
Starting from the top, you can see the appointment's scheduled Time & Date, and the Arrival Window. You can also click here to open the Appointment Details window.
Below that, you can access the account and location info by clicking on the Account Name or Site Address.
Right below that is a bar of activities related to the order or account:
Email: Send an email to the client, this will automatically attach a PDF copy of the Estimate, Work Order, or Invoice depending on what stage it is at.
Pay: Record a payment for this order.
Completion Wizard: Complete the order by going through the Completion Wizard (Click here for more on the Completion Wizard).
Scheduled: Here you can change the status of this appointment from Scheduled to Confirmed, On The Job, Complete, Cancelled, or Unscheduled.

More Options Drop-Down:
Copy: Make a copy of the appointment that you can easily drag and drop into a new place on the Schedule.
Activity: Create an Activity, including a Note, Task, Call, or Mail.
Notification Settings: Open up the notification settings for the appointment to view or adjust.
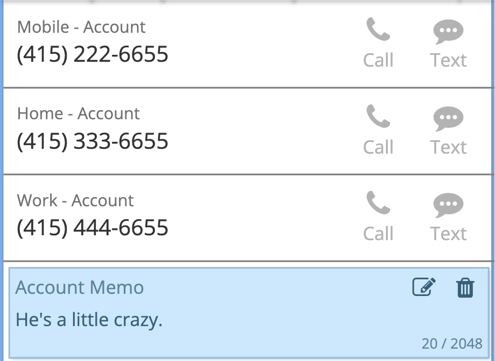
In the next section, you can see the phone numbers recorded for the account and you can call or text (The call function will only work if you have a phone service such as Skype set up on your computer).
You can text your clients through the ServiceMonster system, but unless you integrate with Twilio it will be one-way communication sent from a Seattle area code.
You can also add to the Account Memo (notes about the customer that are Not visible to the customer).
You can then edit or add different notes for the appointment. Tech notes will appear for techs in the mobile app and in route packets.
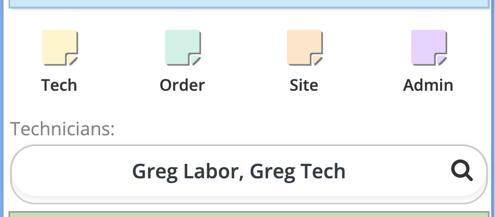
In the "Technicians" section, you can view which techs are assigned to this appointment and change them if needed.
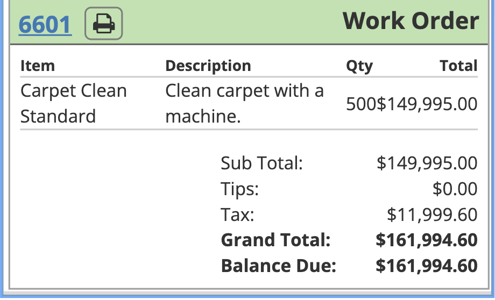
Finally, you can view the details of the order, including the line items, grand total, and balance due.
Click on the Order Number to go to the page for that order, or click the Print Icon to print the order directly.
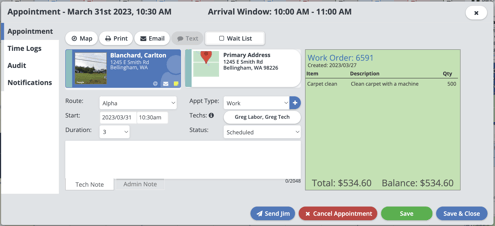
If you double click on an appointment, it will open up the Appointment Details window where you will see four tabs.
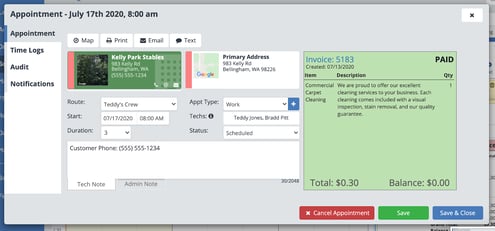
Appointment
Starting at the top, in the Appointment tab you can do a few different things:

Map: Clicking here opens up the site address on Google Maps.
Print: Clicking here opens a PDF of the order you can download and print.
Email: Clicking here sets up an email you can send to your client.
Text: Clicking here allows you to send a text to your client.

You can then see the Account and Site Details. Click on the Account or Site info to go to the Account or Site page.
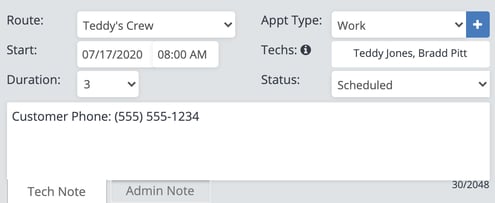
Here you can edit appointment details:
Route: Change what route this appointment is on using the drop-down menu.
Start: Change the start date and time here.
Duration: Change how long the appointment is scheduled to take here.
Appt Type: Change the appointment type here.
Techs: View or change the techs assigned to this appointment here.
Status: Change the status of this appointment here.
Tech Note: Add in any notes you want your techs to be able to see (Client’s can not see those notes).
Admin Note: Add in any notes you only want those who are admin level in ServiceMonster to be able to see.
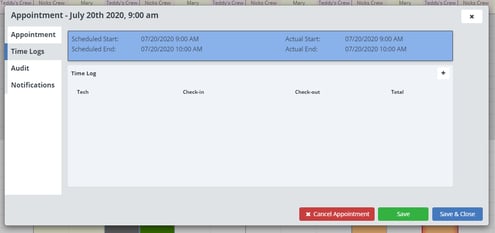
Time Logs
Here you can view and edit the time logs for the appointment.
Audit
Here you can see all the actions and edits made to the appointment.

Notifications
Here you can view and edit the appointment reminders the client will receive.
