
You can track activities from the Activities List, Account Pages, and on the Schedule. You can also use Activities as a quick way to note time-off on the Schedule for the occasional day.
Click on a link to hop to a specific section on this page:
How Do I Create An Activity? (Note, Task, Calls, Mail)
Where Can I Make An Activity?
There are multiple places where you can create an activity including the Schedule, Customer Account, Customer Order, Activity List and Lead Records.
The Schedule
You can create activities from the Schedule by right-clicking on the schedule where you want the activity to go. Then click “+ New Activity” to start creating your new activity.

You can also click on an appointment to open its details in the sidebar, then open the More Options drop-down on the right, and click on the “+ Activity” button.

From an existing Activity on the Schedule, you can also right click and select "Copy Activity" to copy that activity and drag and drop it to a new spot.

From the Customer's Account
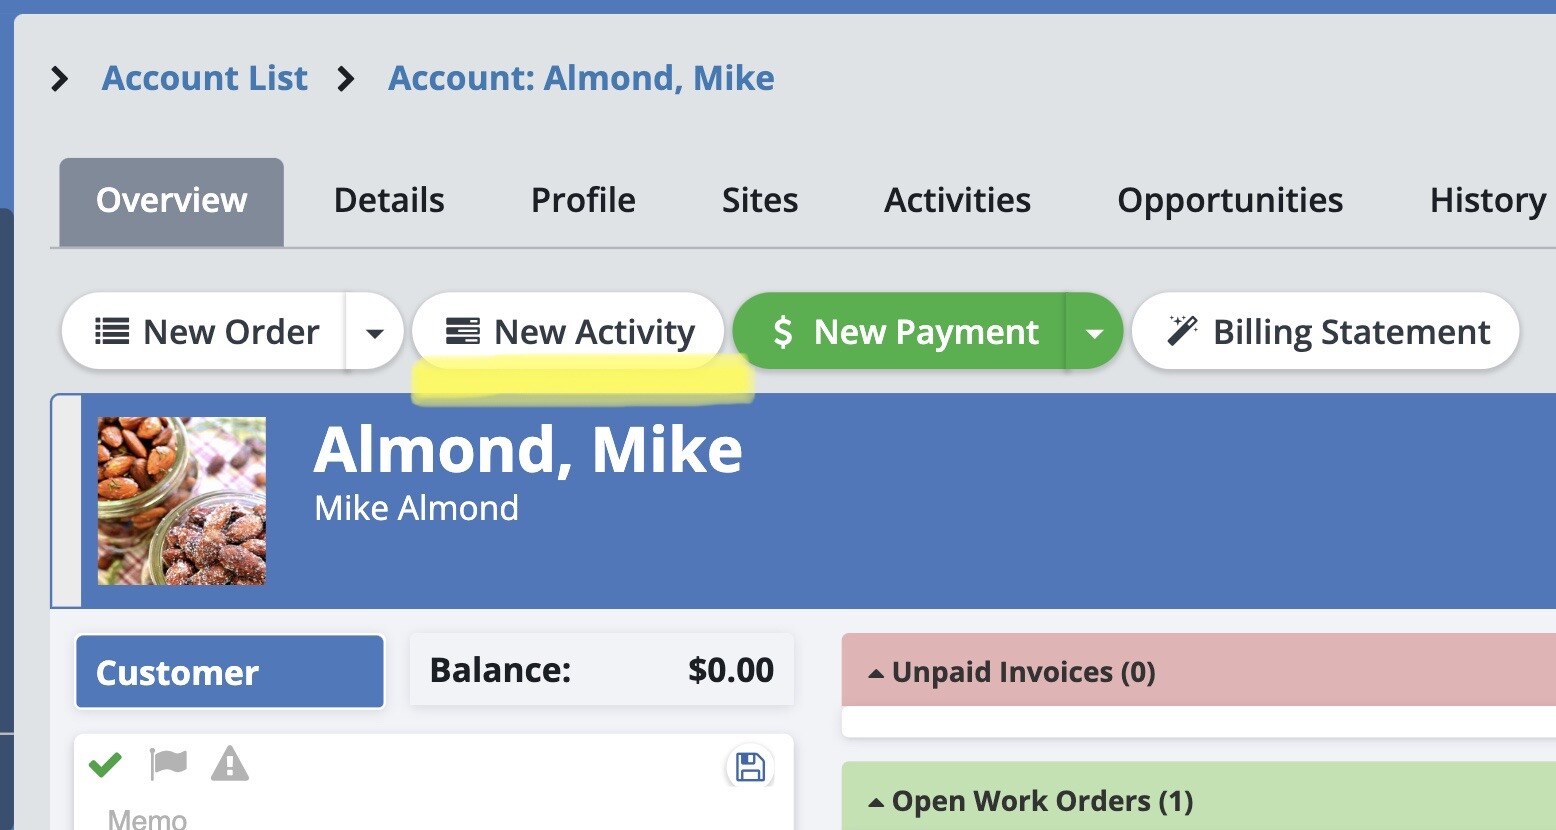
On a customer’s account, you can make an activity for that account by clicking on the New Activity button. This button can be found on the Overview Tab, the Details Tab and the Activities tab
From an Order
On a customer’s order, you can make an activity for that order by clicking on the Activities tab and then click on the “New Activity” button.

Activity List
You can create an activity from the Activity List by clicking on the “+ Activity” button when using the Grid View.

Or by clicking on the “+” button if you are using the Panel View.

Leads
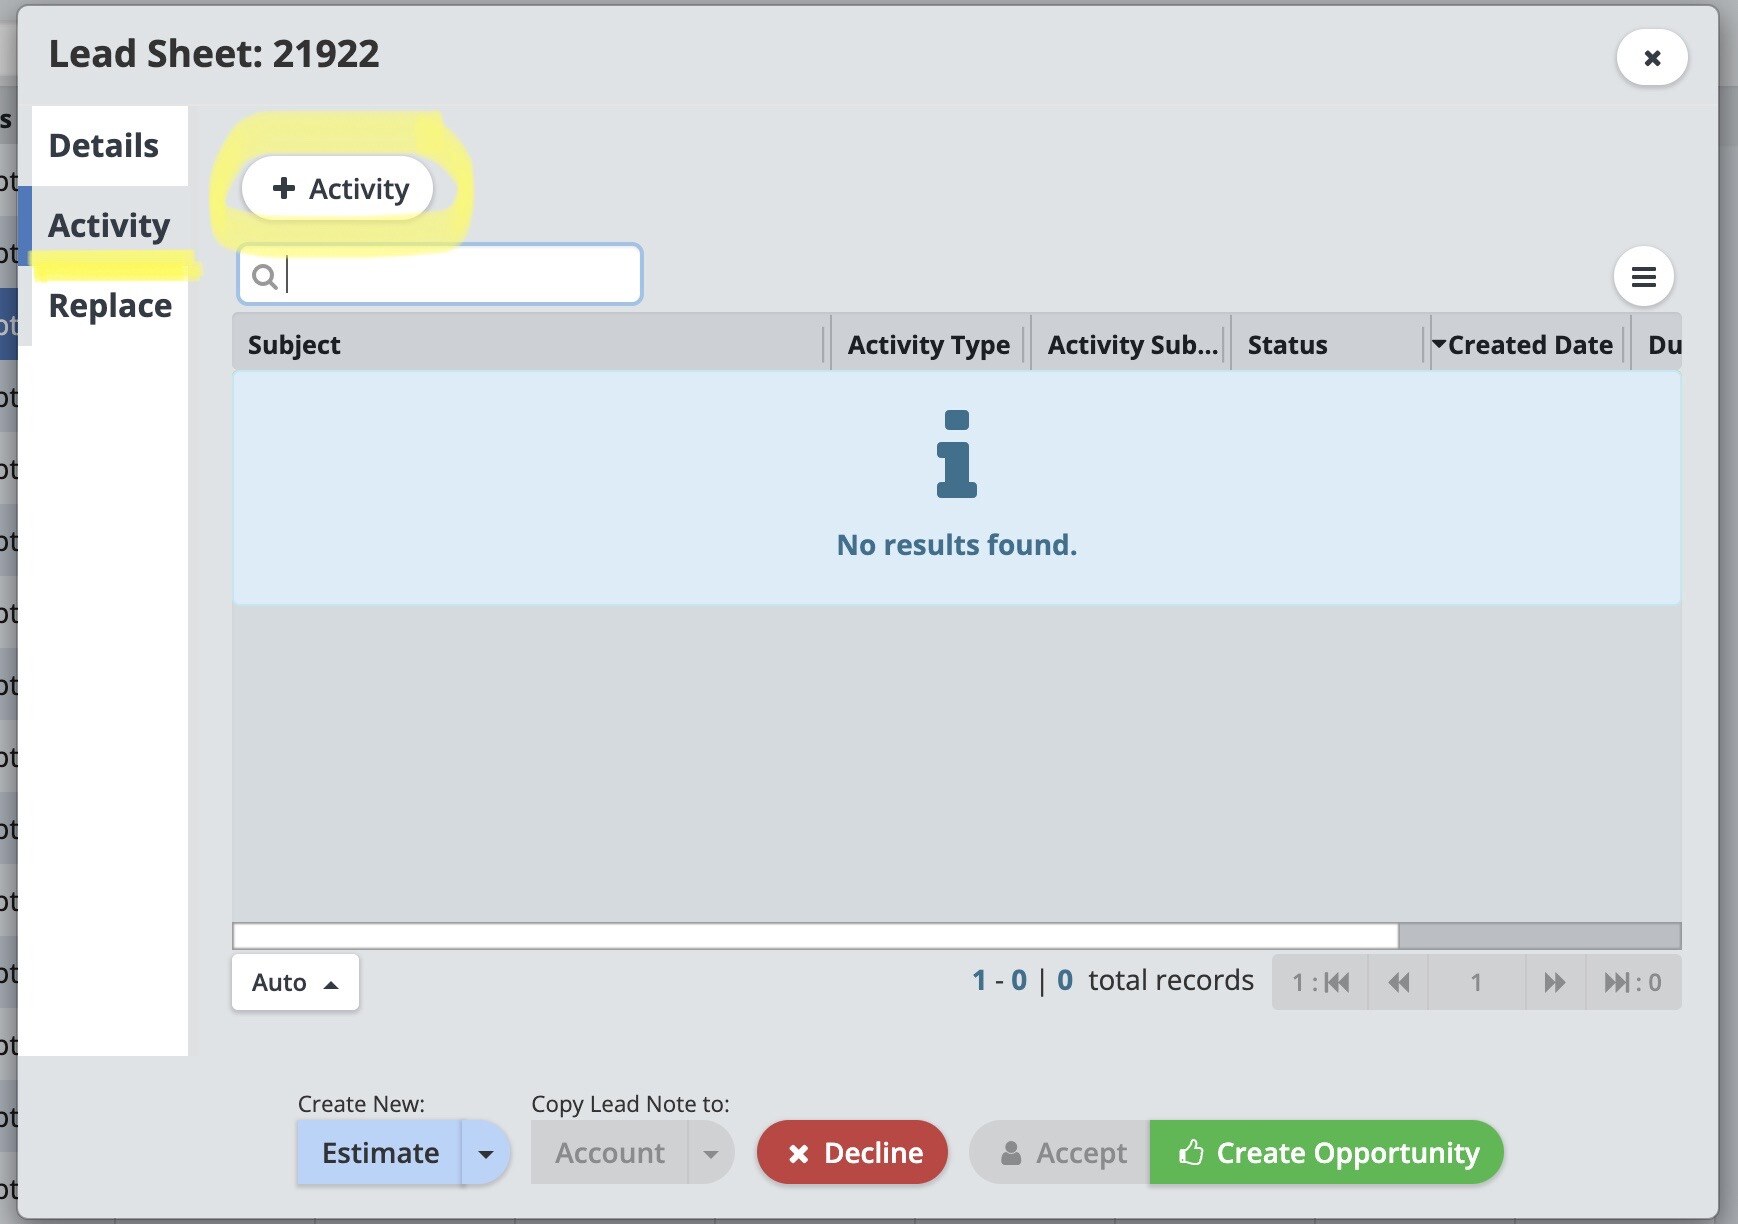
You can create activities on Leads by opening a lead and going to the Activity tab and clicking the “+ Activity” button.
How Do I Create An Activity?
Creating A Note Activity
Note activities are great for keeping track of information about a client or work. If you choose Tech and print the Schedule Route Packet with the Technician Service Report and Technician Notes included, the activity note you entered will appear on that page. For more information on Schedule Route Packets, please visit this link: Route Packets
Here you can choose the following information, all of these areas are optional and you can use them however you need.
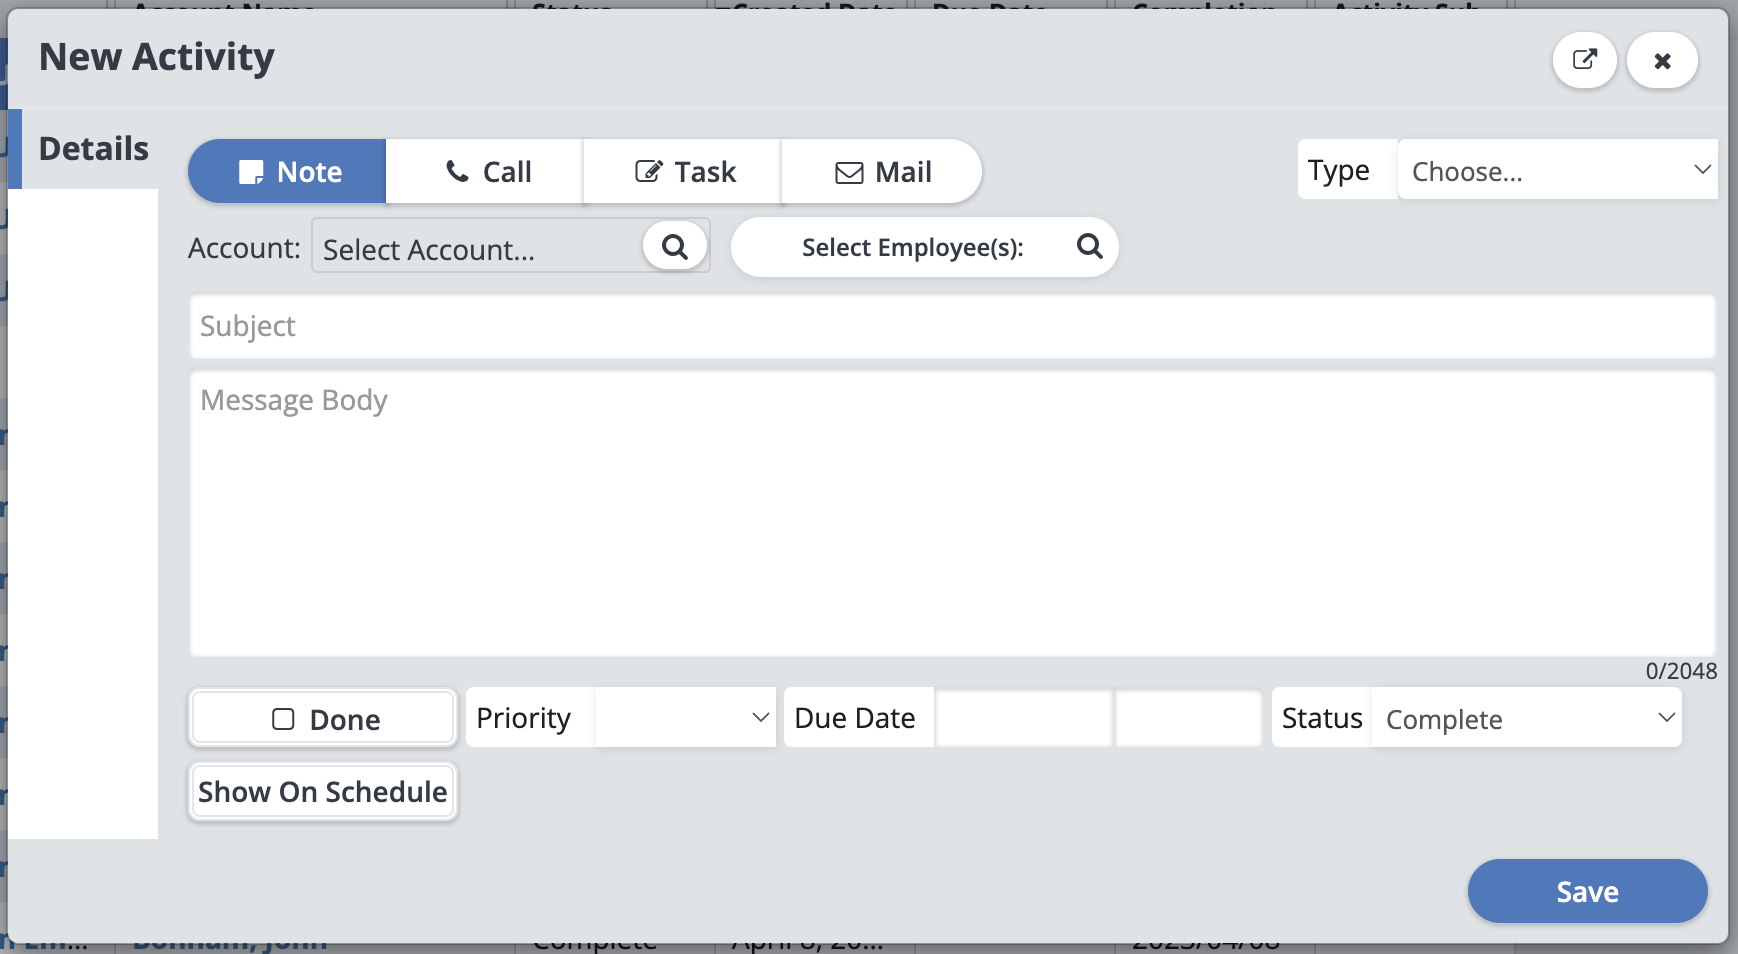
Type: For notes, you can choose between “Internal” or “Tech”
Account: Select an account this activity is associated with.
Select Employees: Select employees this activity is assigned to or should be seeing this activity.
Subject: The main subject line for the activity, this is what you will see on activities lists.
Message Body: The message you want to be included.
Done: If this activity is completed, mark it as “Done”
Priority: You can assign the activity as being “High” or “Low”
Due Date: You can assign a due date for the activity.
Status: For notes, this will be automatically set as complete, you can change it to “pending”
Show On Schedule: If you click on this button, more options will appear to show this activity on the schedule.

Duration: Choose how much time the activity should take on the schedule.
Start Date: Select the date and time the activity should start at.
Route: Select the route that the activity will appear on.
Click “Save” to create the activity.
Creating A Phone Activity
Phone activities are great for keeping track of your calls about Orders or Appointments.
Here you can choose the following information, all of these areas are optional and you can use them however you need:
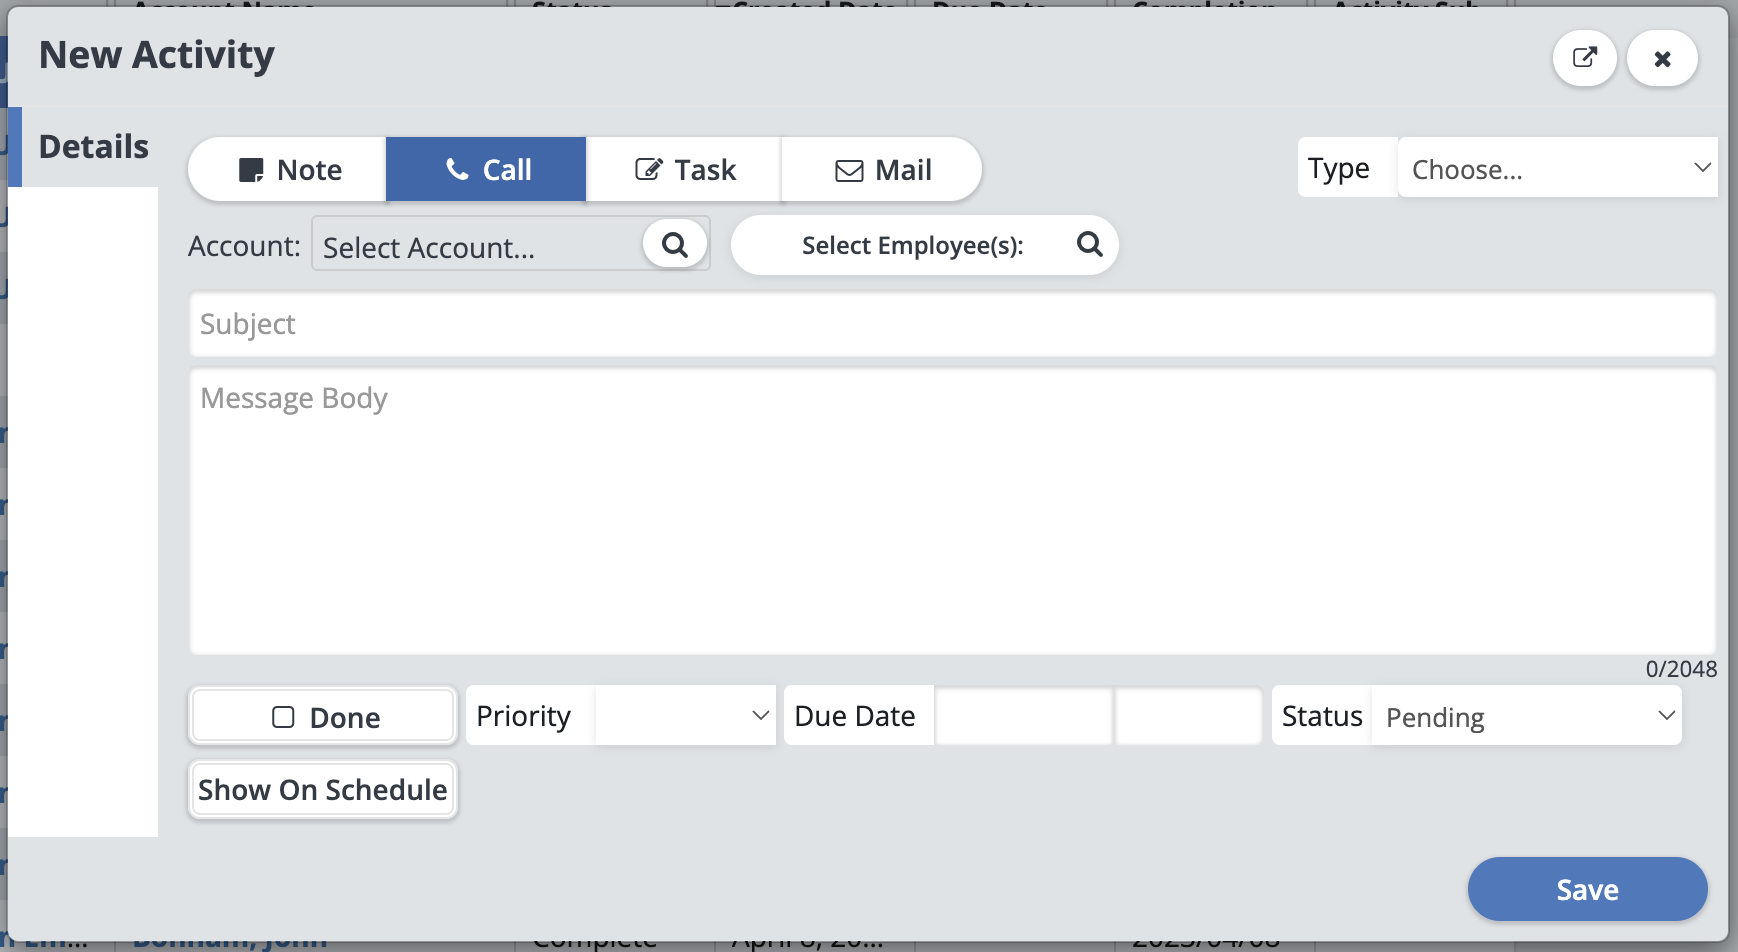
Type: For calls, you can choose between “Inbound”, “Outbound”, or “Marketing”.
Account: Select an account this activity is associated with.
Select Employees: Select employees this activity is assigned to or should be seeing this activity.
Subject: The main subject line for the activity, this is what you will see on activities lists.
Message Body: The information about the call.
Done: If this activity is completed, mark it as “Done”
Priority: You can assign the activity as being “High” or “Low”
Due Date: You can assign a due date for the activity.
Status: For calls, this will be automatically set as “Pending”, you can change it to “Complete”, “Call Back”, “Disconnected”, “Do Not Call”, “Left Message”, or “Wrong Number”.
Show On Schedule: If you click on this button, more options will appear to show this activity on the schedule.

Duration: Choose how much time the activity should take on the schedule.
Start Date: Select the date and time the activity should start at.
Route: Select the route that the activity will appear on.
Click “Save” to create the activity.
Creating A Task Activity
Task activities are great for keeping track of tasks for your techs or for around the office.
Here you can choose the following information, all of these areas are optional and you can use them however you need:
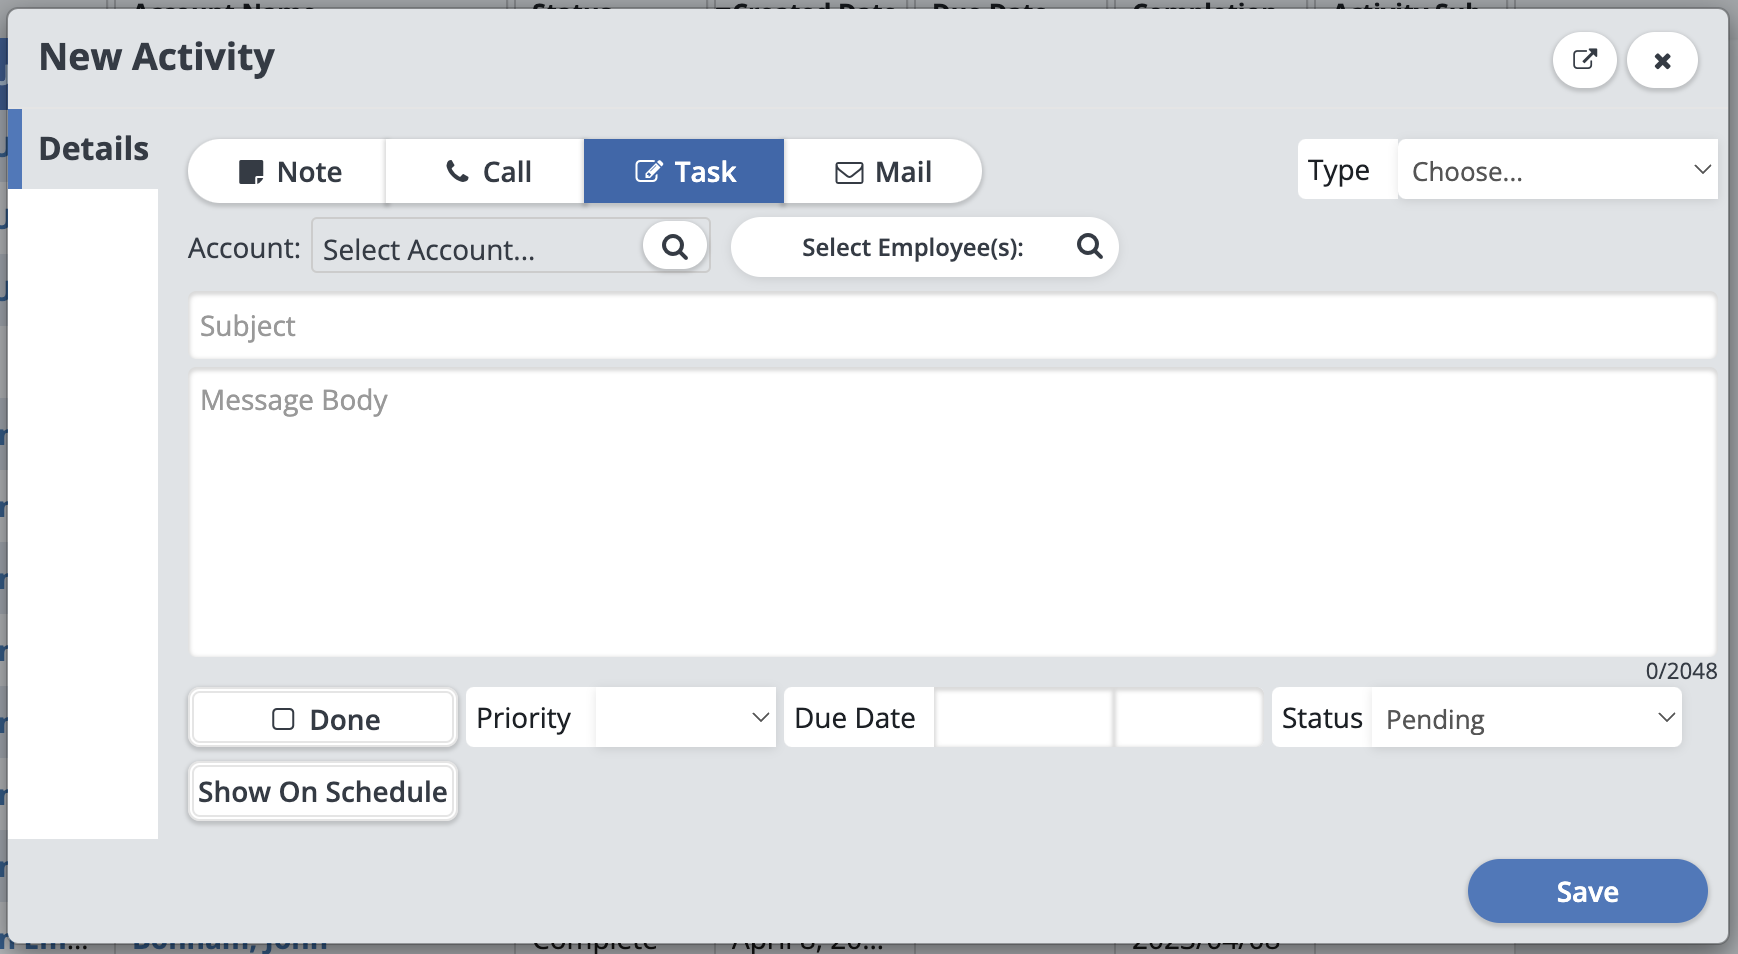
Type: For tasks, you can choose between “Internal” or “Customer Related”.
Account: Select an account this activity is associated with.
Select Employees: Select employees this activity is assigned to or should be seeing this activity.
Subject: The main subject line for the activity, this is what you will see on activities lists.
Message Body: The information about the task.
Done: If this activity is completed, mark it as “Done”
Priority: You can assign the activity as being “High” or “Low”
Due Date: You can assign a due date for the activity.
Status: For tasks, this will be automatically set as “Pending”, you can change it to “Complete”, “Call Back”, “Disconnected”, “Do Not Call”, “Left Message”, or “Wrong Number”.
Show On Schedule: If you click on this button, more options will appear to show this activity on the schedule.

Duration: Choose how much time the activity should take on the schedule.
Start Date: Select the date and time the activity should start at.
Route: Select the route that the activity will appear on.
Click “Save” to create the activity.
Creating A Mail Activity
Mail activities are great for keeping track of letters you send to clients.
Here you can choose the following information, all of these areas are optional and you can use them however you need:
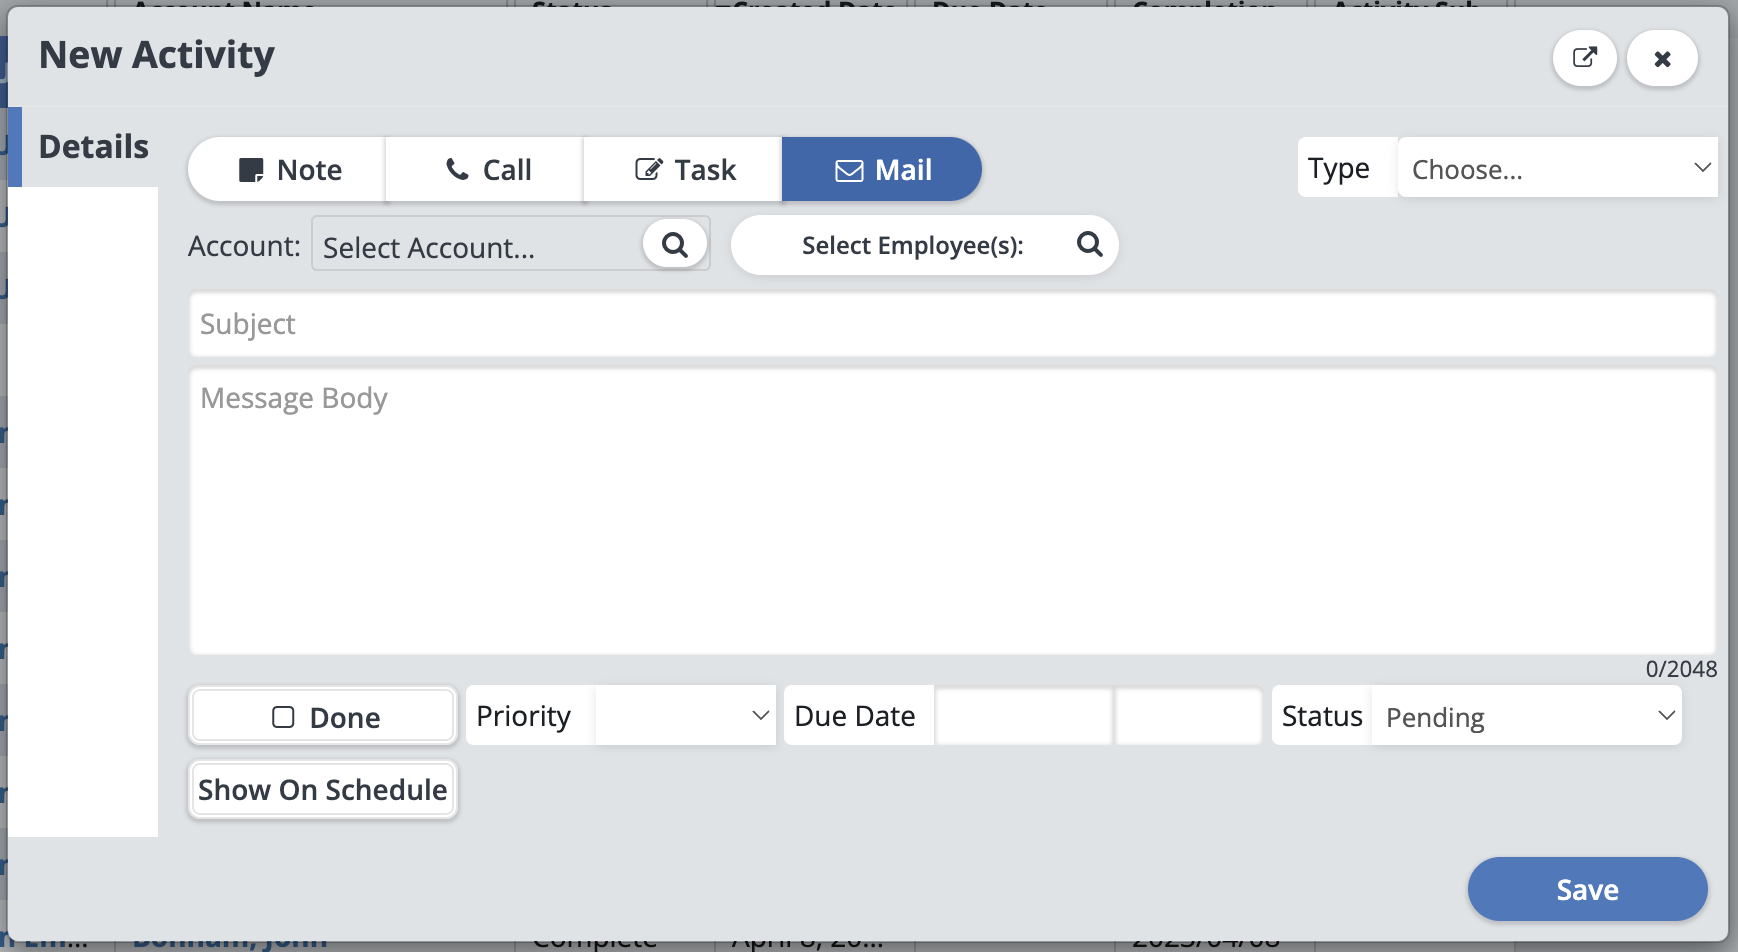
Type: For mail, you can choose between “Inbound”, “Outbound”, or “Marketing”.
Account: Select an account this activity is associated with.
Select Employees: Select employees this activity is assigned to or should be seeing this activity.
Subject: The main subject line for the activity, this is what you will see on activities lists.
Message Body: The information about the mail.
Done: If this activity is completed, mark it as “Done”
Priority: You can assign the activity as being “High” or “Low”
Due Date: You can assign a due date for the activity.
Status: For Mail, this will be automatically set as “Pending”, you can change it to “Complete”, “Call Back”, “Disconnected”, “Do Not Call”, “Left Message”, or “Wrong Number”.
Show On Schedule: If you click on this button, more options will appear to show this activity on the schedule.

Duration: Choose how much time the activity should take on the schedule.
Start Date: Select the date and time the activity should start at.
Route: Select the route that the activity will appear on.
Click “Save” to create the activity.
How Do I Complete Or Track Activities?
You can access the Activity List by clicking on “Accounts” in the Main Menu, then selecting the “Activities” icon. This will take you to the Activity List, where you can choose the typical “Grid View” or the “Panel View”.

Grid View
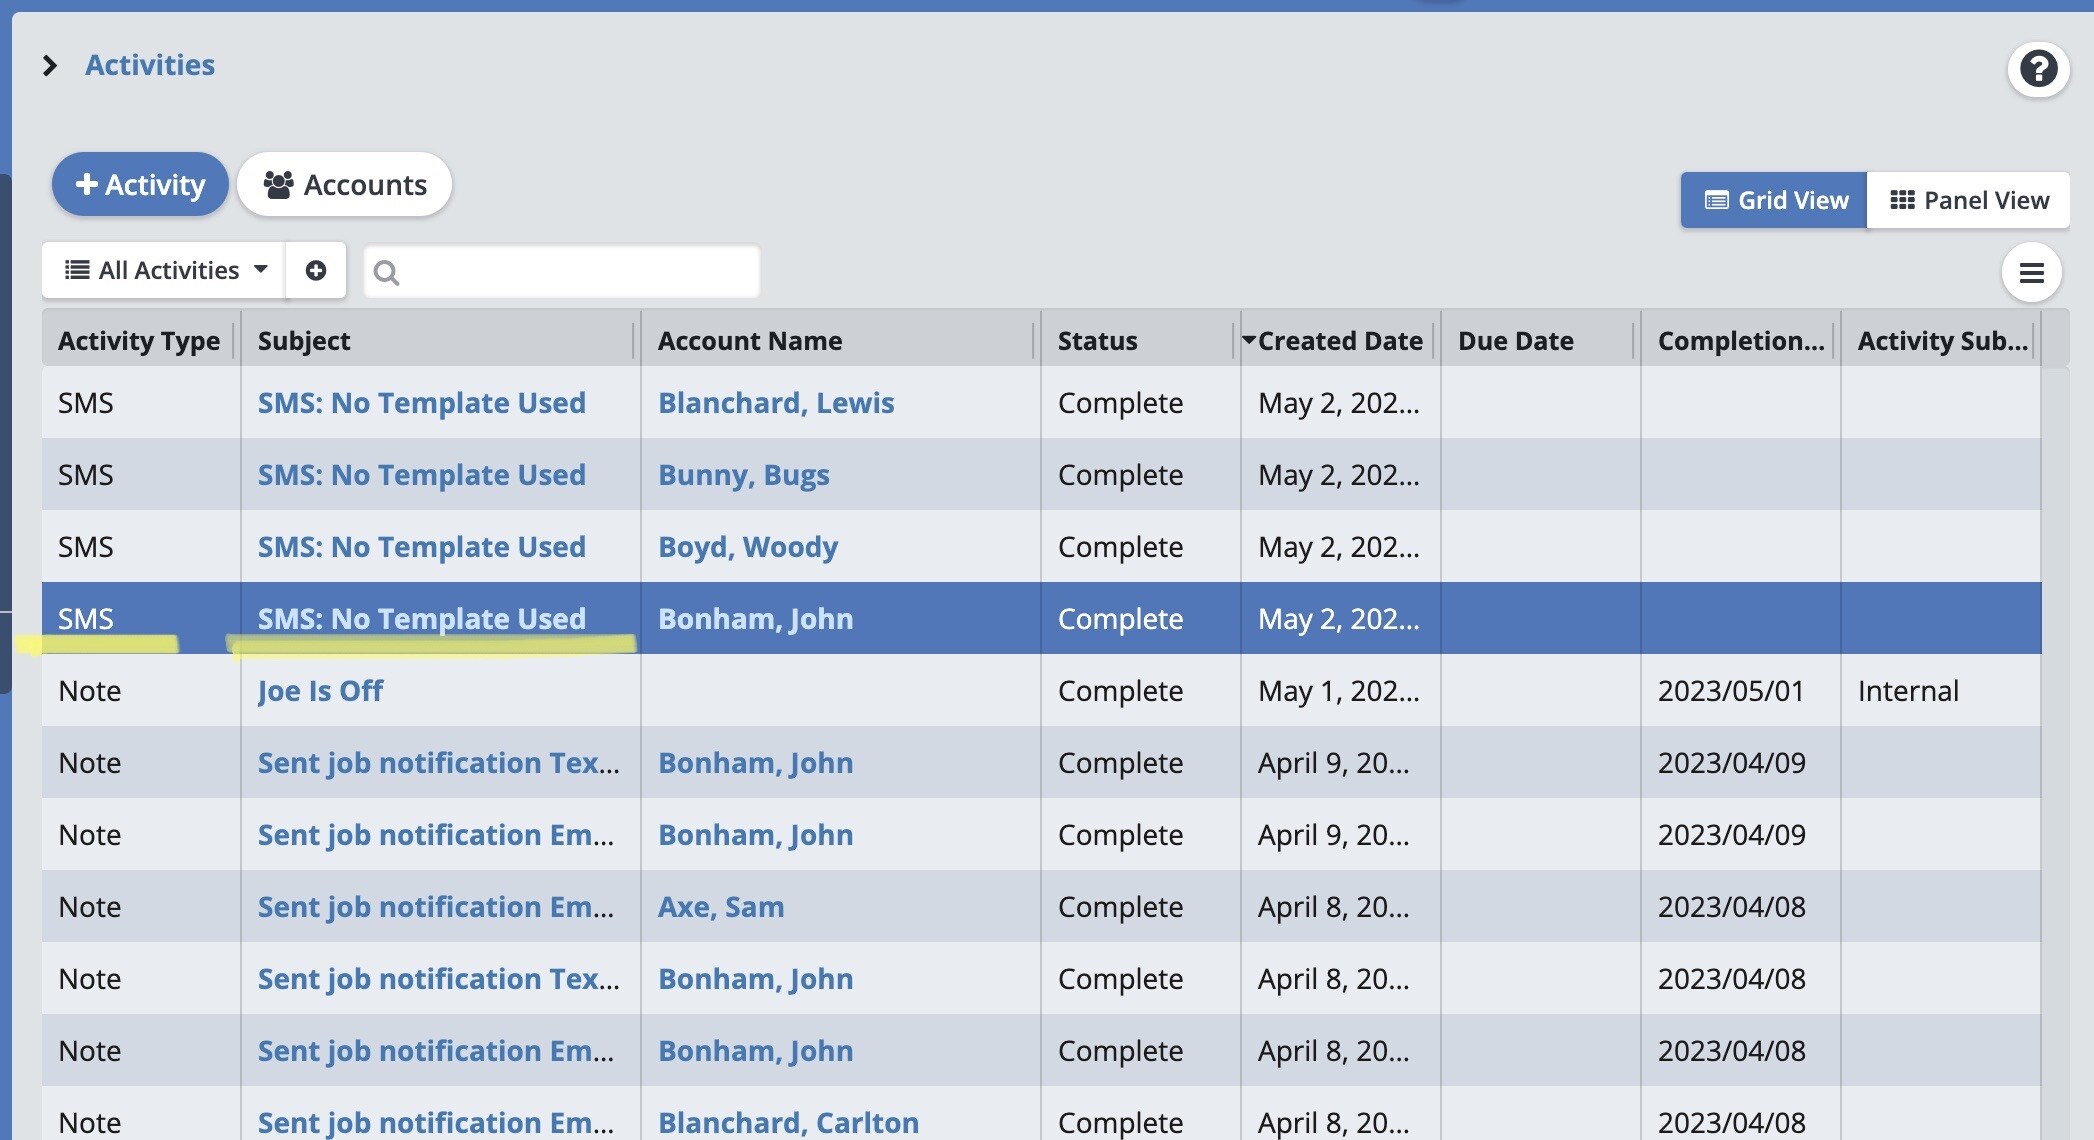
Here you can see the list of activities in the grid style view. Click on the “+ Activity” button if you want to create a new activity.
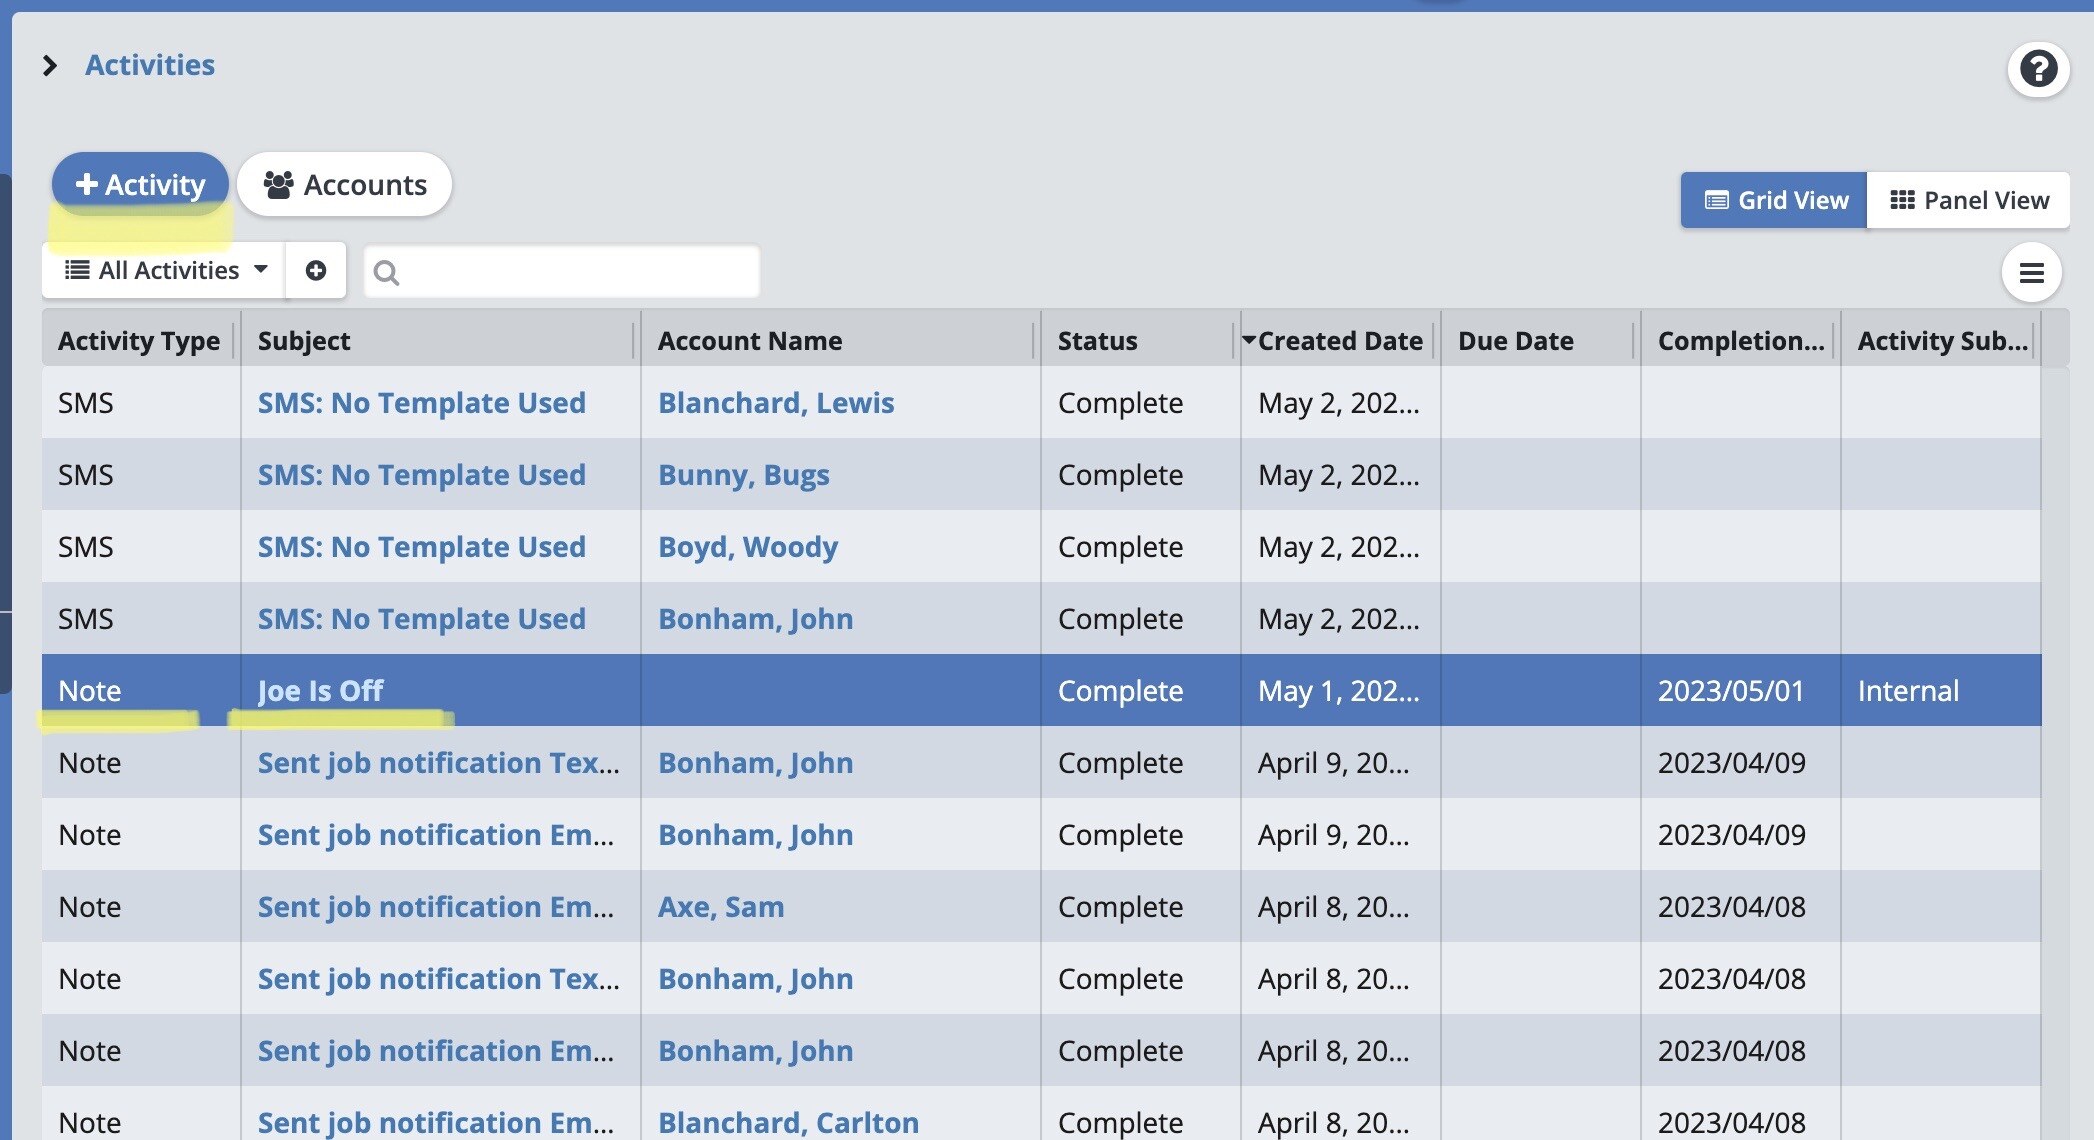
Click on the “Subject” or Activity Name, and it will open up in a window.
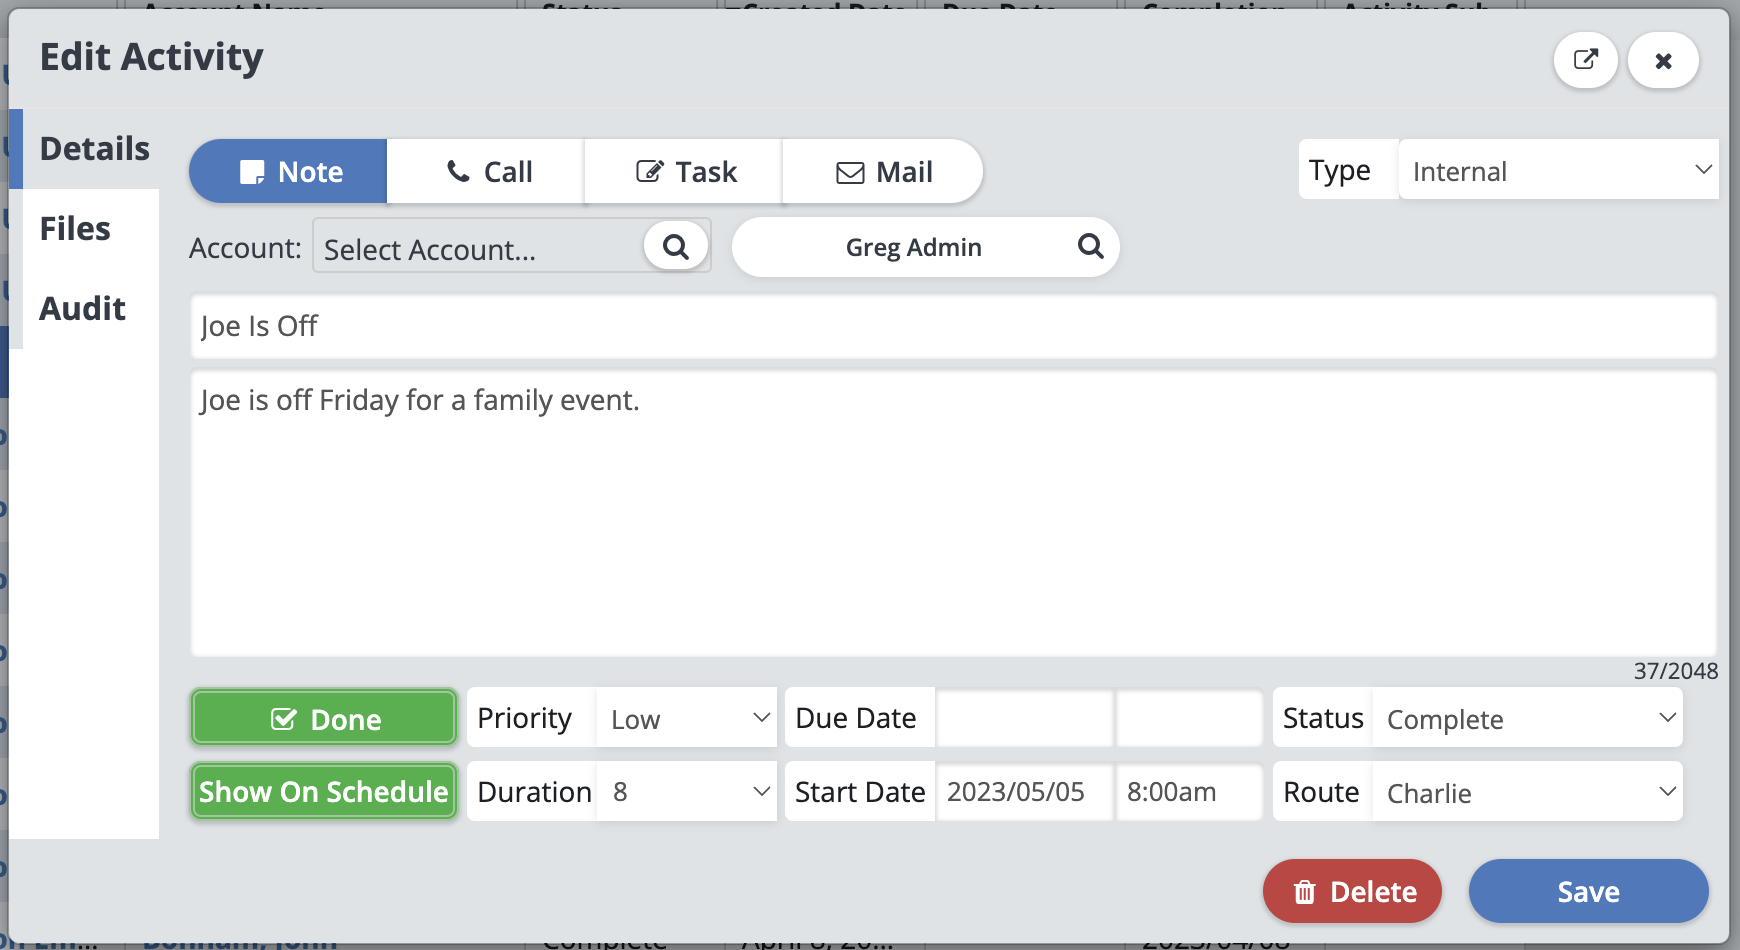
In the "Details" tab you can see it’s details and make any edits as needed.
In the “Files” tab you can upload files related to the activity.
In the “Audit” tab you can see any changes made to the activity, when they took place, and who did it.
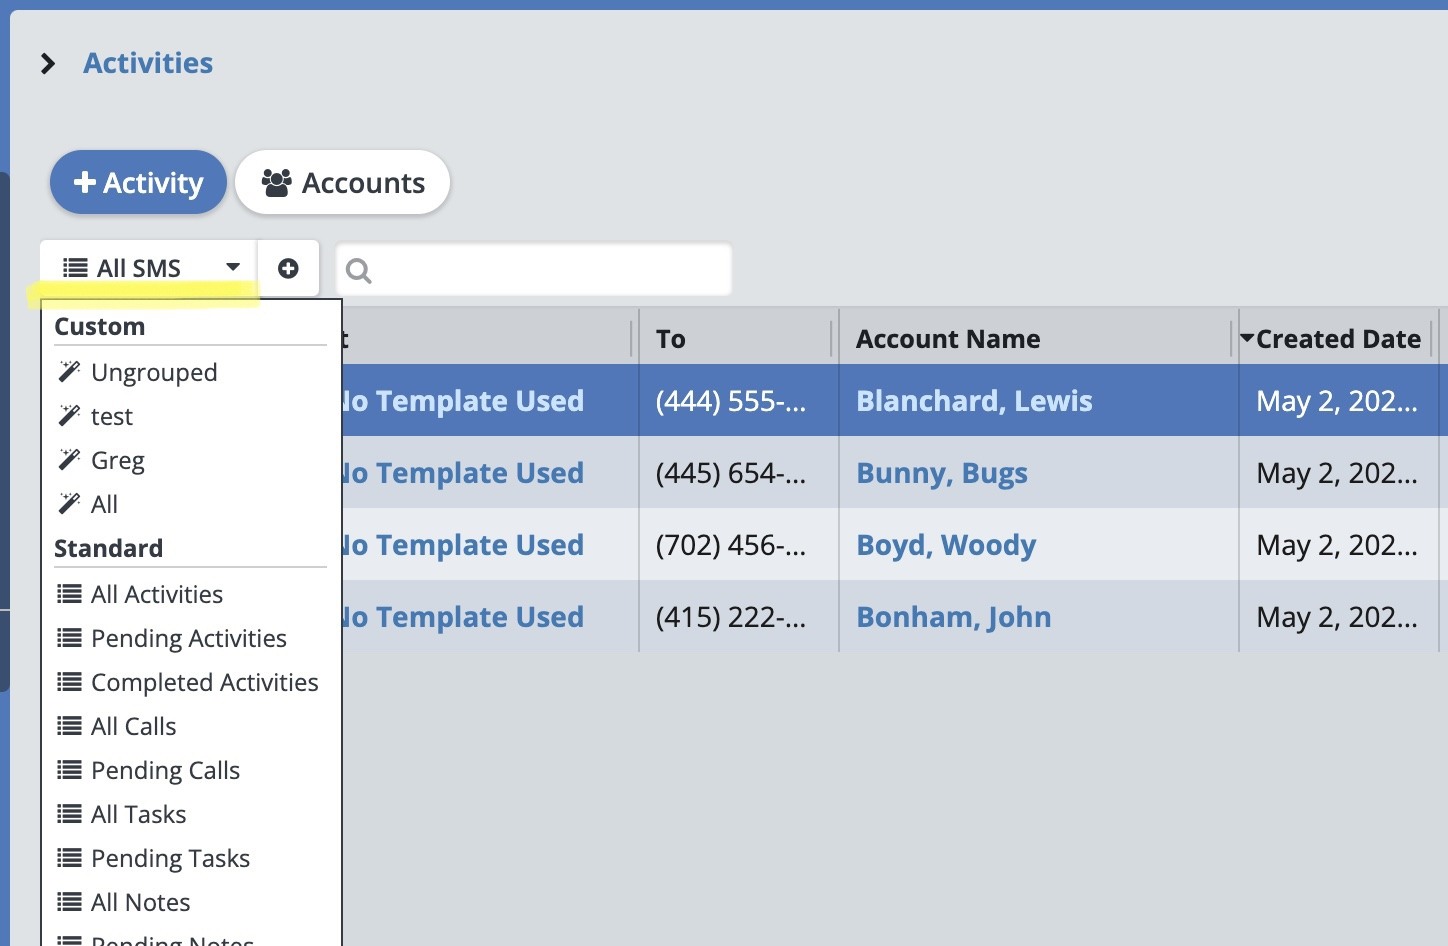
The window for an SMS Activity will look a little different. Select an SMS Activity from the Activity List.
Remember to use the drop-down filter to make it easier!
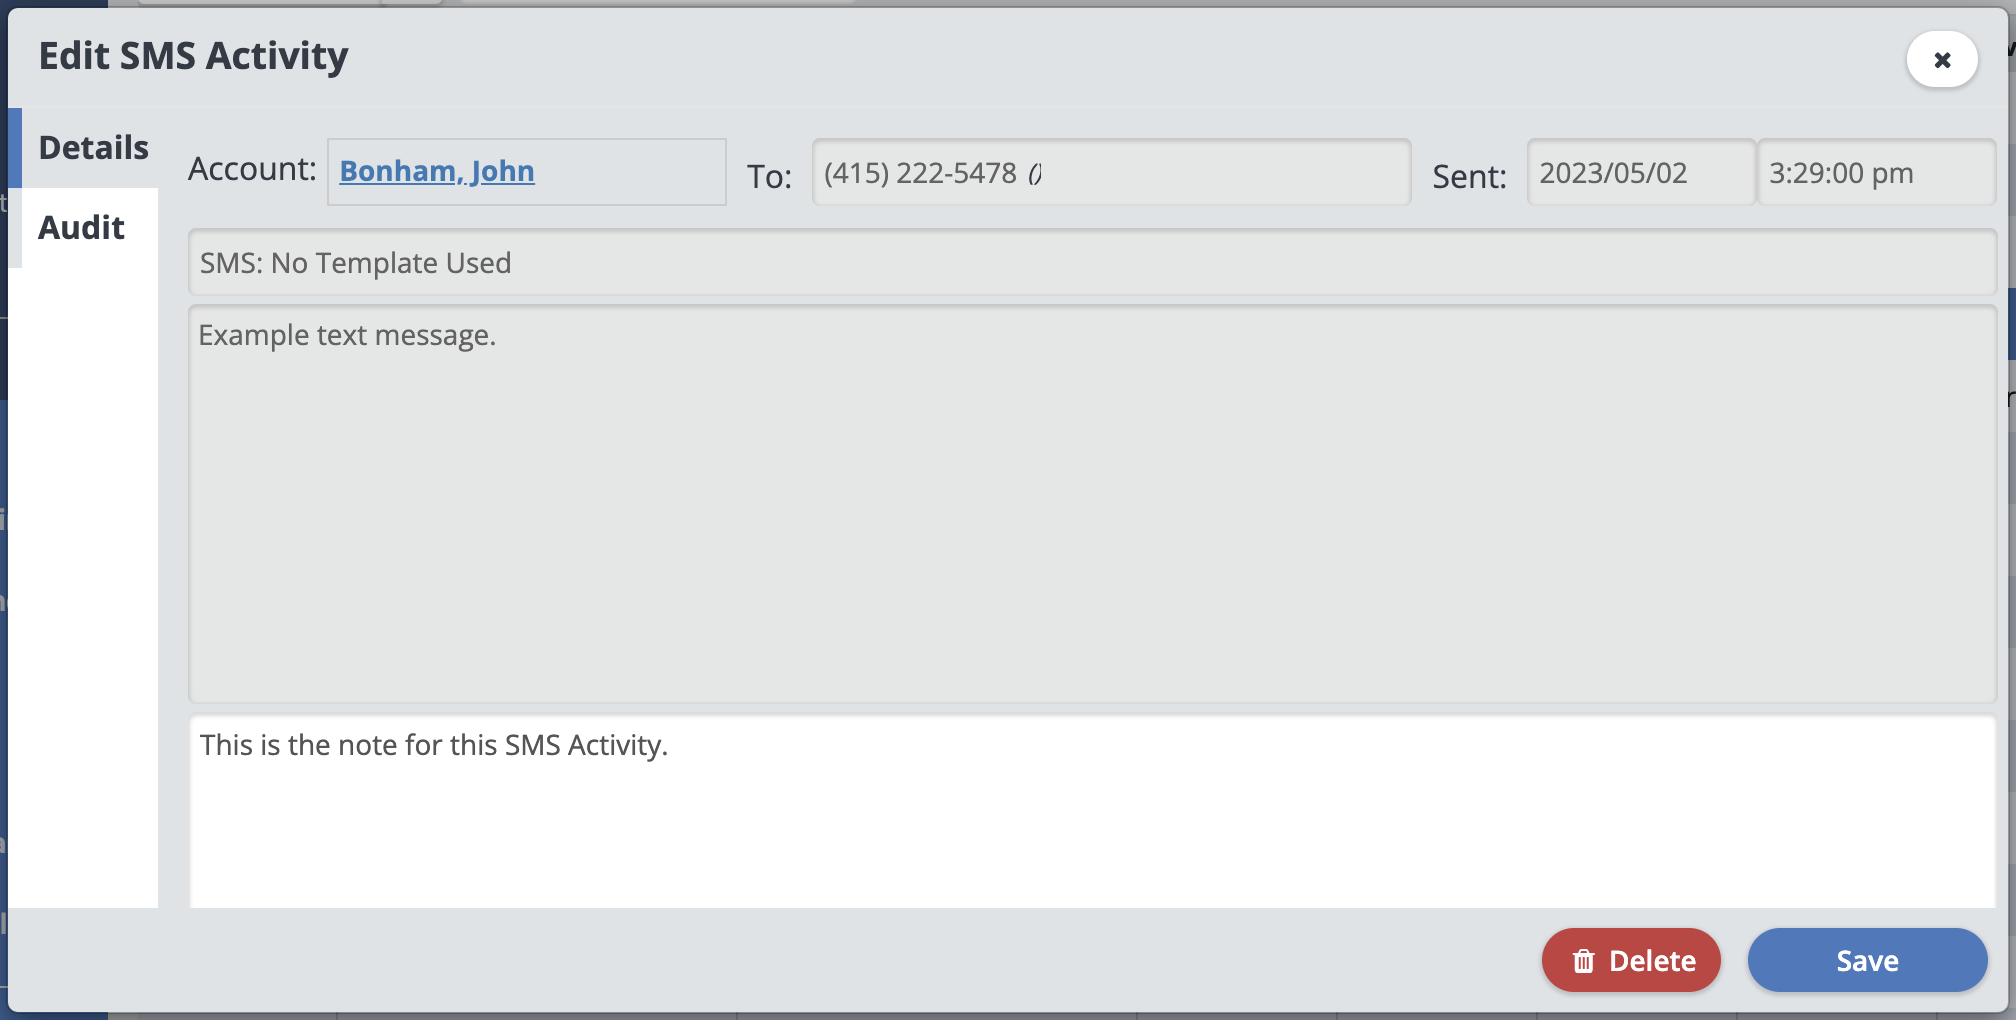
In the "Details" tab you can view the activity details and make changes, including the day/time it was sent, which template was used, and the full message itself. You can also add any extra notes to the "Activity Note" box at the bottom.
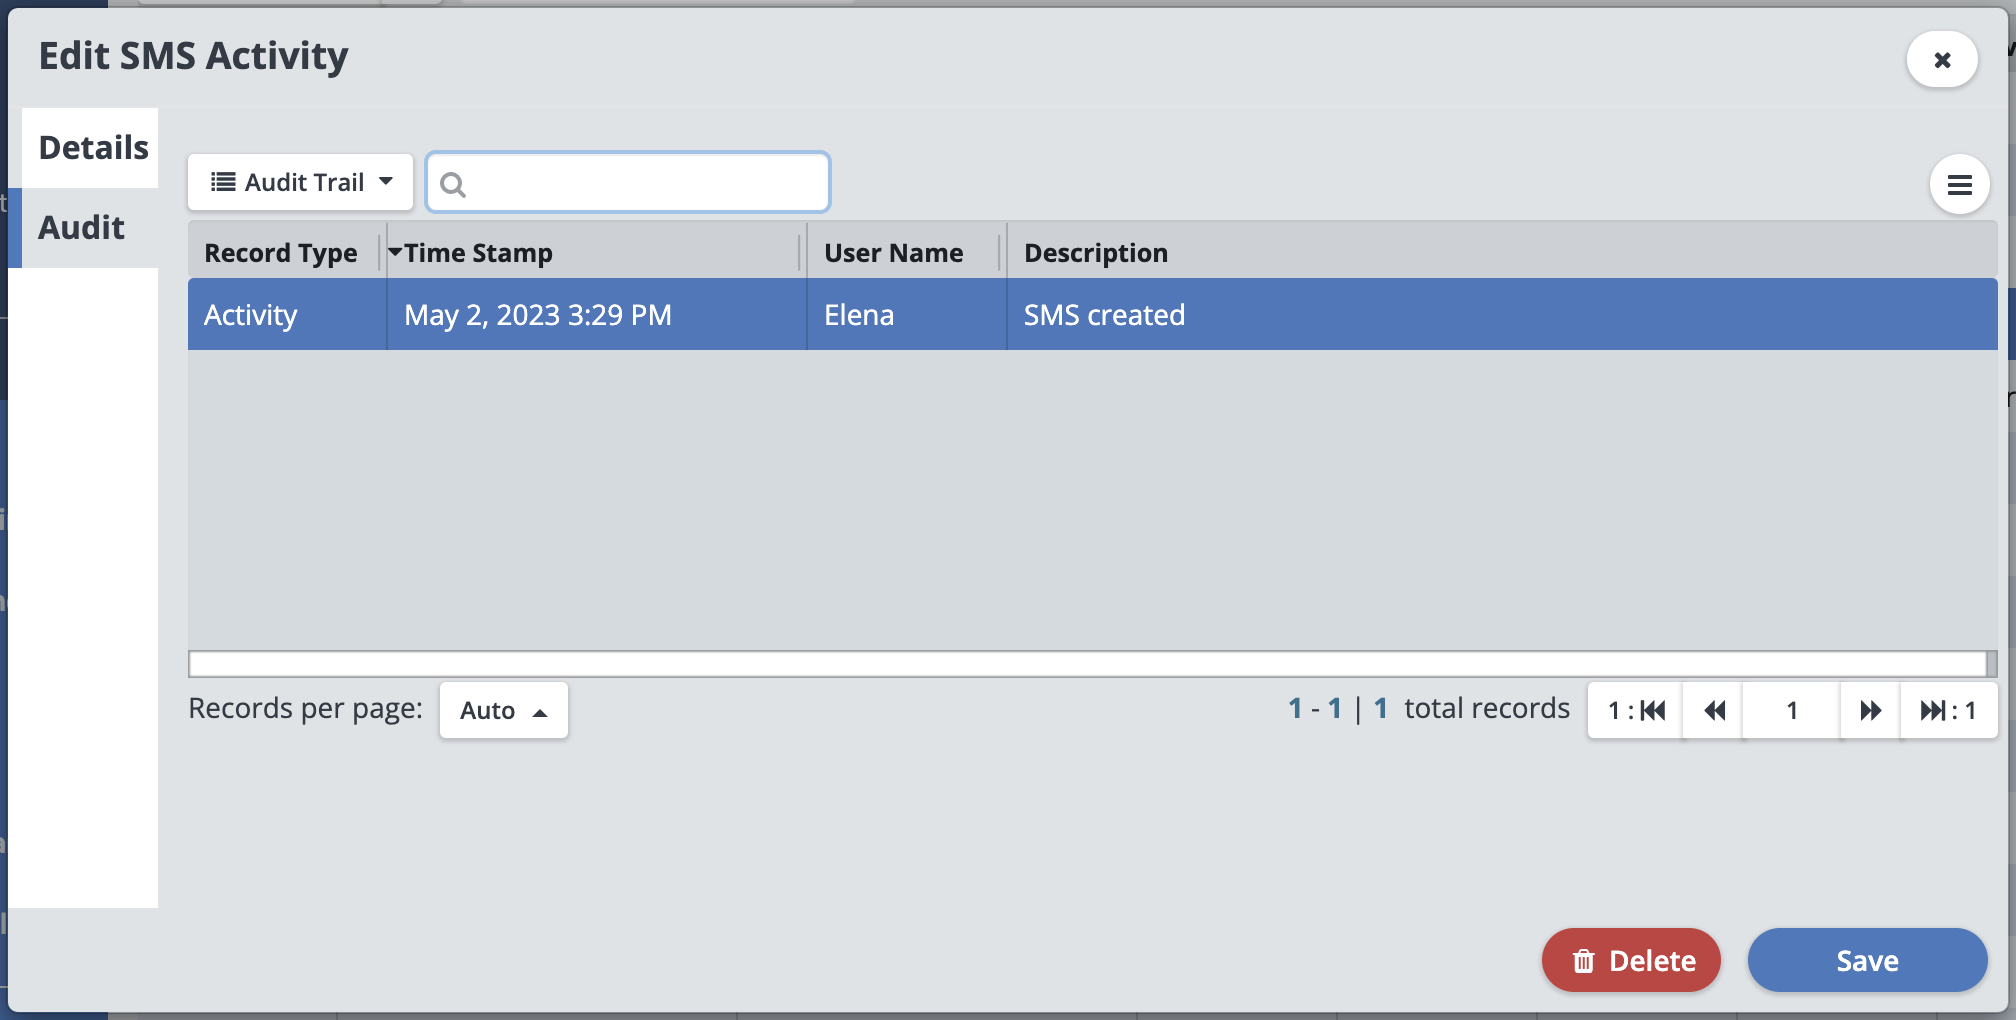
In the "Audit" tab you can see any changes made to the activity, when they took place, and who did it.
Panel View
The panel view allows you to see your activities and their details, and keep track of your progress completing activities.
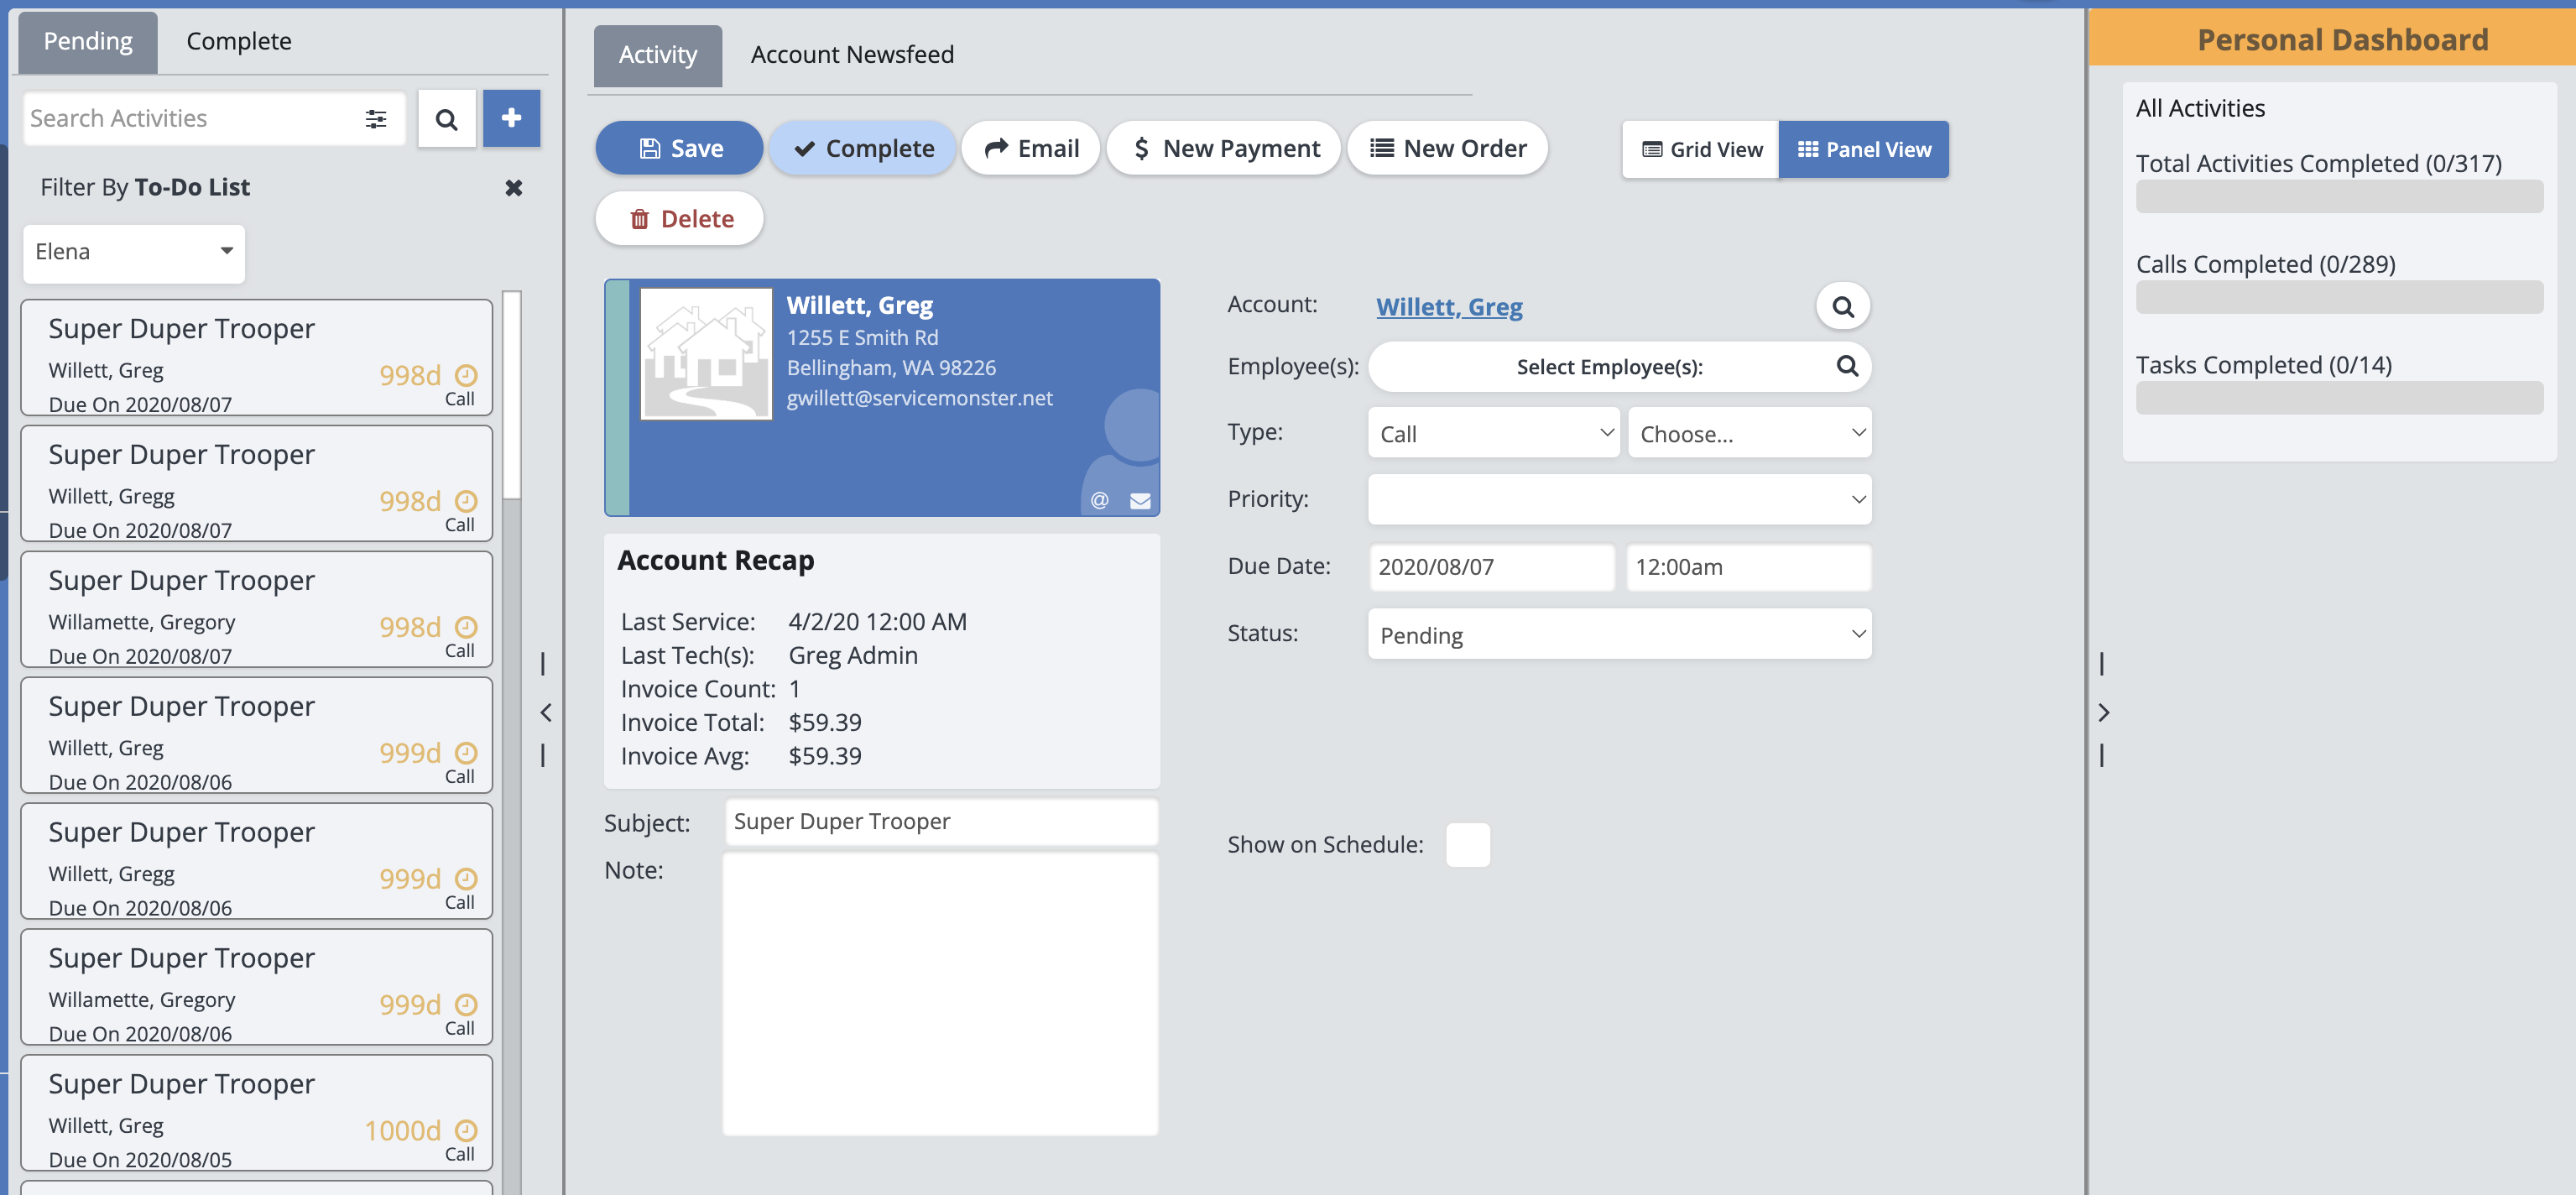
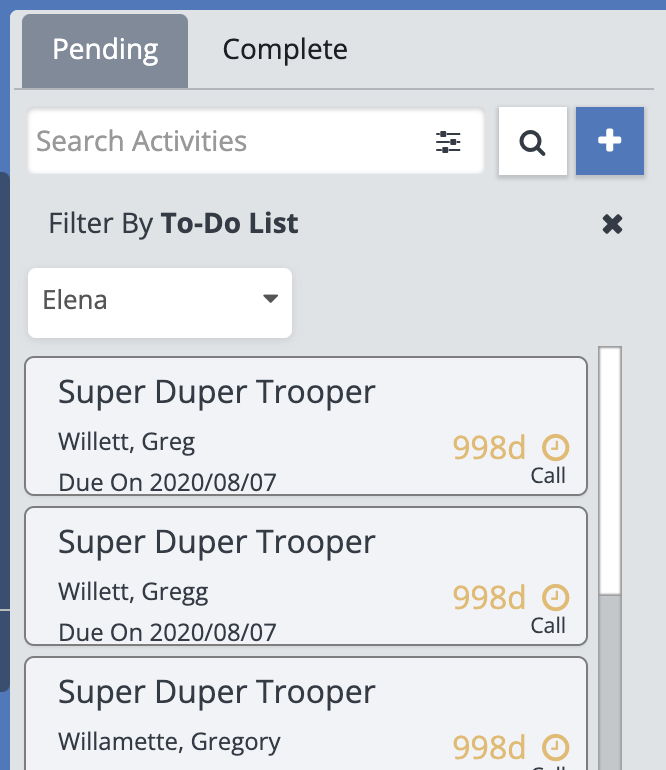
On the left side you can see cards of your activities, filtered by type or who is assigned to them.
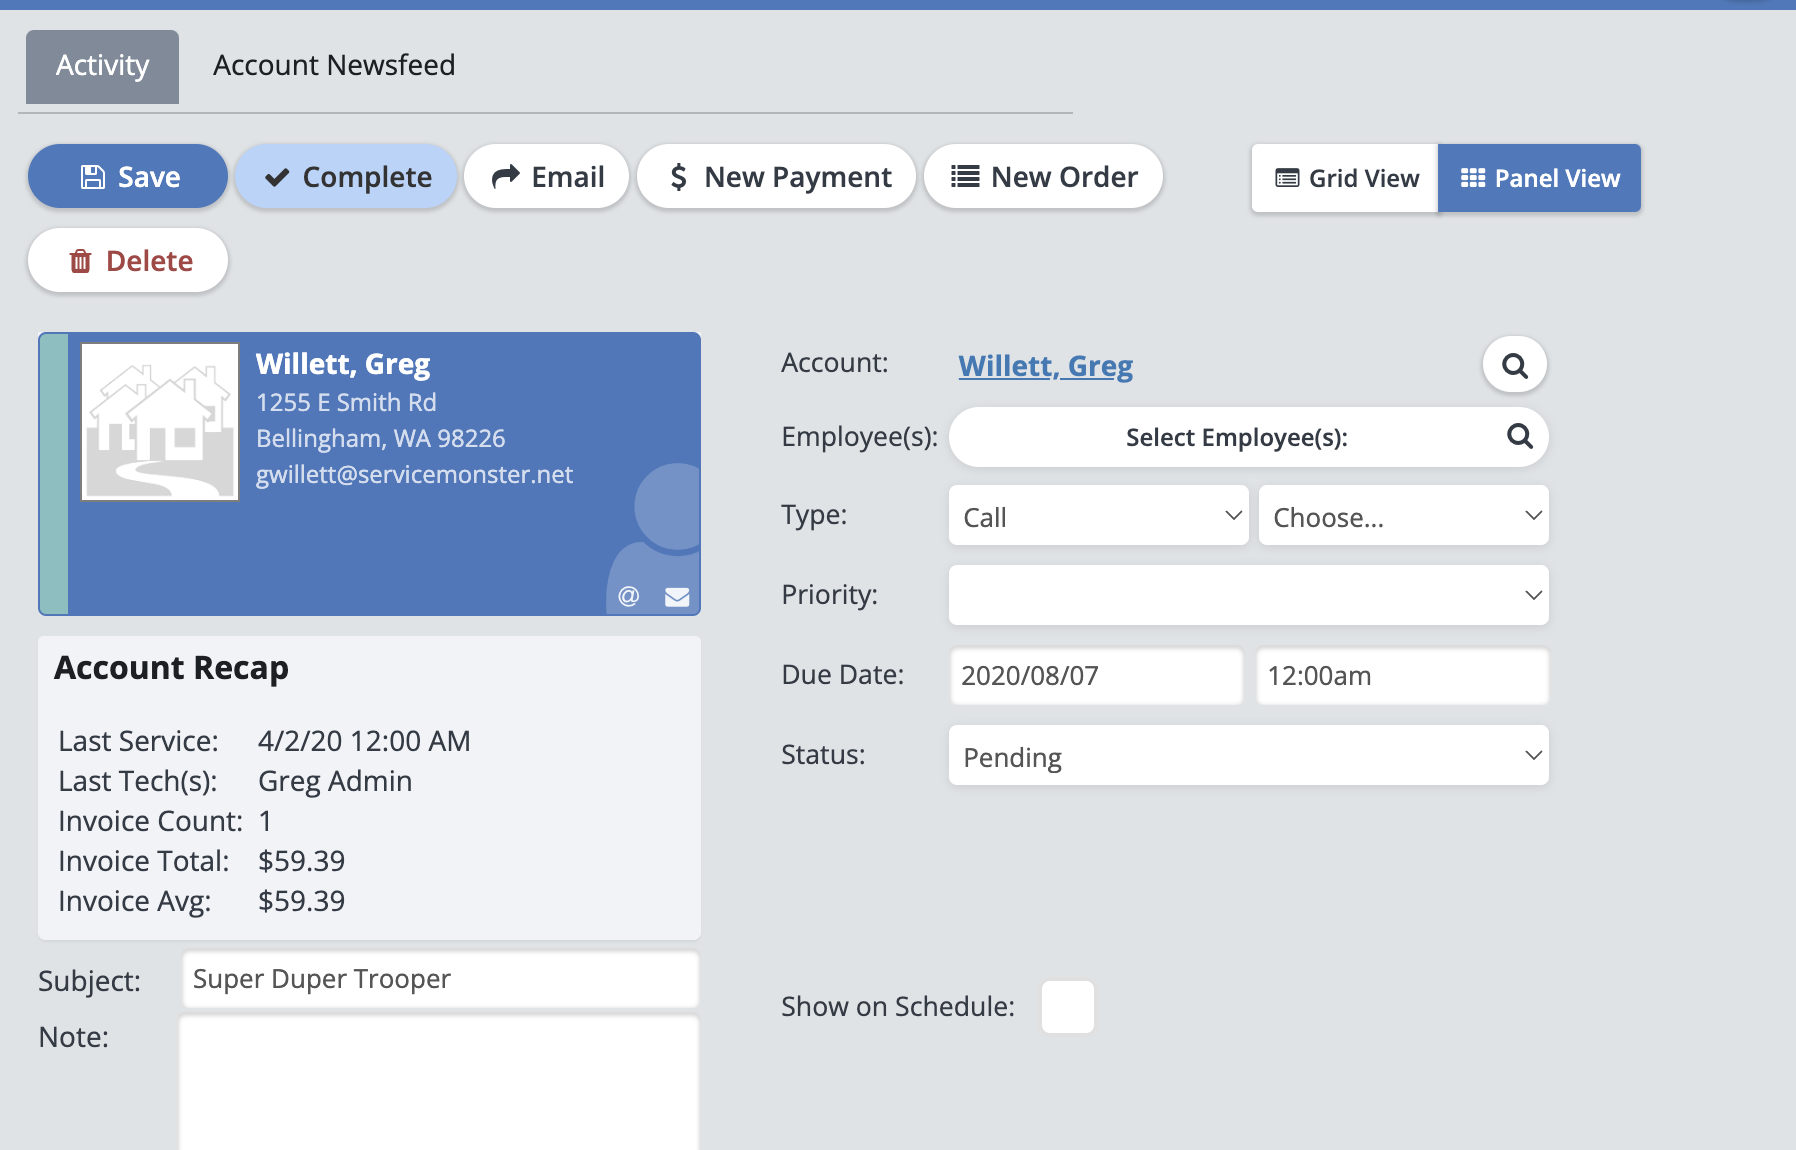
In the center you can see the details of whichever account is selected. You may edit the details of the activity, as well as create a new Email, Payment, or Order.
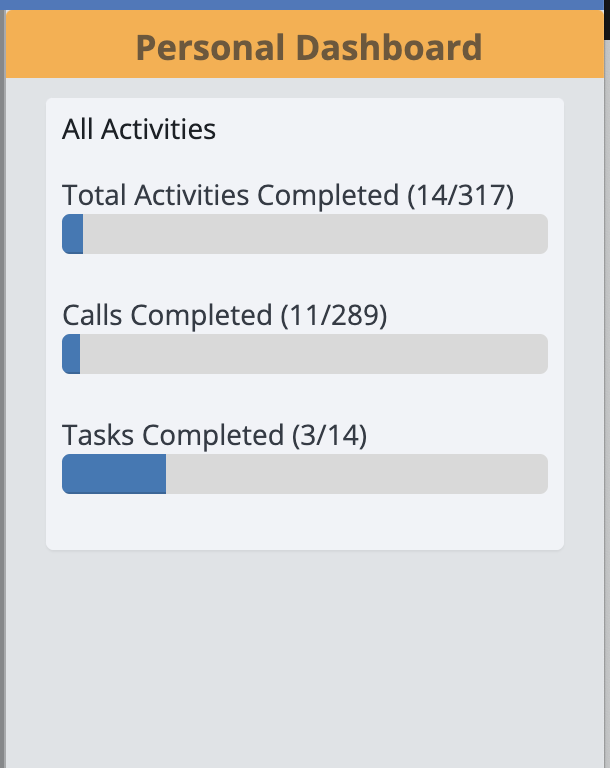
On the right side you can see your Personal Dashboard, which shows your progress in completing activities.
Schedule Sidebar
After making an activity, select the Activity Card to open up its Sidebar on the right.
The Sidebar provides easy access to a few important actions you can make with your Activity.
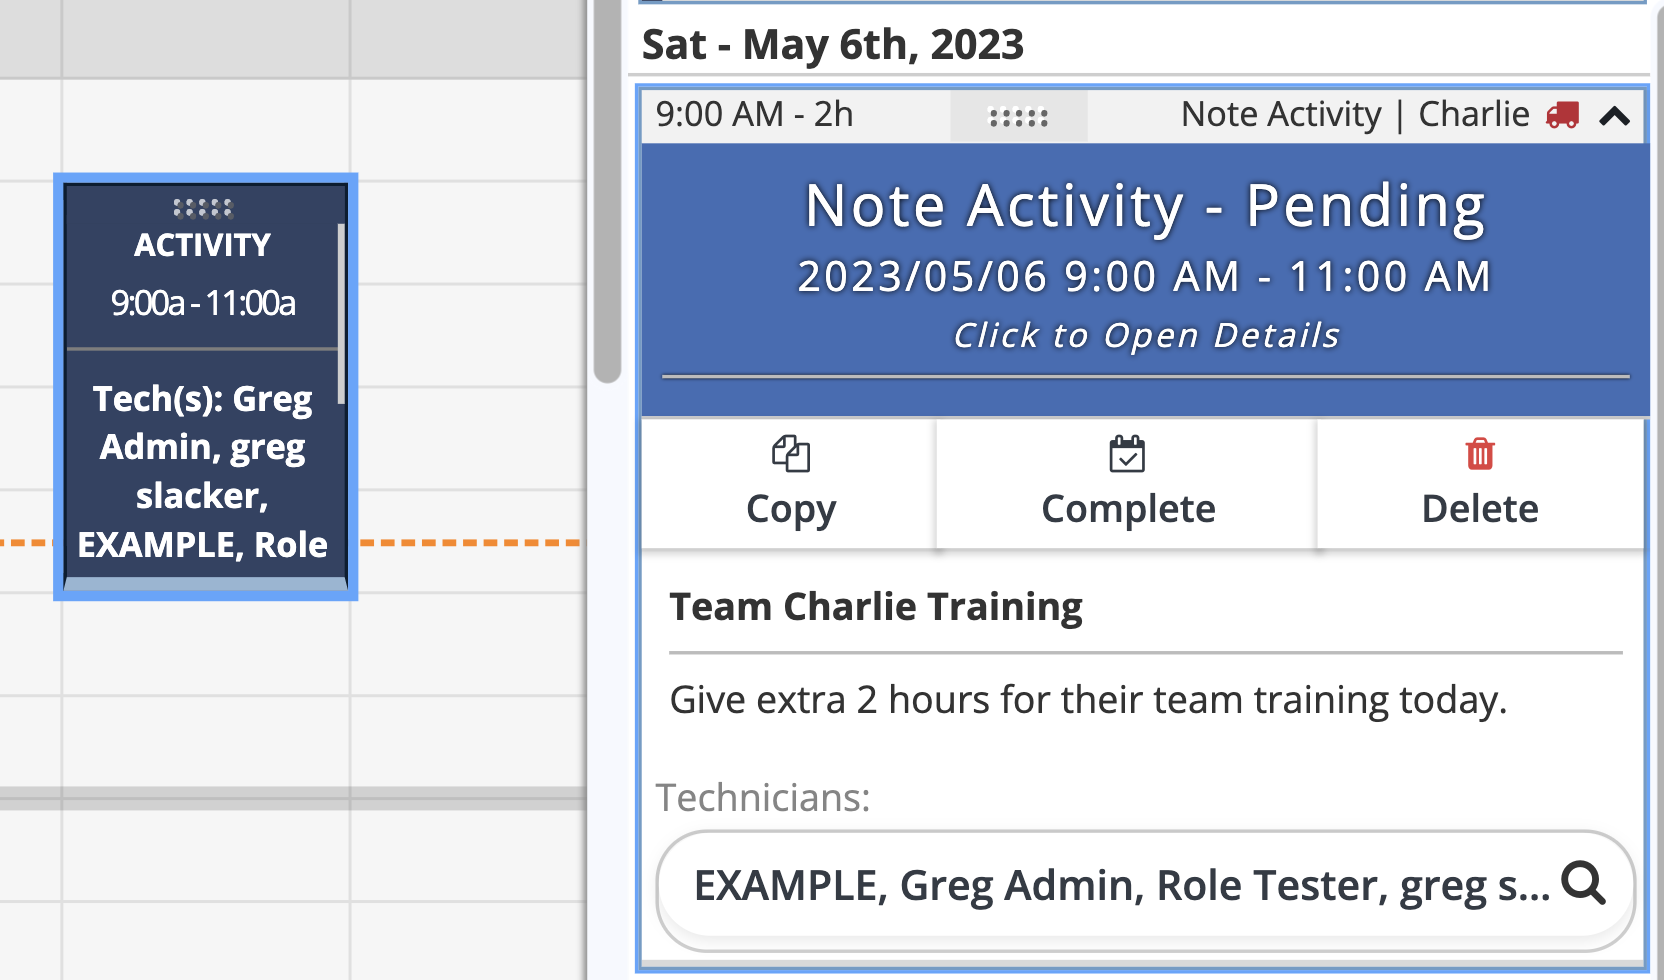
For example, click on the top blue portion to open up the Activity Details if you need to make any changes.
You can also click "Copy" to make a copy of the activity that you can drag and drop to a new location on the Schedule, or click "Complete" to mark the activity as complete, or click "Delete" to delete the activity.
Under "Technicians" you can also view or change which technicians are assigned to the activity.