
Click on a link to hop to a specific section on this page:
How To Create A Recurring Appointment
How Do These Look On The Schedule? What Are Reminders?
How To Bulk Change Appointment Reminders Into Orders
How To Create A Recurring Appointment
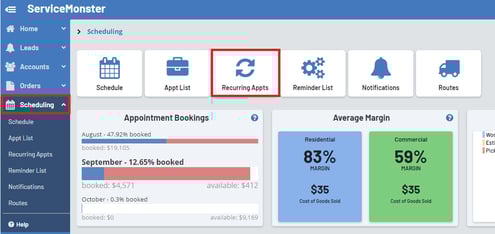
To create a recurring appointment, click on “Scheduling” in the Main Menu and select "Recurring Appts".
Here you can view a list of the recurring appointments you have already created, and make a new one by clicking on the “+ Recurring Appointment” button.
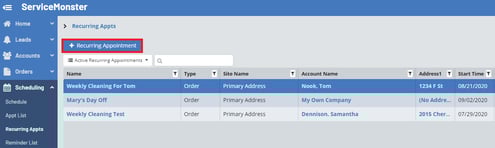
Here you can create the new recurring appointment.

General, Account, And Appointment Settings
Here you can add in details for the account you are working with.

General Settings:
Active: Leave this box checked if this recurrence is currently active. Uncheck this box if this is not an active recurrence (You no longer want these appointment to be scheduled).
Name: Here you can name this appointment, make sure it is clear and easy for you to understand when you read it on a list, such as “Joe’s Monthly Window Cleaning” or “West’s Carpet Cleaning”.
Occurrence Generation: Here you can pick “3 Months”, “6 Months”, or “12 Months”. This is how far in advance your appointment reminders will be created for this recurrence.
Account Settings:
Account: Choose the account this recurring appointment is for.
Site: This will automatically fill with the primary site address for the account you choose, but you can pick a different site address if needed.
Contract: Here you can link your recurring appointment to a service contract.
Appointment Settings:
Route: The route the appointments for this recurrence will be scheduled on.
Tech(s): Assign the technicians who will be working on this appointment.
Appt Type: Select your appointment type from the drop-down menu.
Start Time: The time this appointment will start at each time it’s scheduled.
Duration: This is how long the appointment will be when scheduled.
Recurrence Settings
Here you can choose how often the appointment is scheduled (Daily, Weekly, Monthly, or Yearly).
You can also set the start date and end date, or select it to run forever.

Daily: With the daily option, you can choose how often it repeats (Every one, two, ten days, etc.) or if it runs every weekday.
Weekly: With the weekly option, you can pick how often it repeats (Every one, two, five weeks, etc.) and what days it occurs on.
Monthly: With the monthly option, either pick what day of the month and how often it repeats, or select a week day it occurs on and how often.
Yearly: With the yearly option, either pick what day of a month you want it to occur on, or what weekday within the month it occurs.
Order Settings
Here you can enter in your order settings and the line items for this order (the products and services you are offering for this recurring appointment).
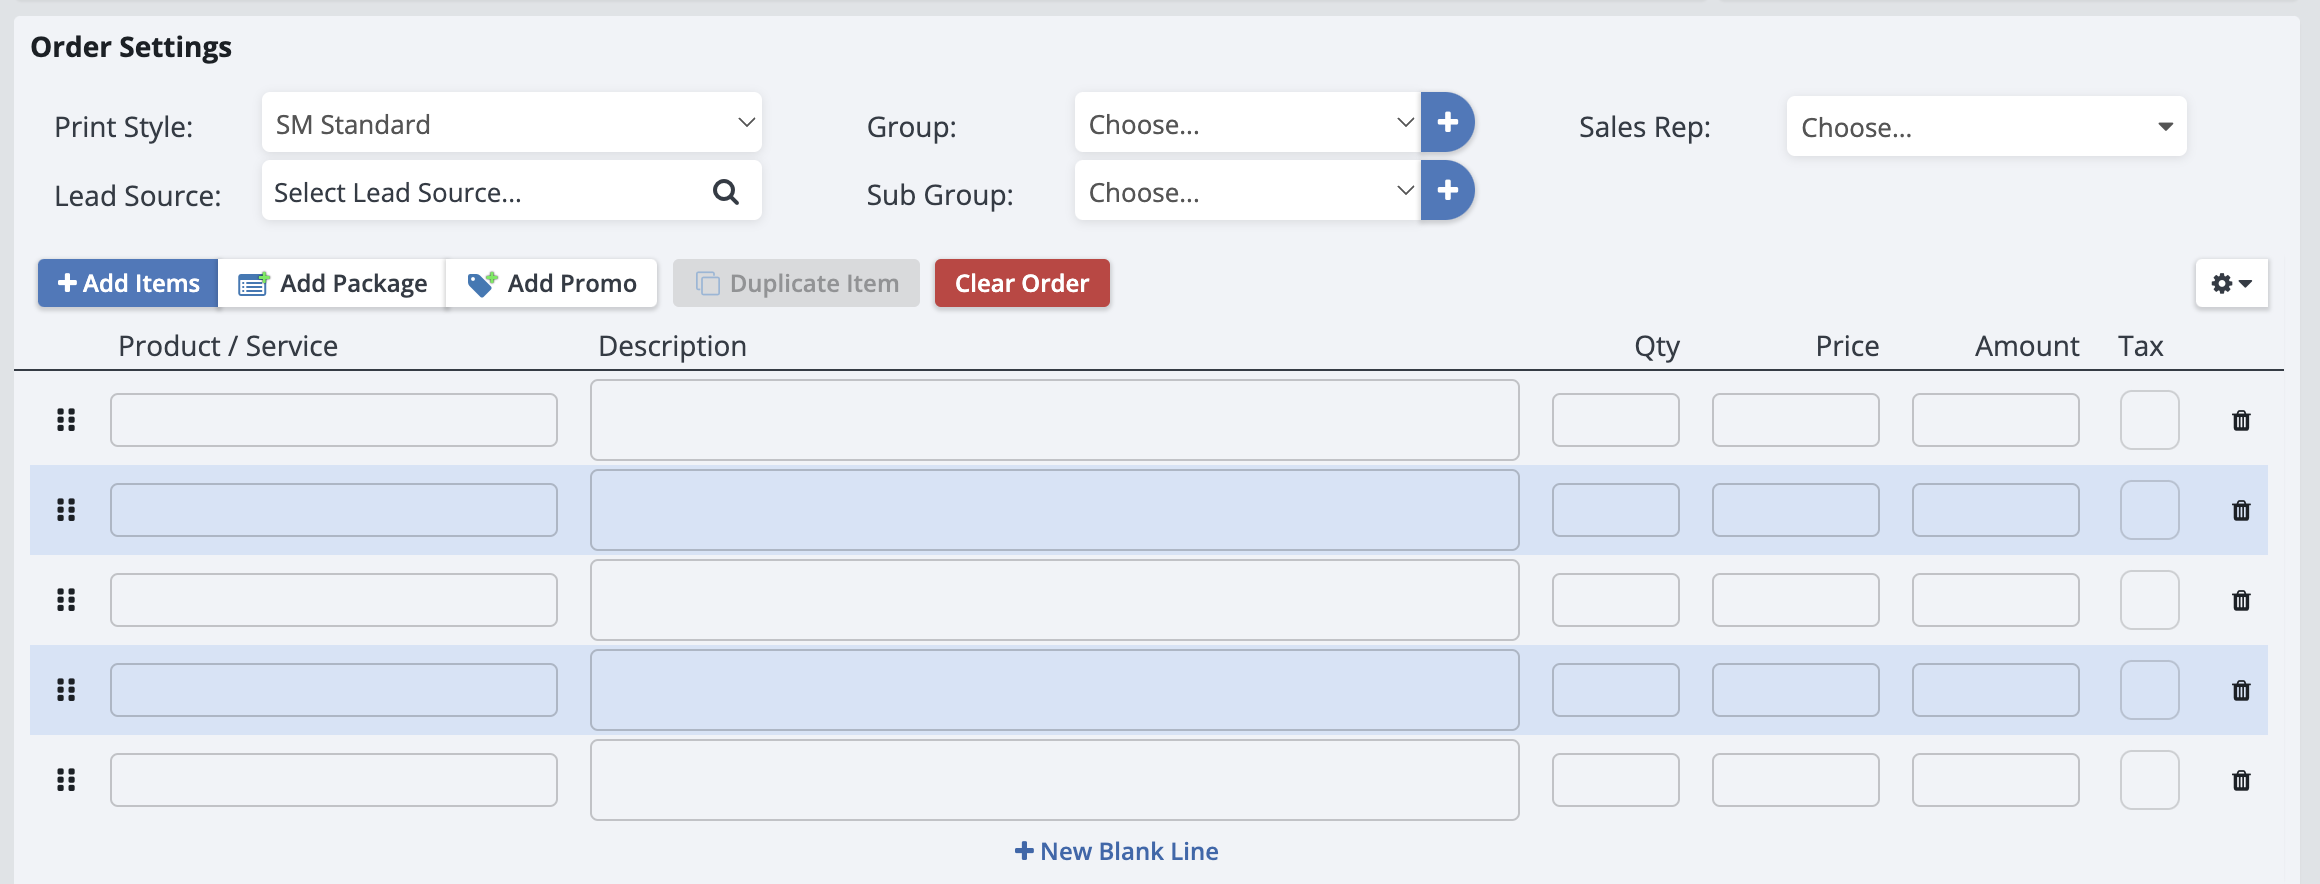
Print Style: Choose your print style from the drop-down menu.
Lead Source: Select the lead source (this is how the client found out about your business or why they are coming back to you. This can be a marketing campaign or another account).
Group: Select a group from the drop-down menu or create a new group by clicking the blue "+" button.
Sub Group: Select a sub group from the drop-down menu or create a new sub group by clicking the blue "+" button.
Sales Rep: Choose a sales rep from the drop-down menu for this recurring appointment.
Under that, you can add in Order Notes and Appointment Notes.
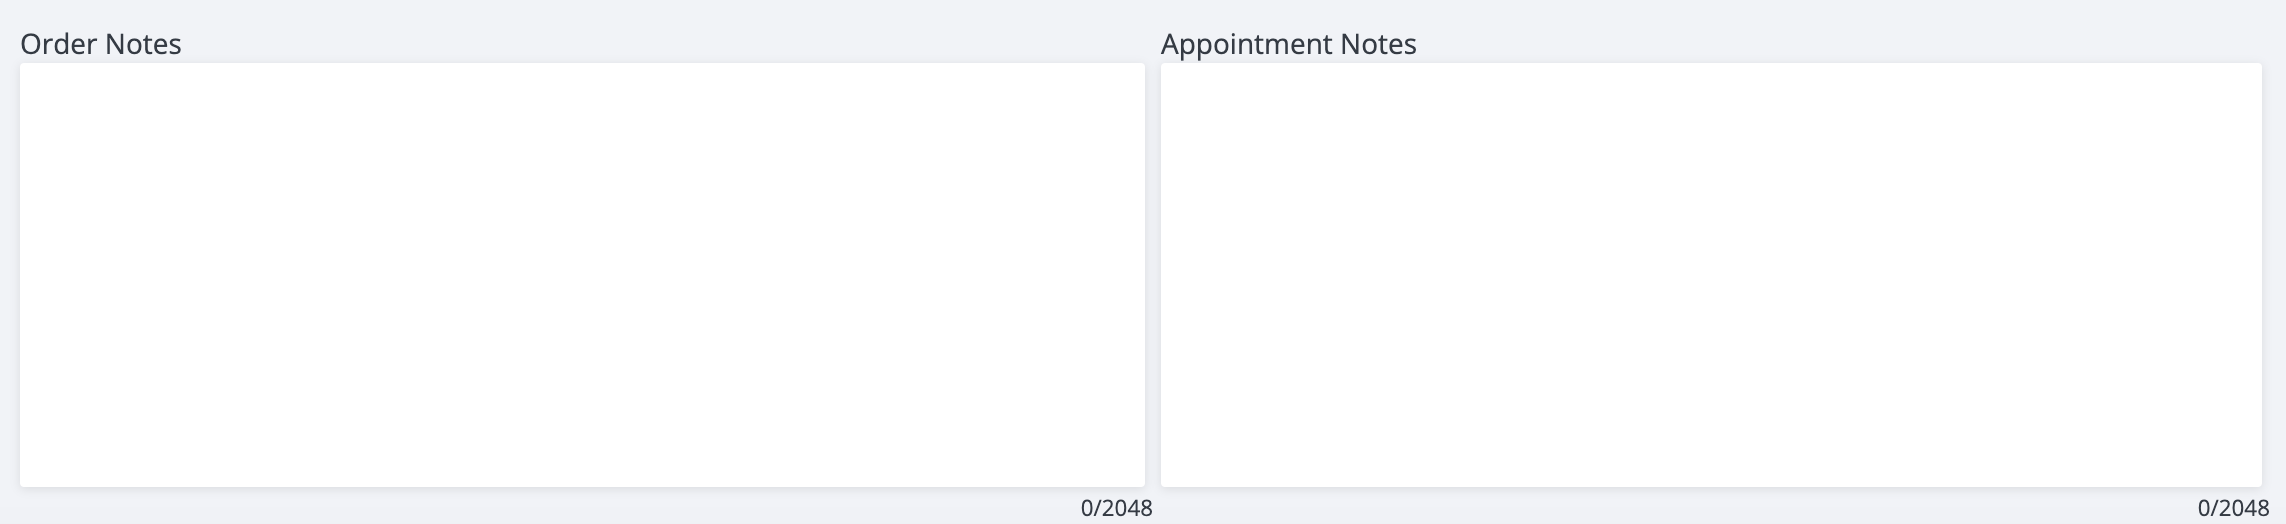
Order Notes: This is your order memo. These notes are client facing and will appear on the order form.
Appointment Notes: These are your technician notes. These notes are NOT client facing and will appear on Route Packets and on the mobile app for technicians. This is a great place to put notes that your team needs to get the job done, such as “Key is under the rug” or “Remember this piece of equipment”.
Click the blue "Save" button in the upper left when you are done.
This order is now created and appointment reminders for this recurrence will now appear on the Schedule.
How Do These Look On The Schedule? What Are Reminders?
Recurring Appointments create Appointment Reminders on the schedule. These block out time like regular appointments, but don’t yet have a Work Order attached to them. This way, if you have recurring appointments that are spaced out over a long period of time, you can check in with the client to confirm the appointment before creating a work order in the system for it.
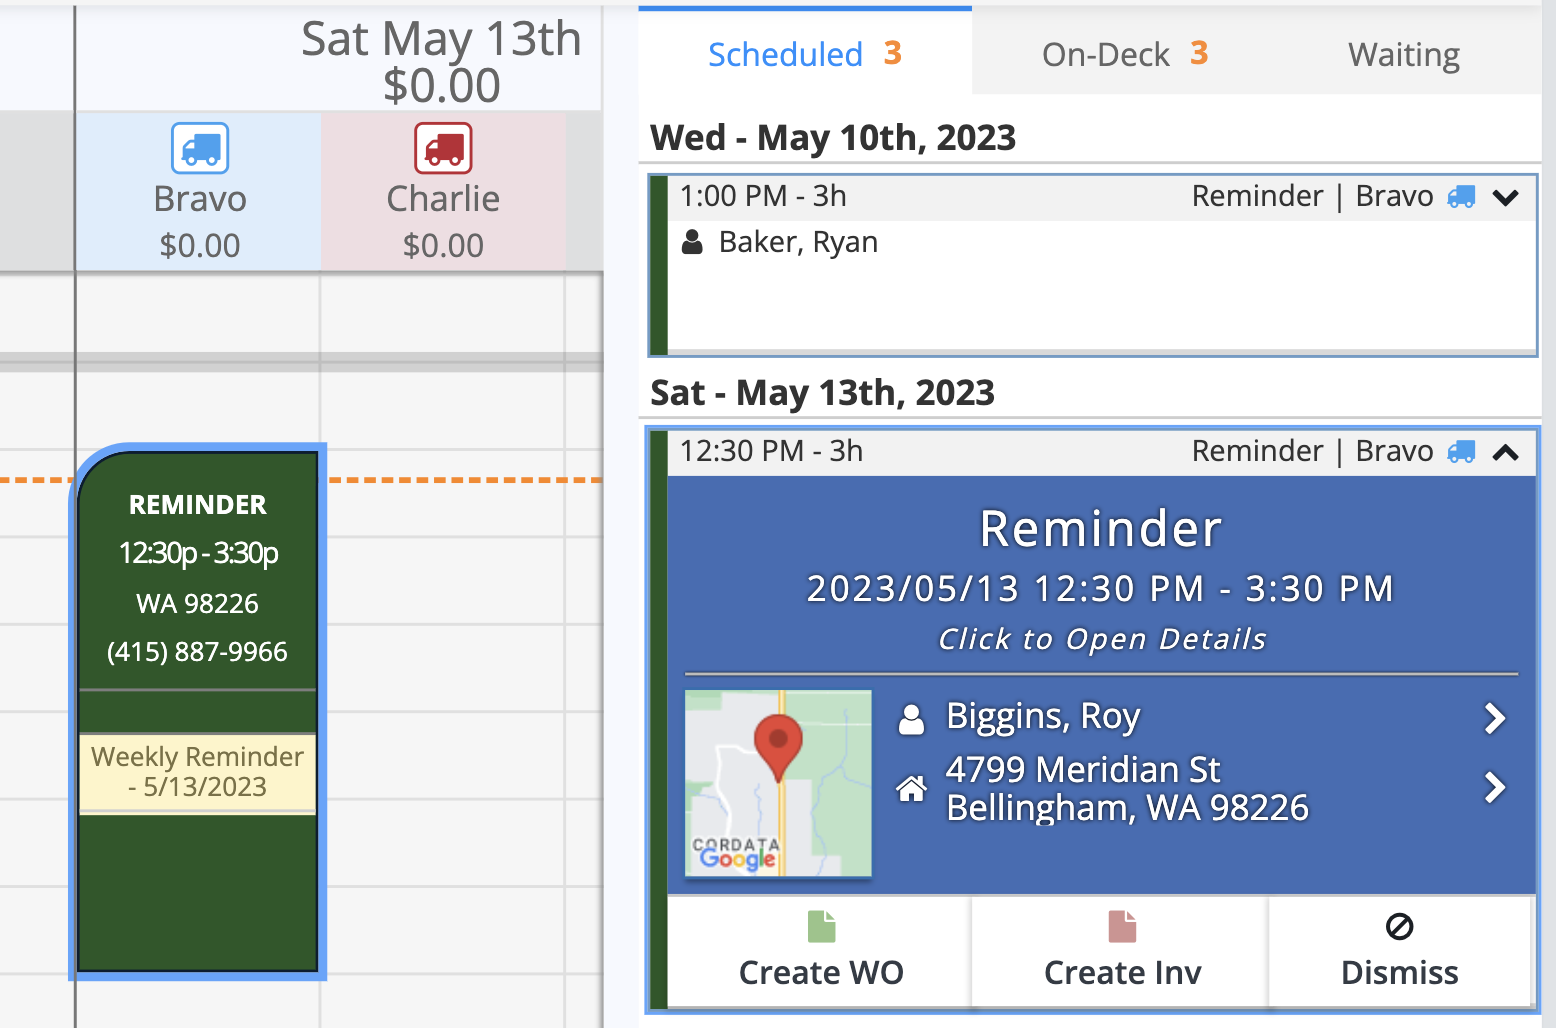
Select an Appt Reminder/Recurring Appt and you will see the Reminder Sidebar open up on the right.
From the top, you can see the Reminder's scheduled Time and Date. You may click here to open up the Reminder Details.
Below that, you can access the account and location info by clicking on the Account Name or Site Address.
At the bottom, you can choose to create a Work Order or Invoice for the Reminder, or Dismiss the reminder altogether.
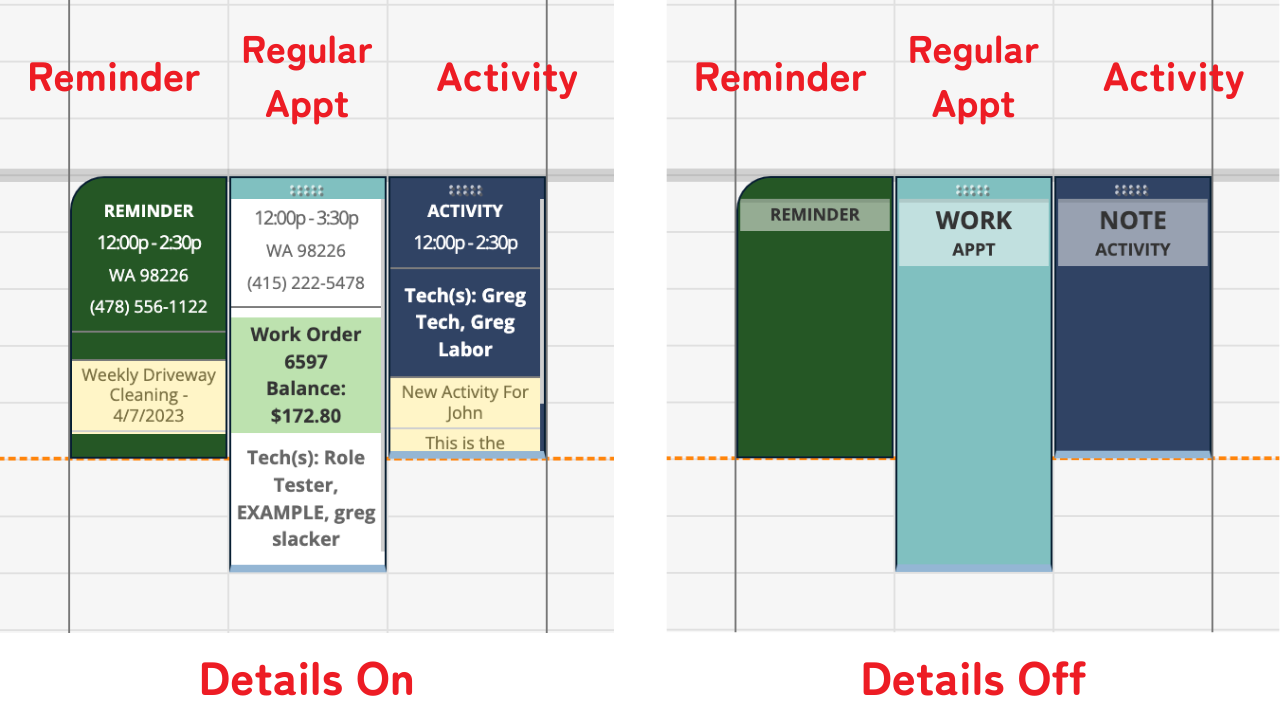
Appt Reminders/Recurring Appts are color-coded green until a Work Order or Invoice is created for it. When this happens it will turn into a regular Appointment Card and the color-coding will change to be based on where that appointment is located (click here to learn more about appointment color coding).
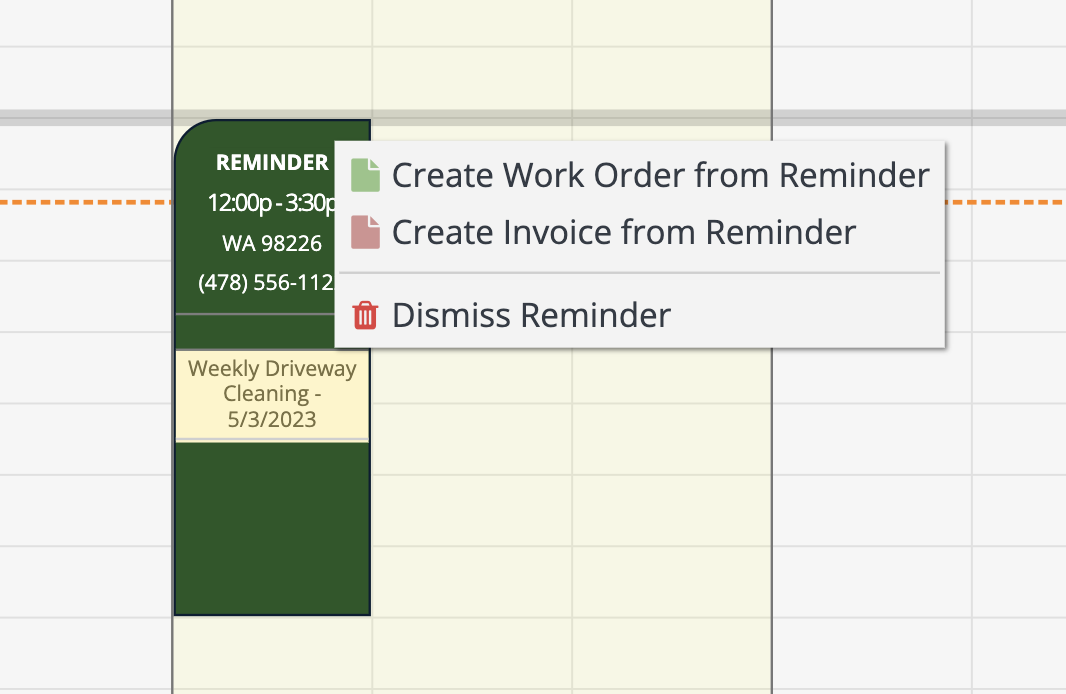
You can do this from the Sidebar or on the Schedule by right clicking on the Appointment Reminder and selecting “Create Work Order from Reminder” or “Create Invoice from Reminder”. You can also remove the reminder from the schedule by clicking “Dismiss Reminder”.
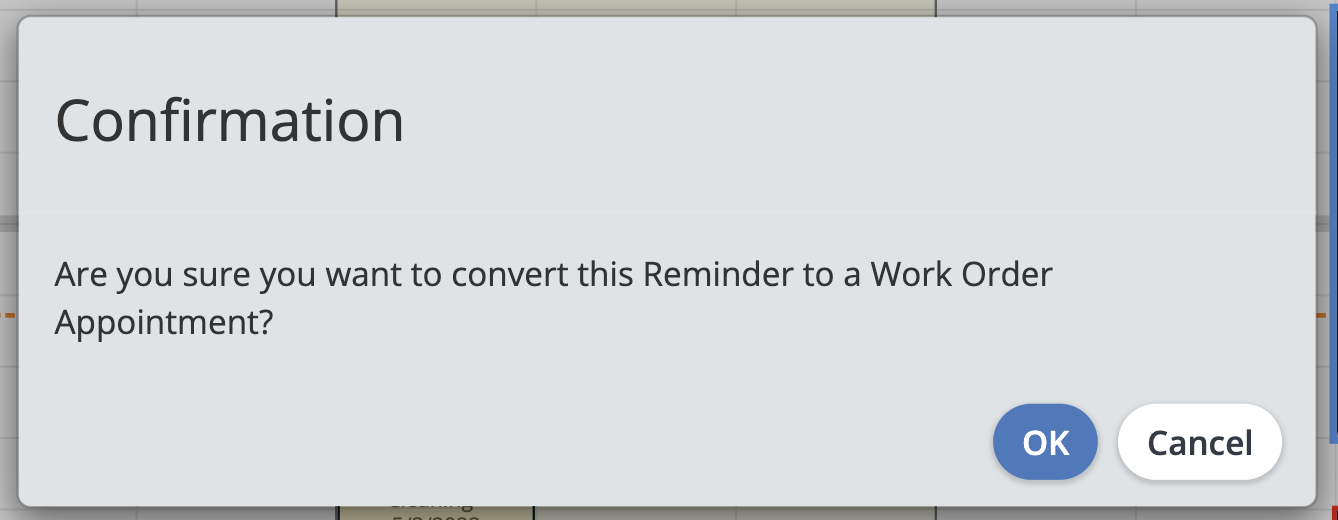
The system will confirm with you before it converts the appointment. Click “Ok” to convert the Reminder to a regular Appointment.
It will now appear as a regular Appointment Card, and a Work Order will be created and available on the Account and Order Lists.
How To Bulk Change Appointment Reminders Into Orders
If you use recurring appointments often it may seem intimidating to change Appointment Reminders one by one into Work Orders from the Schedule.
No worries! You can make this change in bulk.
To do so, click on “Scheduling” in the Main Menu, then select the “Reminder List” icon.
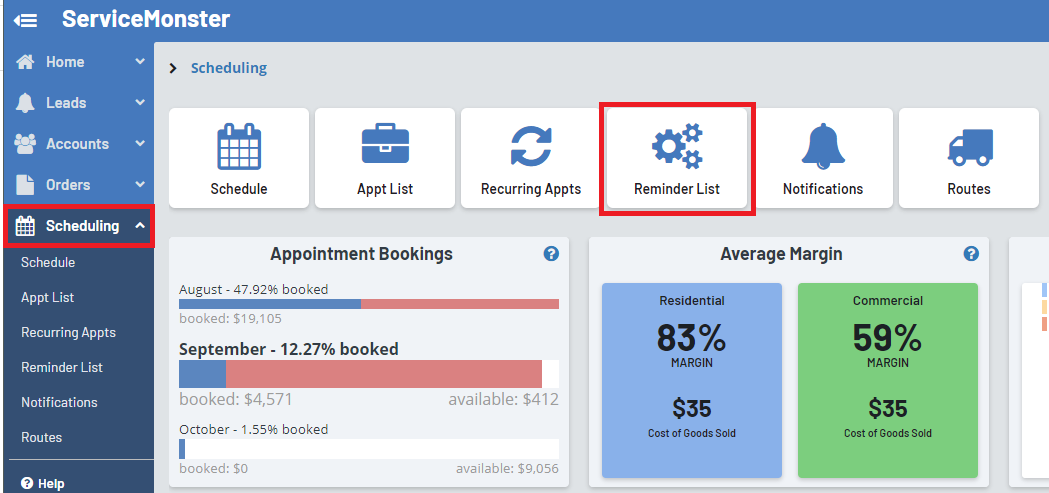
This opens up your Reminder List, which is a list of all your current Appointment Reminders.

This list is pre-set to only show you the Appointment Reminders for the next 30 days. If you want to look at a longer range, adjust this in the drop-down menu.
However, we recommend for the sake of keeping track of your Work Orders that you only transfer up to one month at a time. That way you don’t have a ton of work orders in the system that are many months in advance. Simply revisit this page once a month to transfer the next batch over.
To turn the Reminders into Orders, simply select the reminders from the list that you want to convert using the check box next to their name (or select all reminders by clicking on the check box next to the column header for "Name").
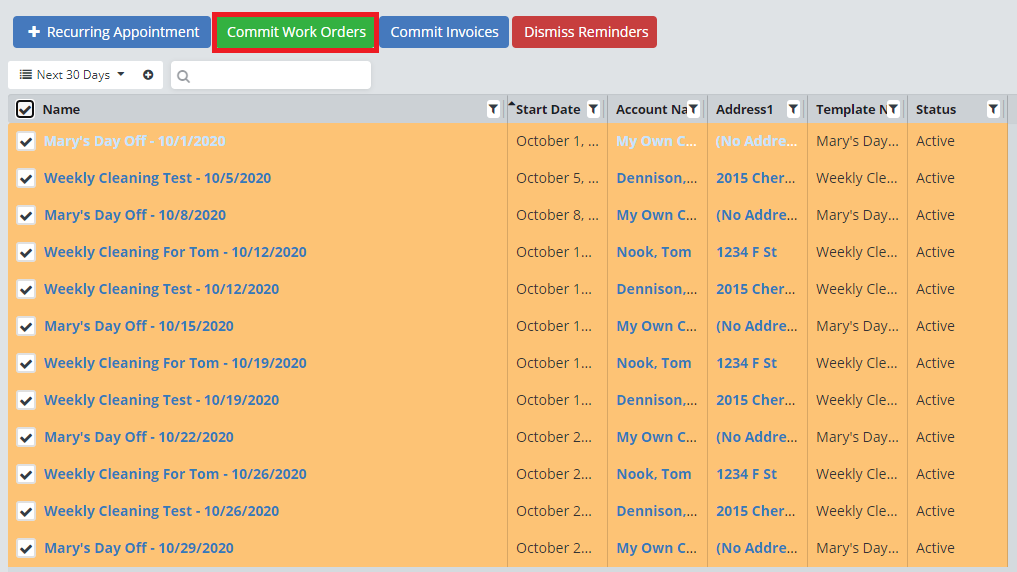
Selected reminders will be highlighted orange.
You can then convert them by clicking on the “Commit Work Orders” button to turn them from Appointment Reminders into regular Appointments, and to create Work Orders for them. You also have the option to commit them to Invoices by selecting "Commit Invoices" (just keep in mind that you can no longer edit an Order when it's in the Invoice state).
And finally, you have the option to "Dismiss Reminders" if you want them to be removed from the list and the Schedule.
Once you commit or dismiss your Reminders they will be removed from this list and appear on the Appointment list instead.