Brand awareness is the key! Most importantly, you want to make sure your company is what pops into your client's mind when they need work done. You will also continue to position yourself as the expert of their home so that you can build long lasting customer relationships.
Click on a link to hop to a specific section on this page:
How Do I Create A Marketing Campaign?
To create a marketing campaign, click on “Marketing” in the left-hand side menu, then on “Campaigns“.

Here, you will be able to view your past campaigns and lead sources. To create a new campaign click on the “+ Campaign” button.

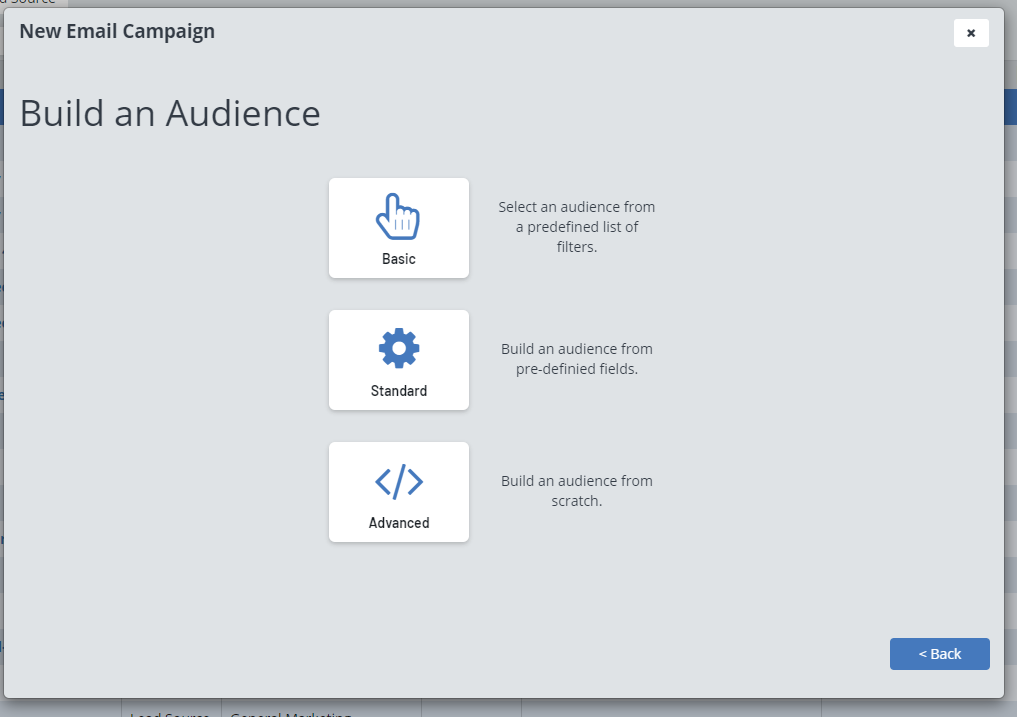
This will open up our Campaign Builder Wizard. From here you will choose what type of campaign you want to make.

Campaign Types
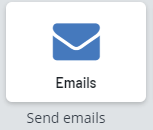
Email Campaigns: Allows you to send out a mass email to your audience, or create an export file of the audience's information for external use. These emails are sent through the ServiceMonster server unless you have set up your SMTP settings to have them send through your own email Server.
If you want to set the campaign up to send out emails through ServiceMonster you will need to set up a Marketing Template that will be the email sent out. Click here for more information on Marketing Templates.
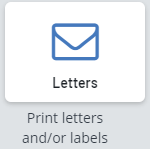
Letter Campaigns: Gives you the option to create labels and or letters to easily send mail to clients.
If you choose to print out letters from ServiceMonster, you will need to set up a Marketing Template for it. These marketing templates can utilize Data Tags (More information on Merge Fields here) to be personally customized for each client you are printing a letter for.
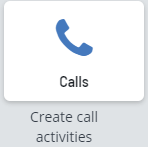
Phone Campaigns: Creates call activities for you within ServiceMonster and or an export file of the audience’s information for external use.
Export Campaigns: This lets you simply create an export file with your audience’s information for marketing use outside of ServiceMonster.
Building Your Audience
Once you choose what type of campaign you want to create, you will start building an audience. You have three options to choose between to use to help build your audience, Basic, Standard, and Advanced.
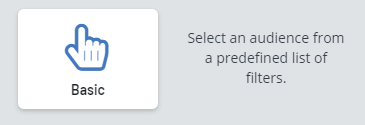
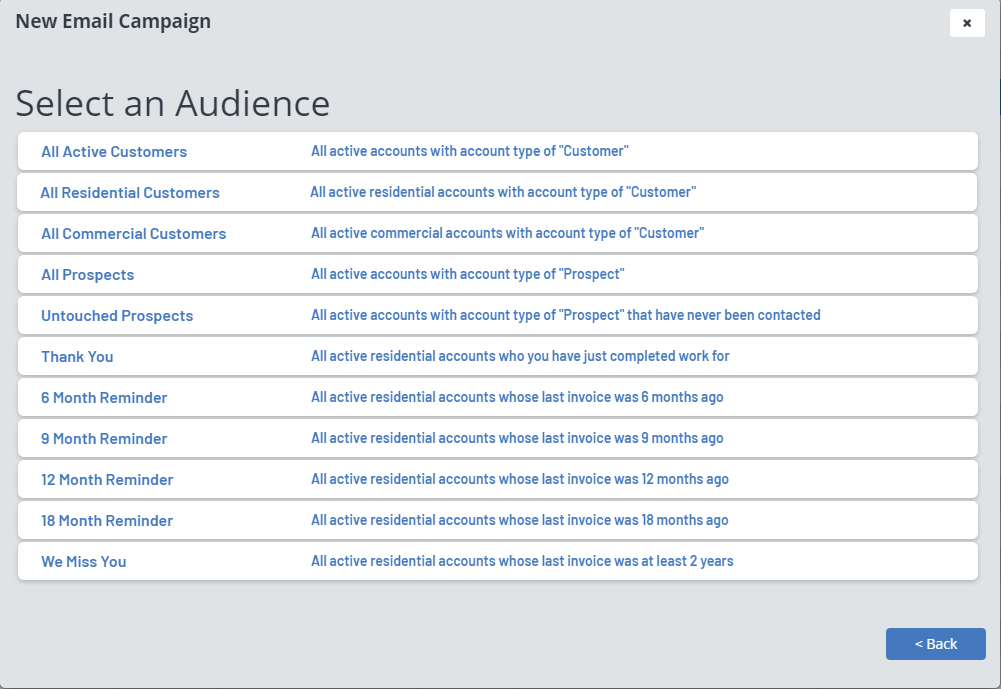
Basic:
The Basic option lets you pick from an audience from a predefined list of filters. We have done the work of setting up the filters for you, all you have to do here is pick one of the options from the list. You can also use this as a starting point for the campaign and can go in and edit or add in filters later.
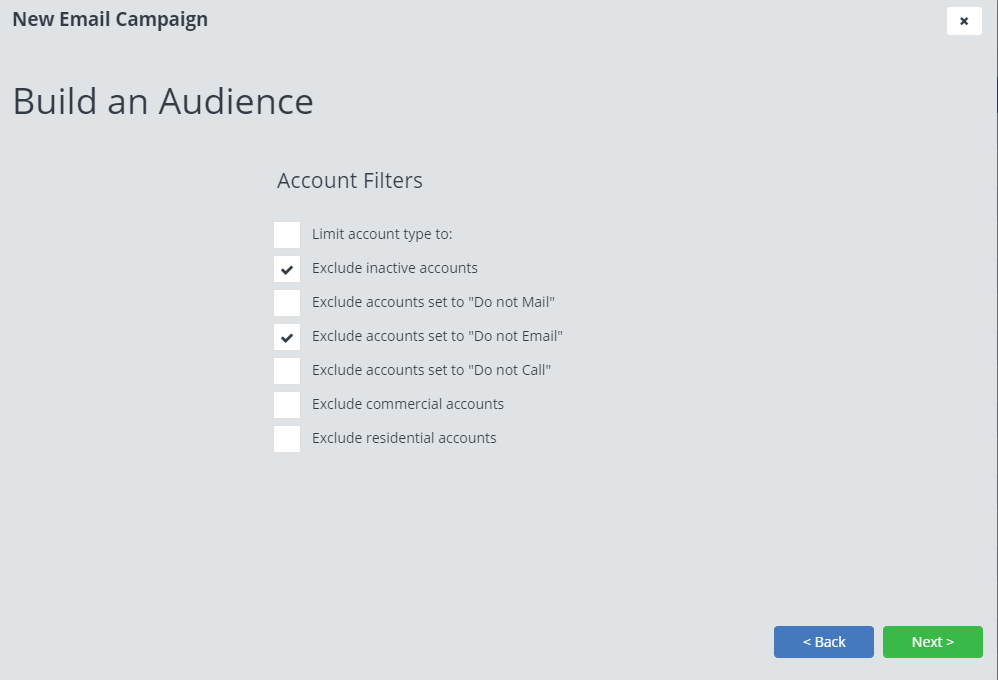
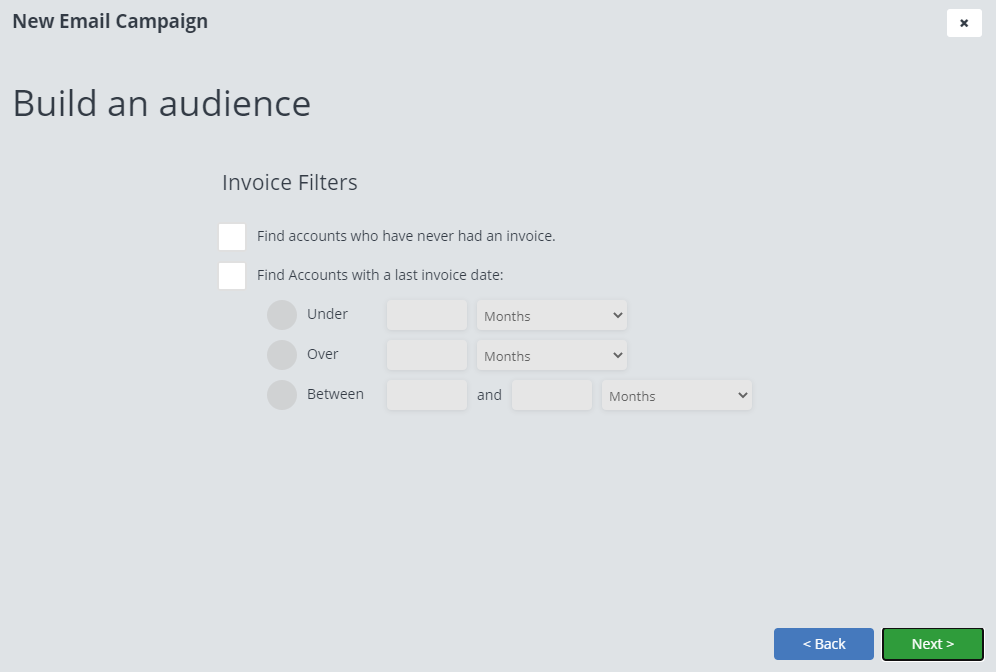
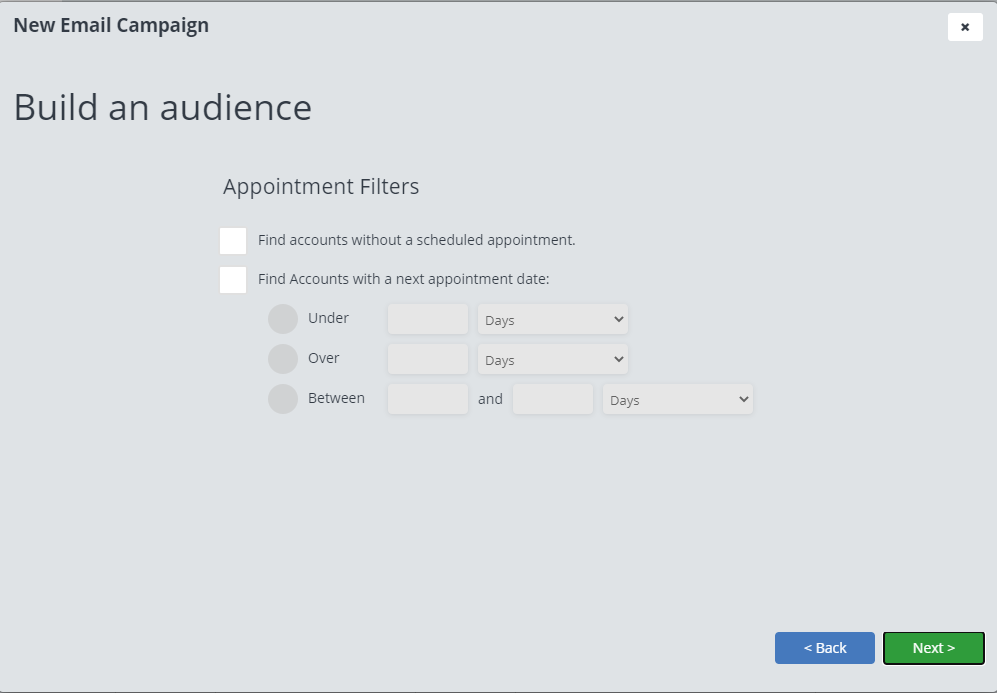
Our Standard option lets you check off boxes to create the filters you want and build your audience. These include account filters, invoice filters, and appointment filters.

Advanced:
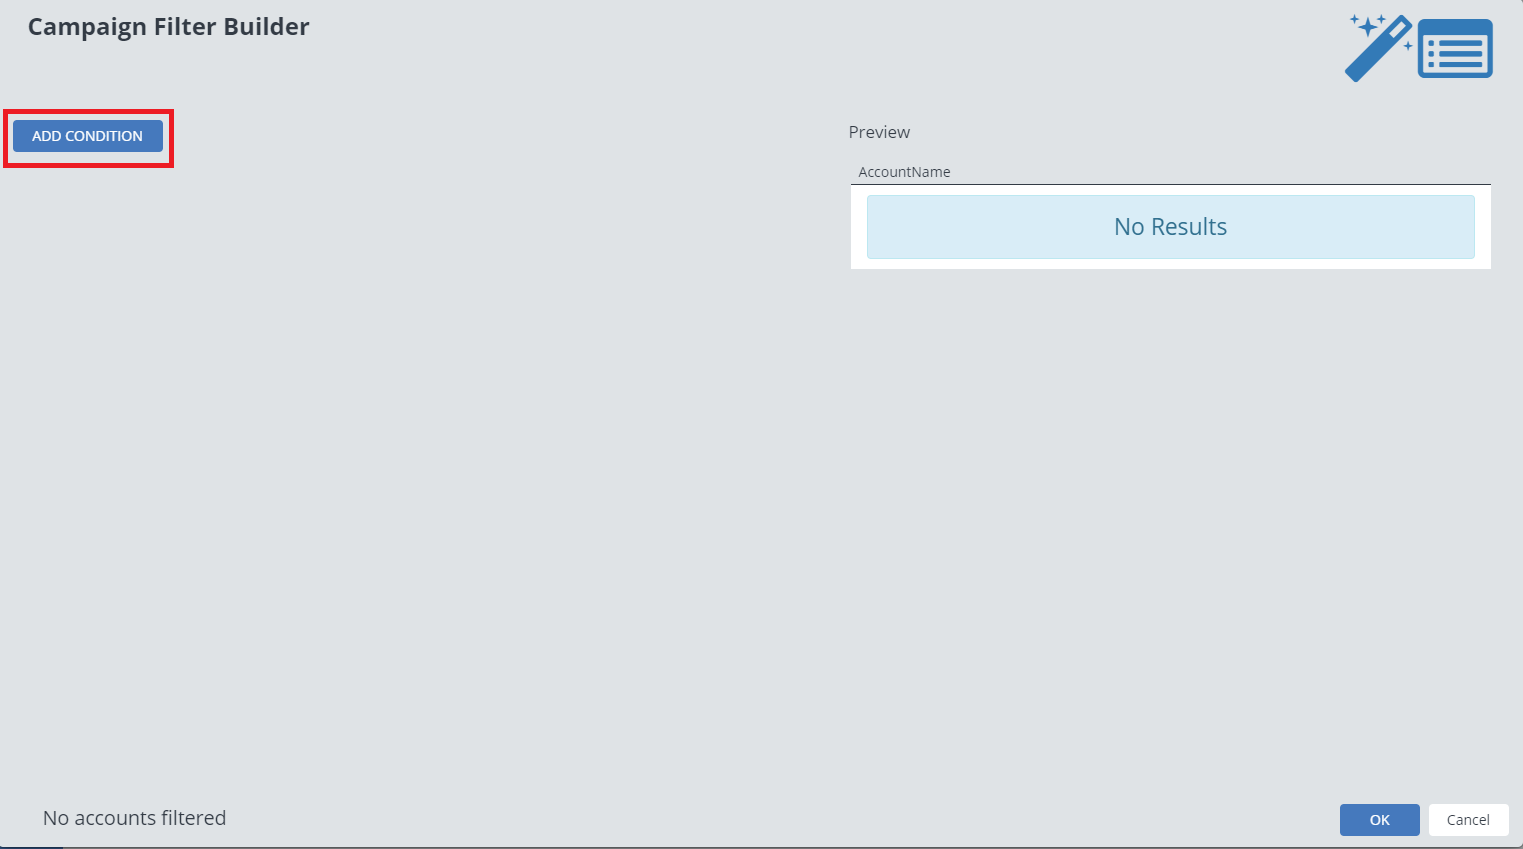
The advanced option lets you build your audience from scratch. From the New Campaign page you can click on the “0/0 Accounts filtered” button, then click on the “ADD CONDITION” button to start adding in your own filters. This is only recommended for those with experience in building campaigns in ServiceMonster already.

Learn more about
Campaign Details
Once you have picked your audience, you will then be able to edit the campaign details including:
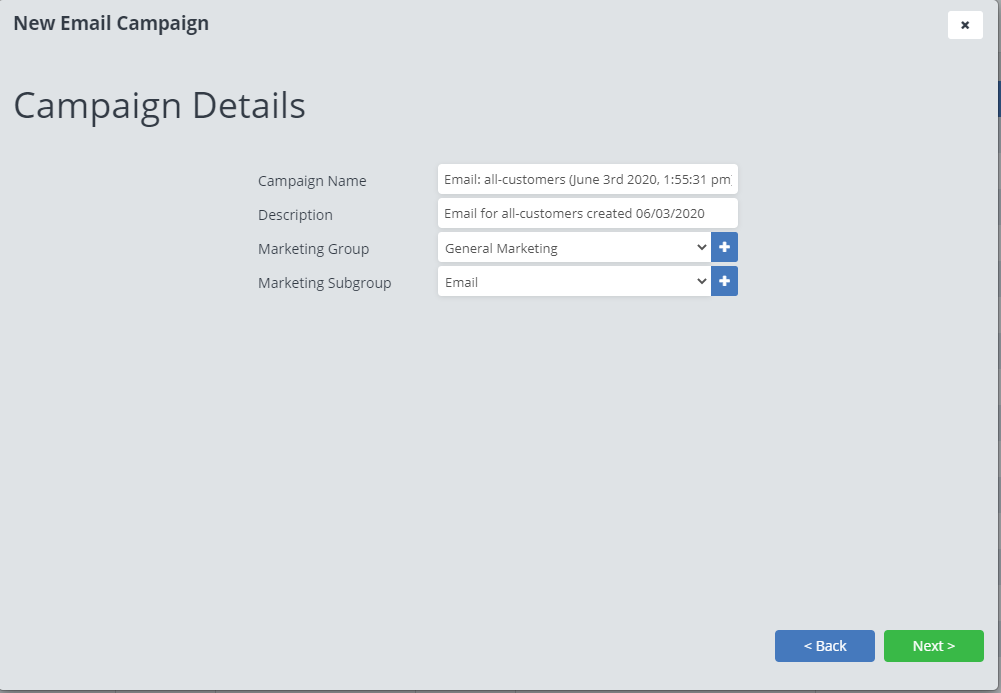
Campaign Name: The name of the campaign
Description: The description of the campaign
Marketing Group: What marketing group you want it to go into, you can also add in your own custom options for this.
Marketing Subgroup: What subgroup you want this campaign to be organized as, you can also add in your own custom options for this.
Campaign Run Options
Here you can choose to just Save the Campaign, or Save and Run the campaign.

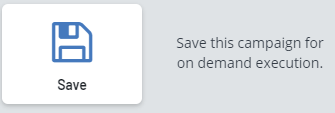
Save:
If you click save, it will take you to the page for that campaign.

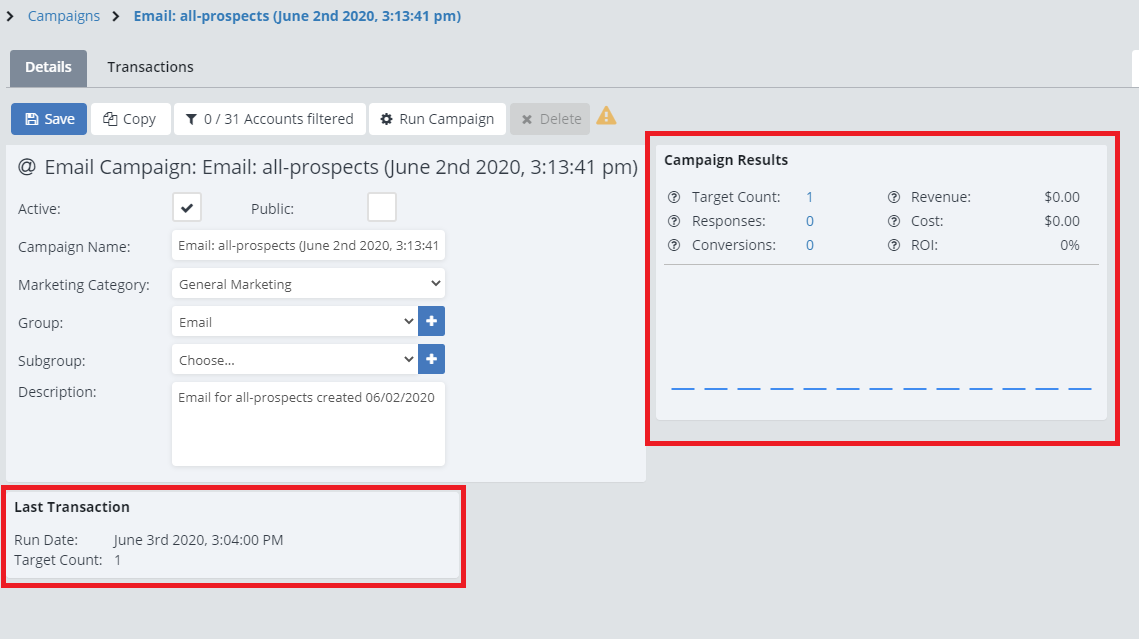
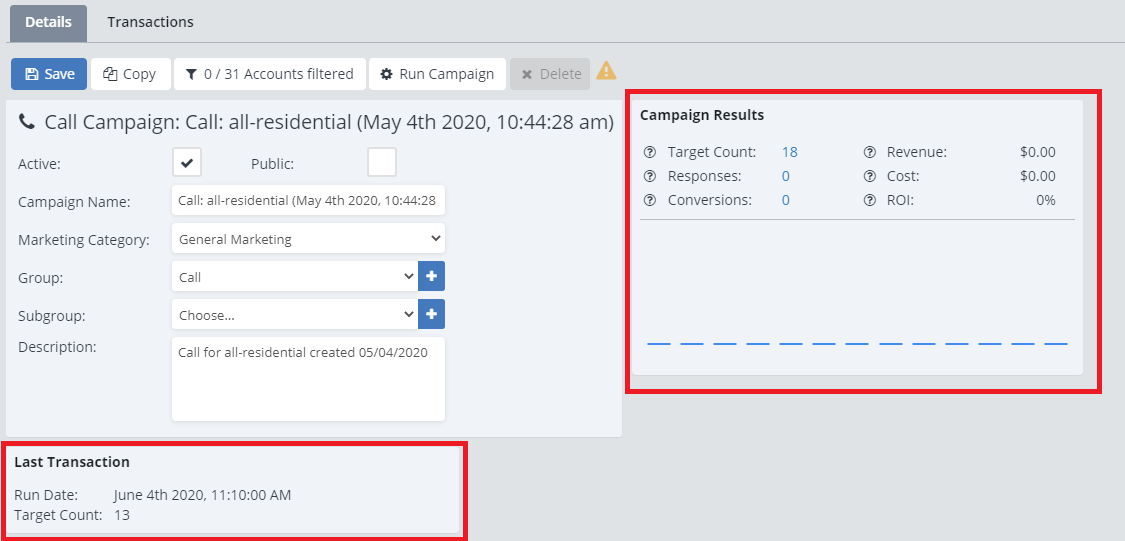
Here you have the options to make a copy of the campaign, check the filters that are on the campaign or add in new filters, run the campaign, delete the campaign, and edit the details of the campaign. The Transactions tab allows you to see the details of all the past times that the campaign had run.

You can run the campaign at any time by clicking on the “Run Campaign” button.
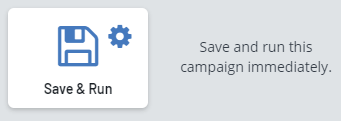
Save and Run:
If you click Save and Run, it will take you to the campaign page and open up the box to set the settings for the campaign to run. This will look a little different for every campaign type.
Running The Campaign
Email Campaigns
For email campaigns, if you want ServiceMonster to send out the email, you can click on the “Send Email” box.
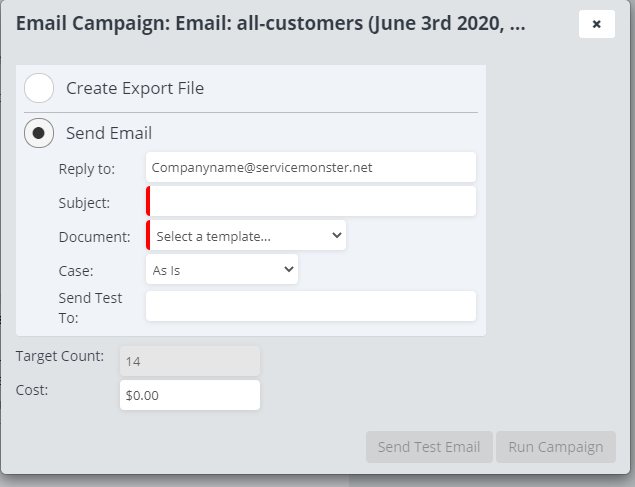
Here you can choose the:
Reply To: The email address it will look like the emails are being sent from and the email that clients can reply to.
Subject: The subject line for the email.
Document: The Marketing Template that will be sent out.
Case: The case style for the email, either As Is, UPPERCASE, or Mixed case.
Send Test To: Here you can add in an email address the test email will be sent to.
Target Count: The number of clients who are being sent this email
Cost: This is an optional box where you can enter in your cost information about a campaign, this is helpful for if you are running campaigns outside of ServiceMonster that have an associated cost.
When you are ready, you can choose to send that test email to yourself, or click “Run Campaign” to run the campaign and send out the emails.
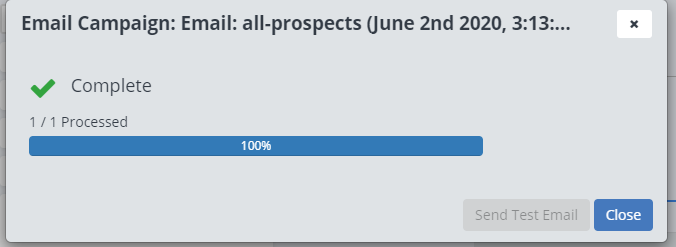
The system will take a moment to process and send out those emails, once it is complete it will notify you by updating to say “Complete“:
Once the campaign has ran, you will be able to see the information about the last time it was ran at the bottom of the page for the campaign. To the right, the Campaign Results will be updated as the campaign is used as a lead source for accounts or orders.
Letter Campaign
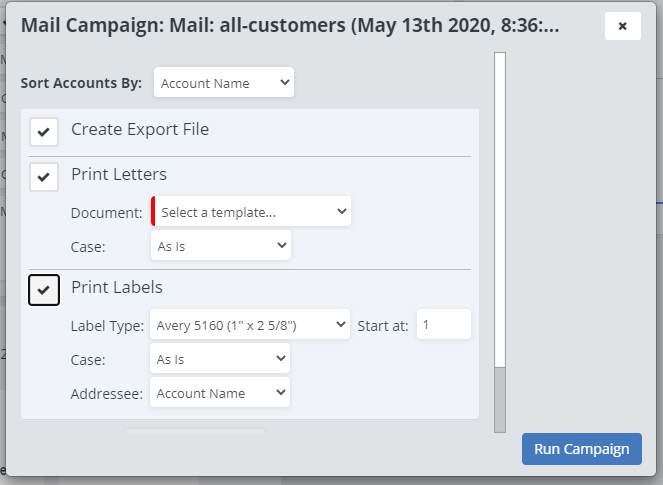
Here you can choose if you want it to create an Export File, Letters, and or Labels.
Print Letters:
Document: If you want to Print Letters, you will need to choose the Marketing Template it will use here
Case Style: As is, UPPERCASE, or Mixed Case
Print Labels:
Label Types: What type of labels you are printing at.
Start At: Which label it will start printing at (In case you are using a previously used label sheet)
Case: Change the case option
Addressee: Choose how the letter will address the recipient.
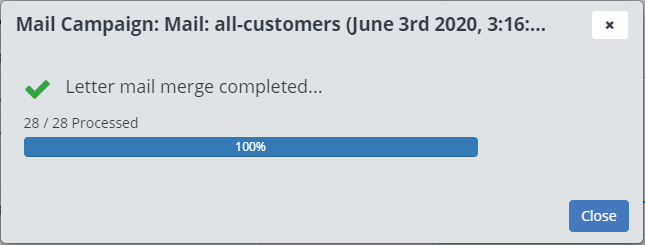
Once you are happy with the details, you can click Run Campaign. The system will begin the process of putting together your letters and labels for you.
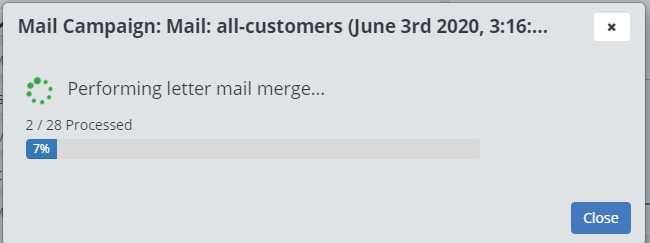
When it’s done it will be marked as Completed
When you click close, the page for the campaign will update. At the bottom of the campaign details, you will be able to click on and download the export list, labels, and letters created for the campaign.
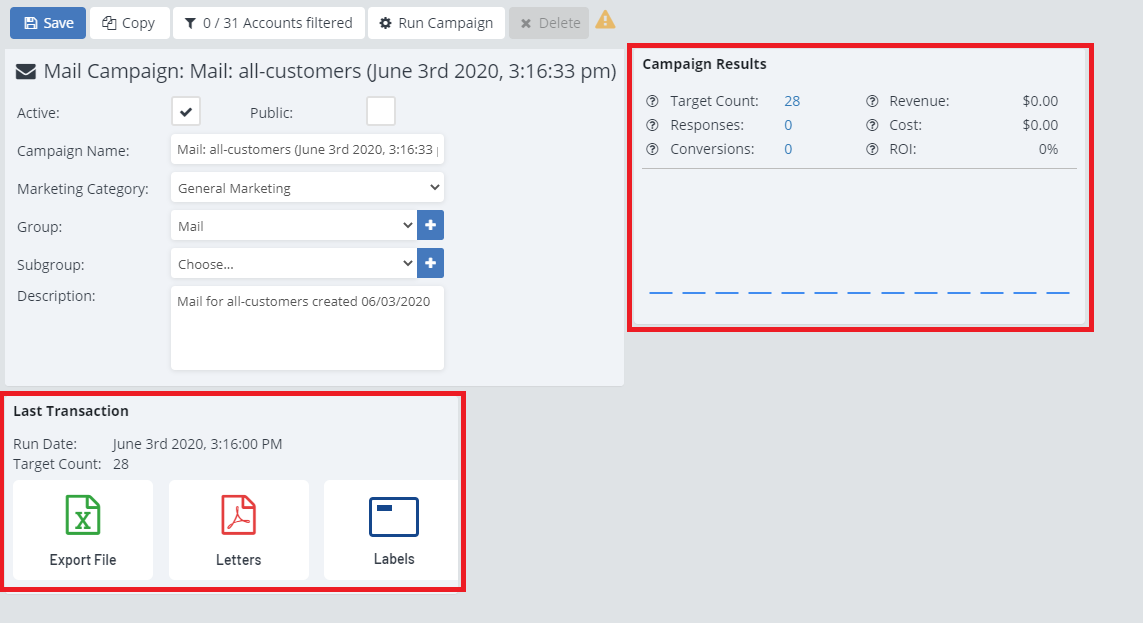
On the right, you will be able to see the information about the campaign as it is used as a lead source for accounts or orders.
Call Campaign
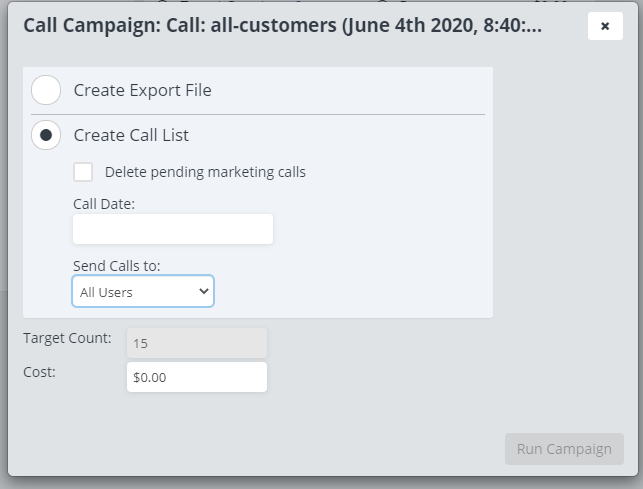
If you choose to create a call list, you have the option to:
Delete pending marketing calls: This will help to clear out your activities and remove past marketing calls that have not been completed
Call Date: Choose the date the call should be done on
Send Call to: You can either select All Users, or specify specific users in ServiceMonster who should be handling the calls.
Once you click “Run Campaign“, it will process the campaign, changing to say Complete when it is done.
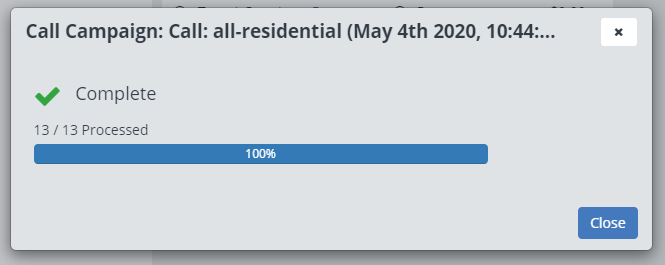
Once you click Close, the page for the campaign will update to include information about the last time the campaign was run at the bottom of the page, and the campaign results to the right as the campaign is used as a lead source for orders.
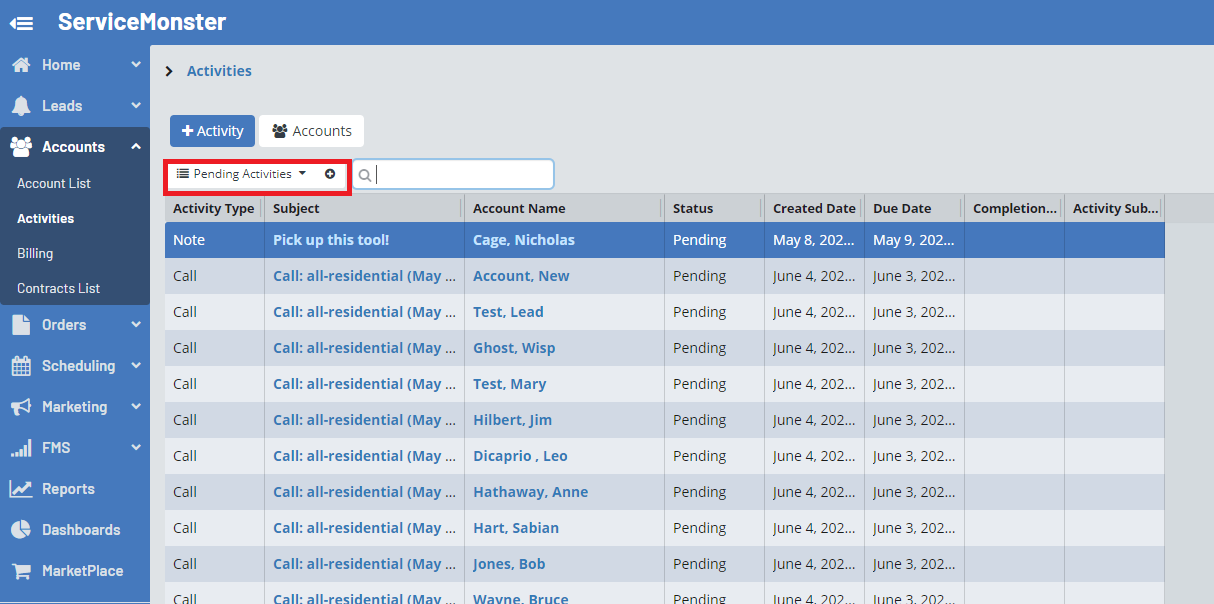
You can find these call activities by going into Accounts, then Activities.
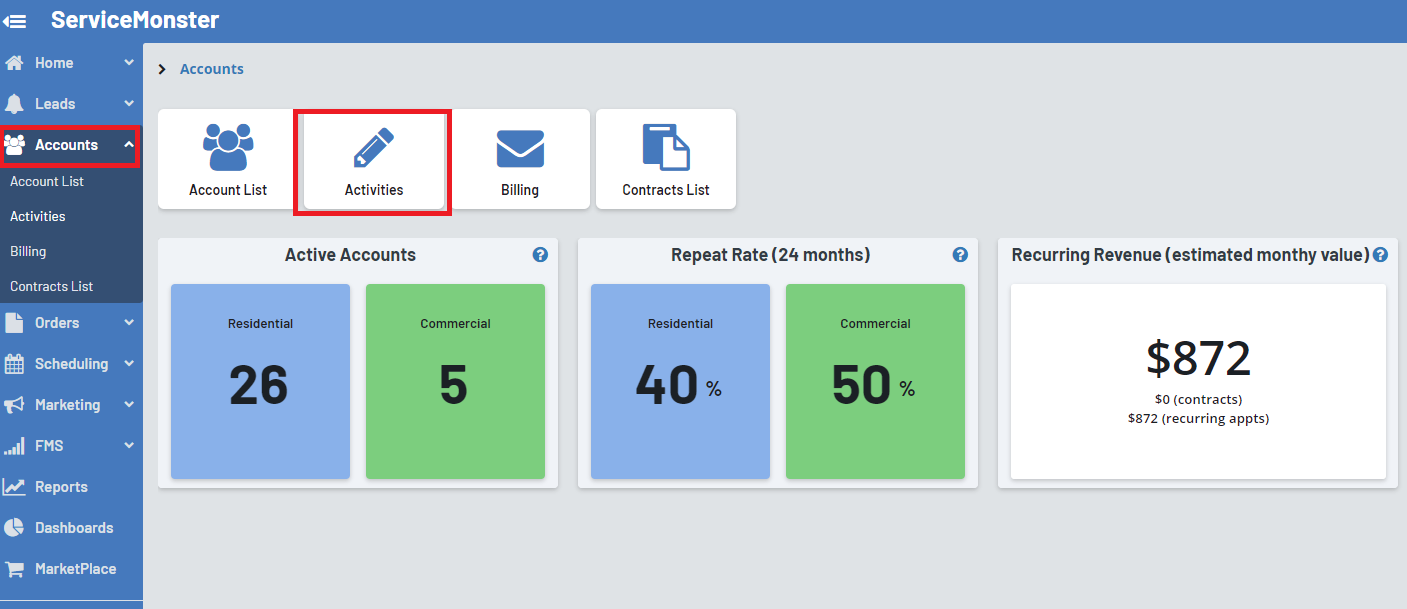
Here you can see a list of all your activities, which you can filter to just show pending activities, or call activities by using the drop-down menu.