Creating A Call Campaign
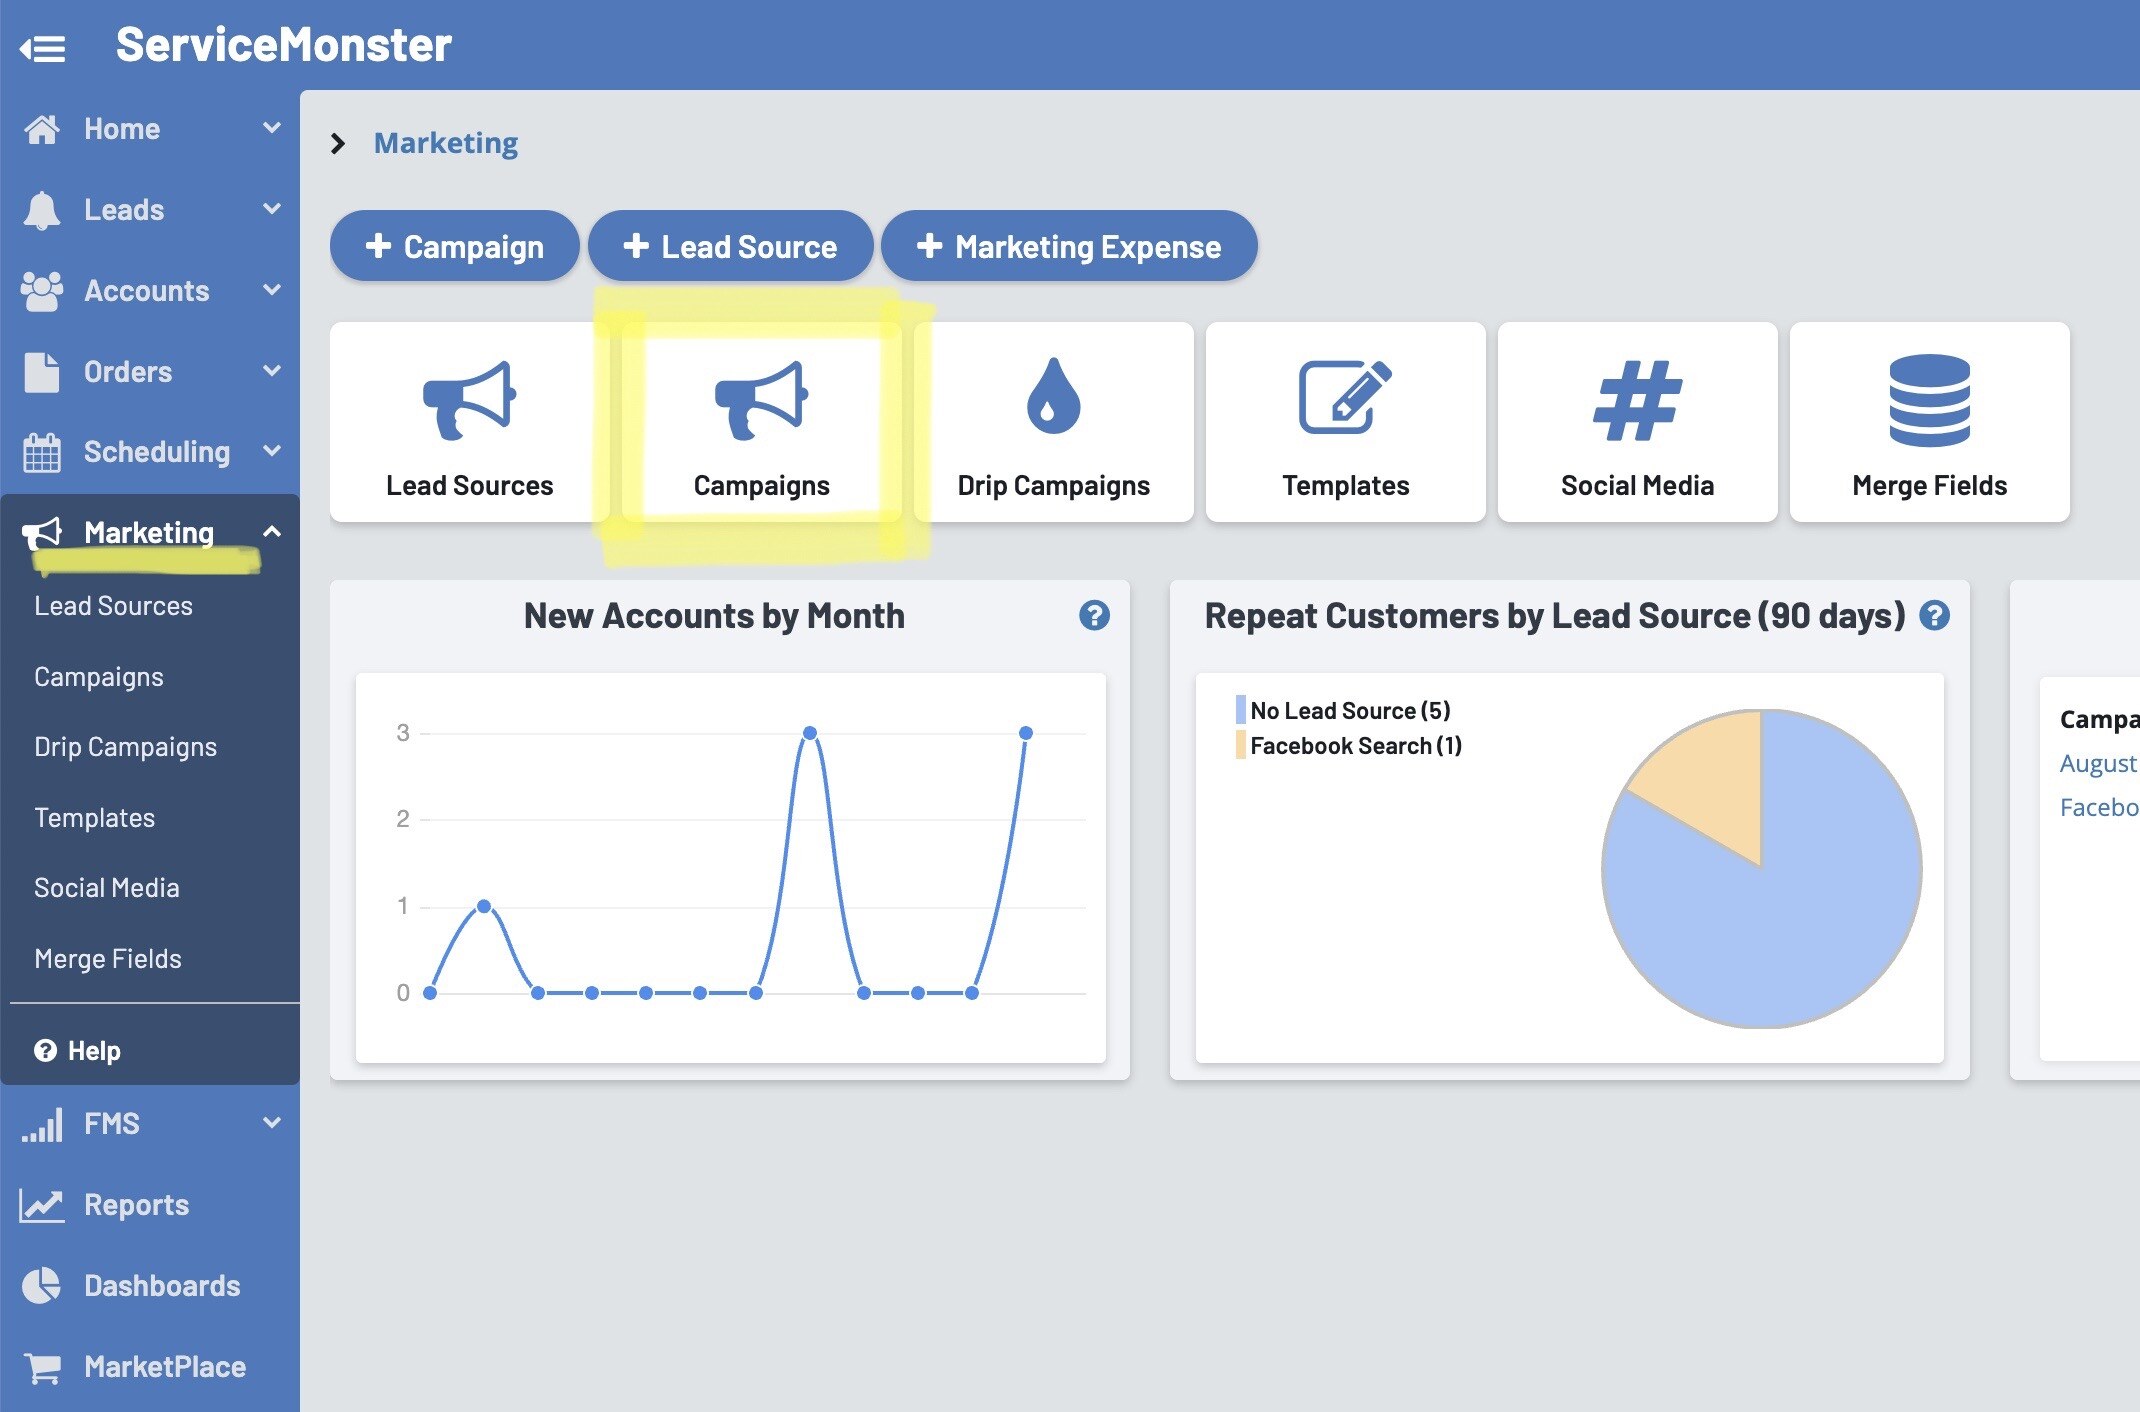
First, select "Marketing" in the Main Menu, then select the "Campaigns" icon.
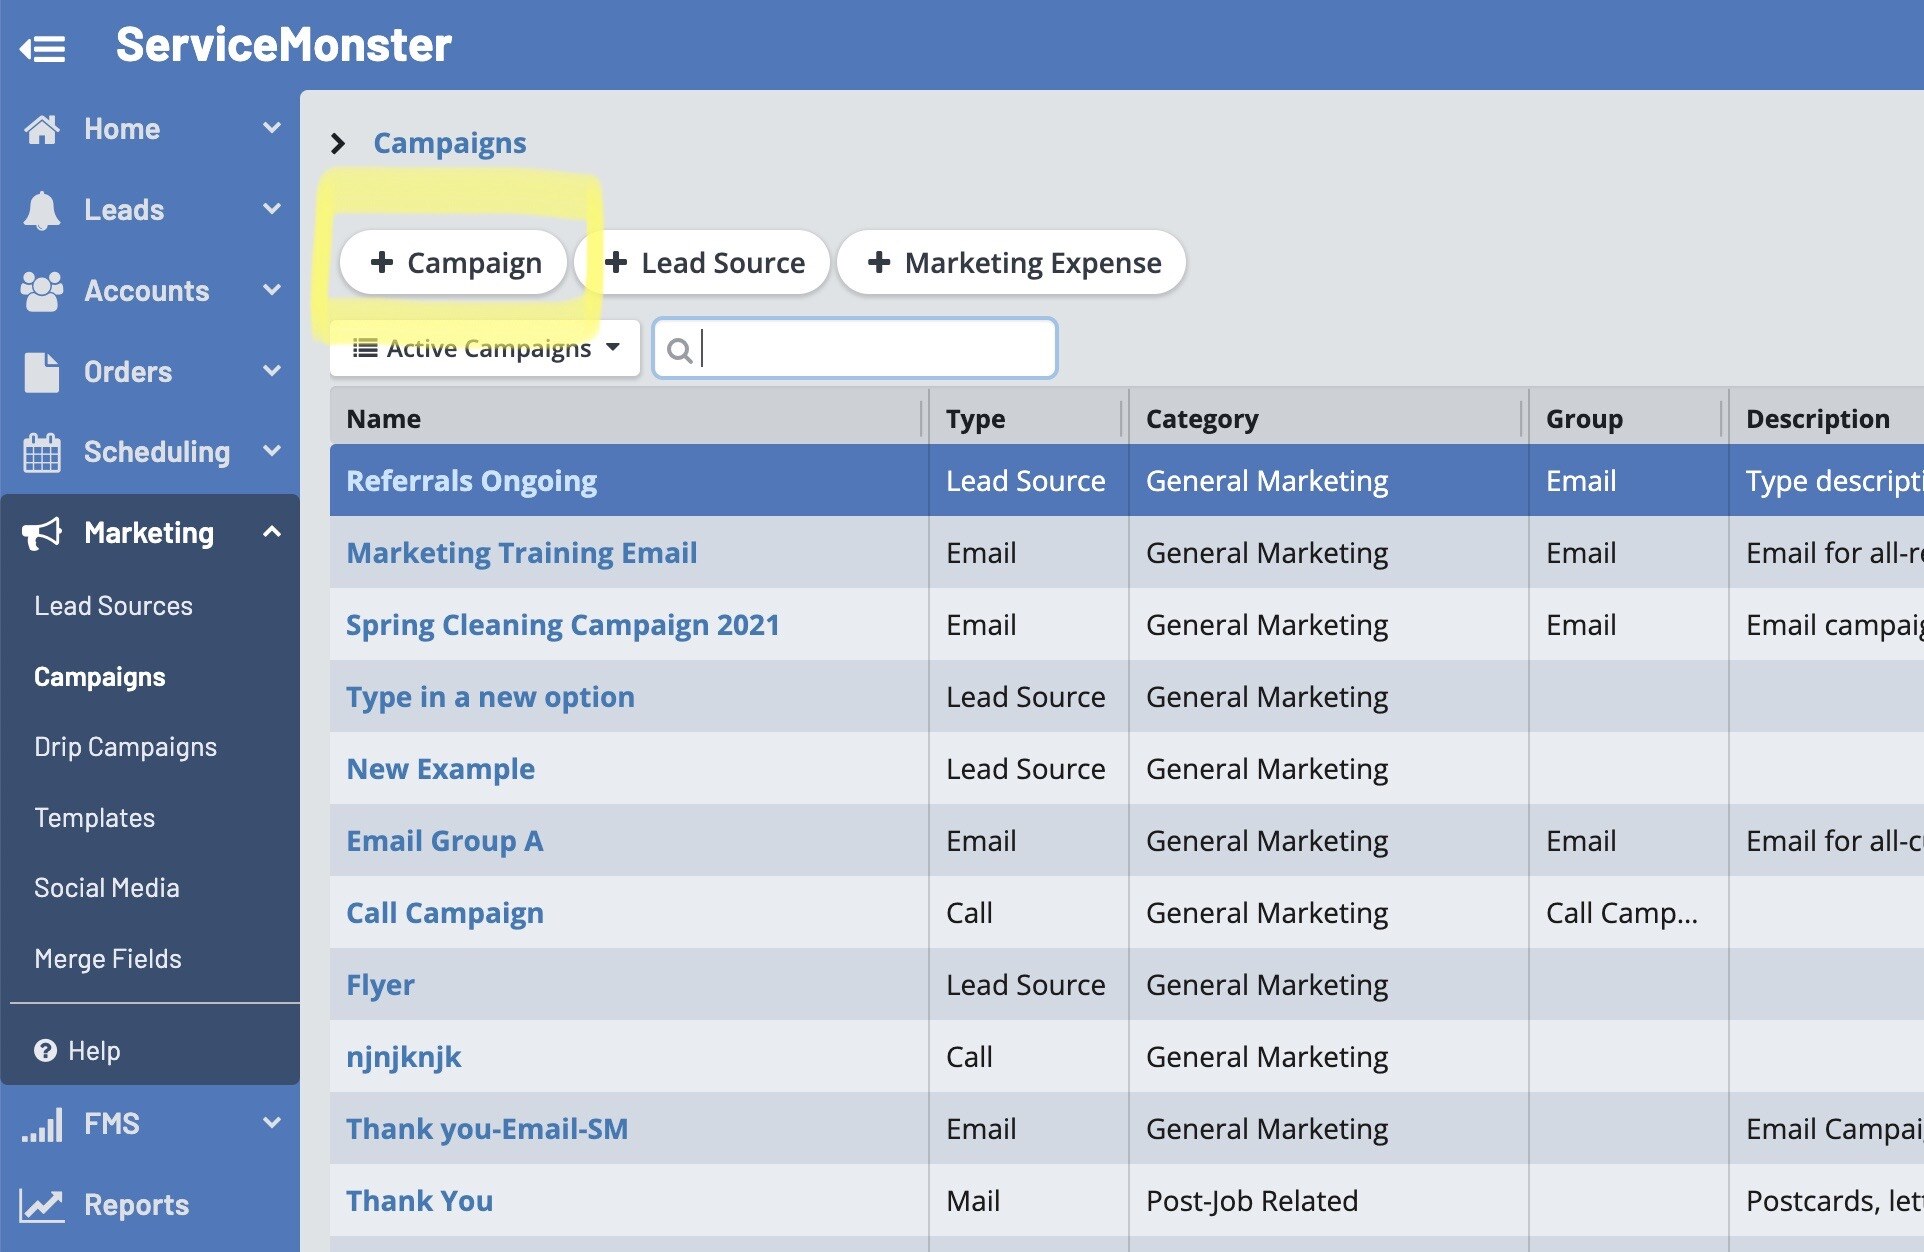
Select the "+ Campaign" button to add a new campaign.
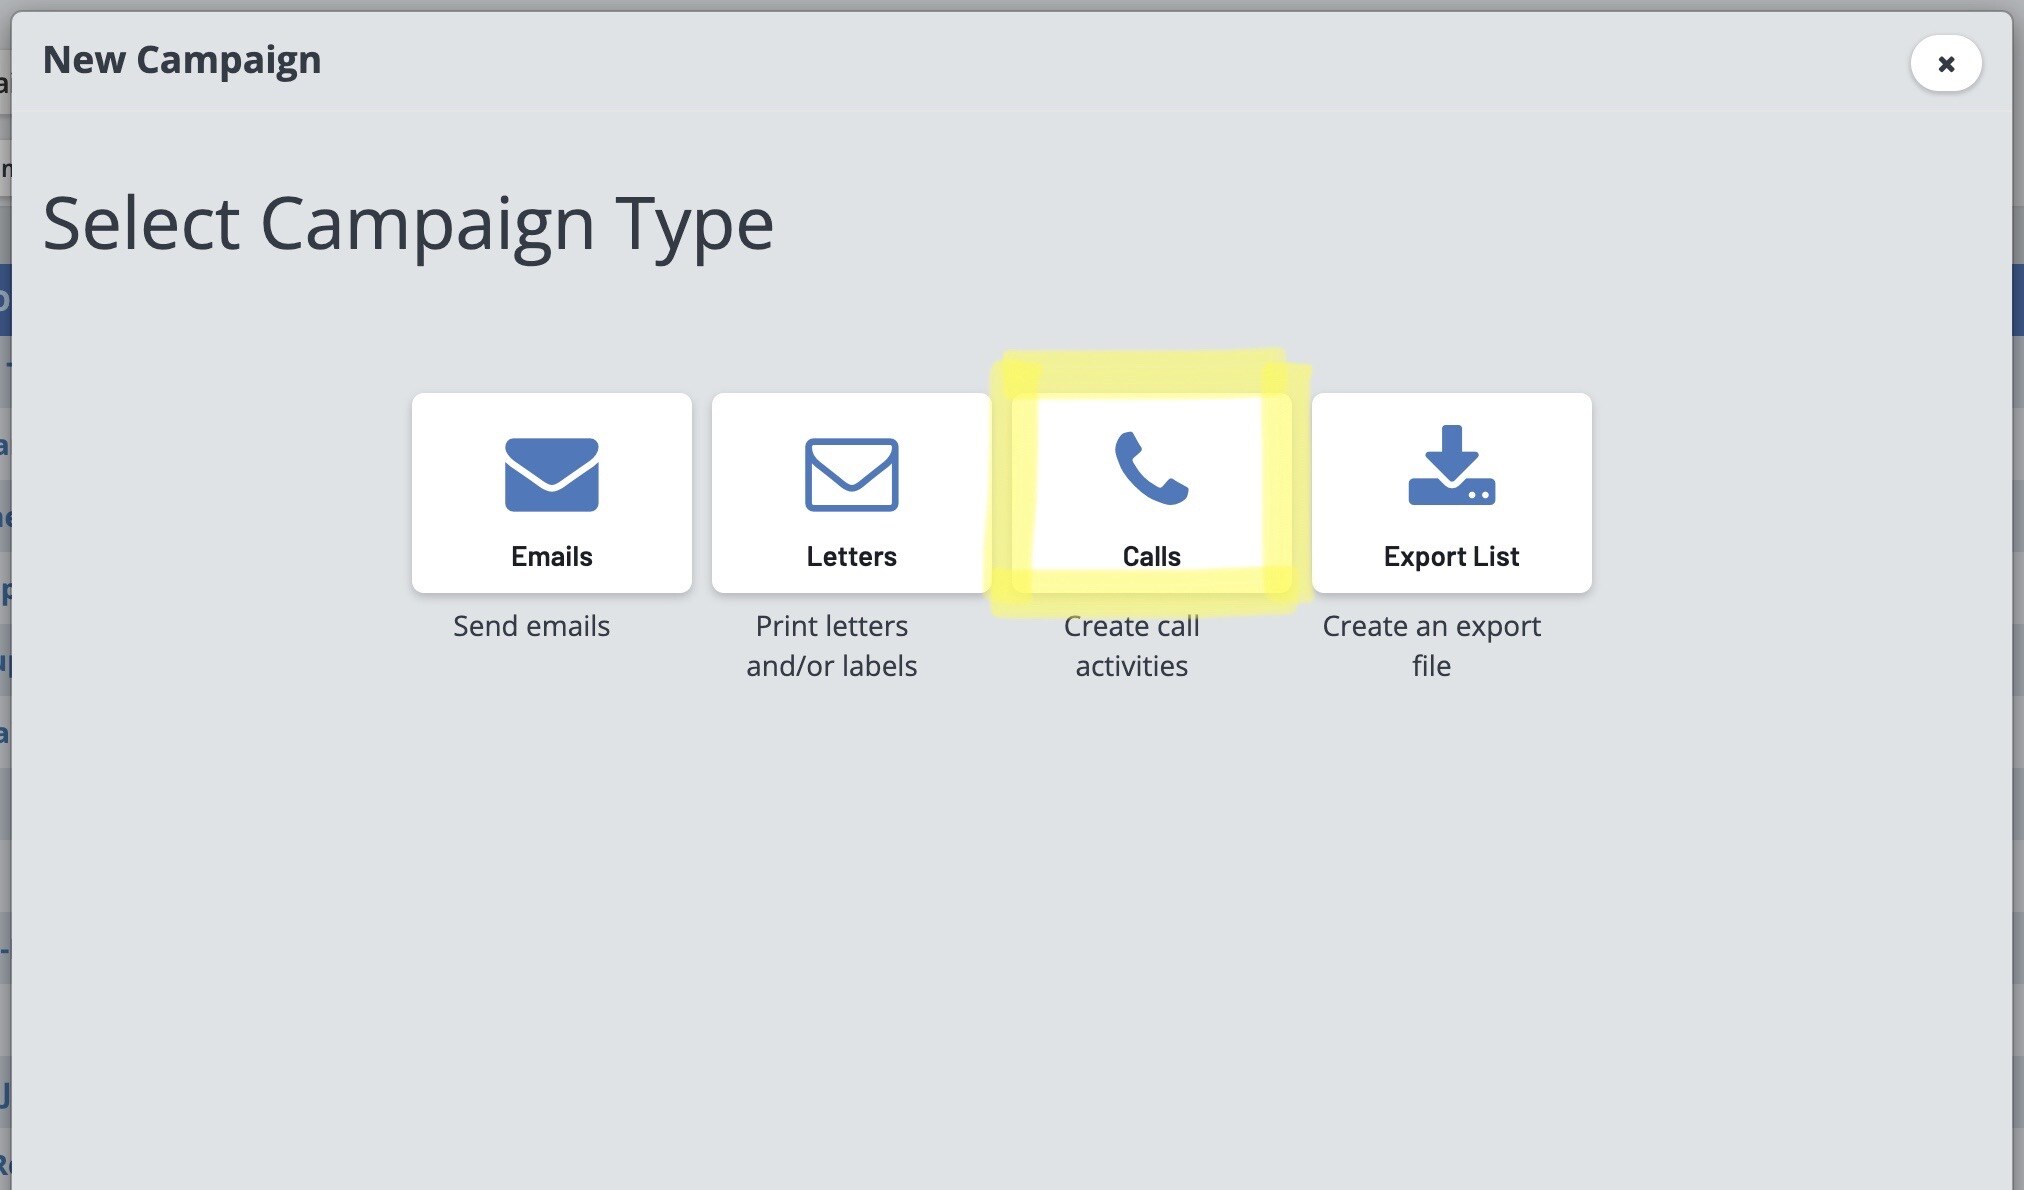
Select the "Calls" icon for your campaign type.
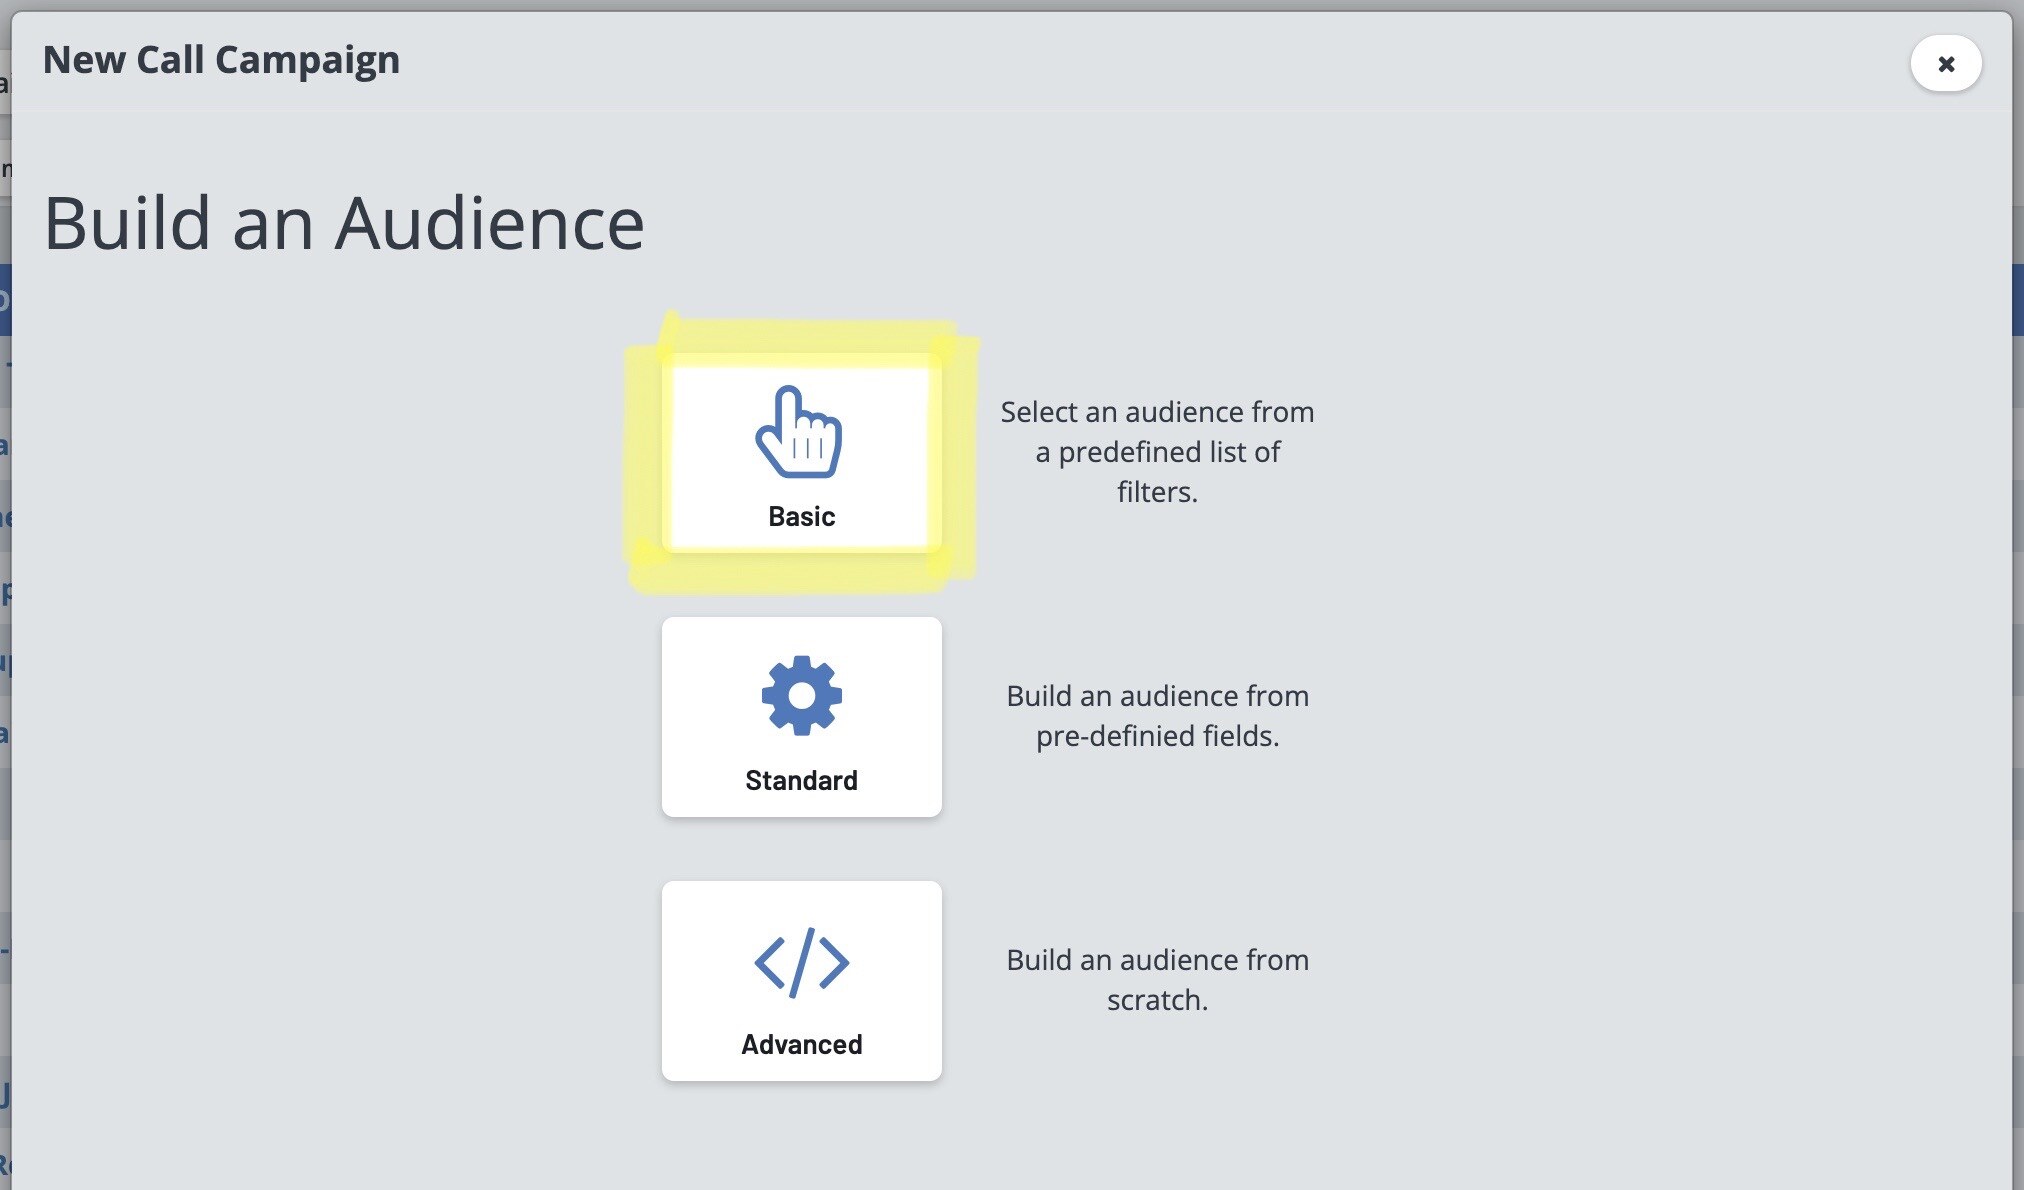
Select how you wish to build your audience. For this example we will use "Basic".
Basic: The Basic option lets you pick an audience from a predefined list of filters. We've done the work of setting up the filters for you and all you have to do is pick one of the options from the list. You can also use this as a starting point for the campaign and can go in and edit or add in filters later.
Standard: The Standard option lets you check off boxes to create the filters you want and build your audience. These include account filters, invoice filters, and appointment filters.
Advanced: The Advanced option lets you build your audience from scratch. From the New Campaign page you can click on the “0/0 Accounts filtered” button, then click on the “ADD CONDITION” button to start adding in your own filters. This is only recommended for those with experience building campaigns in ServiceMonster already.
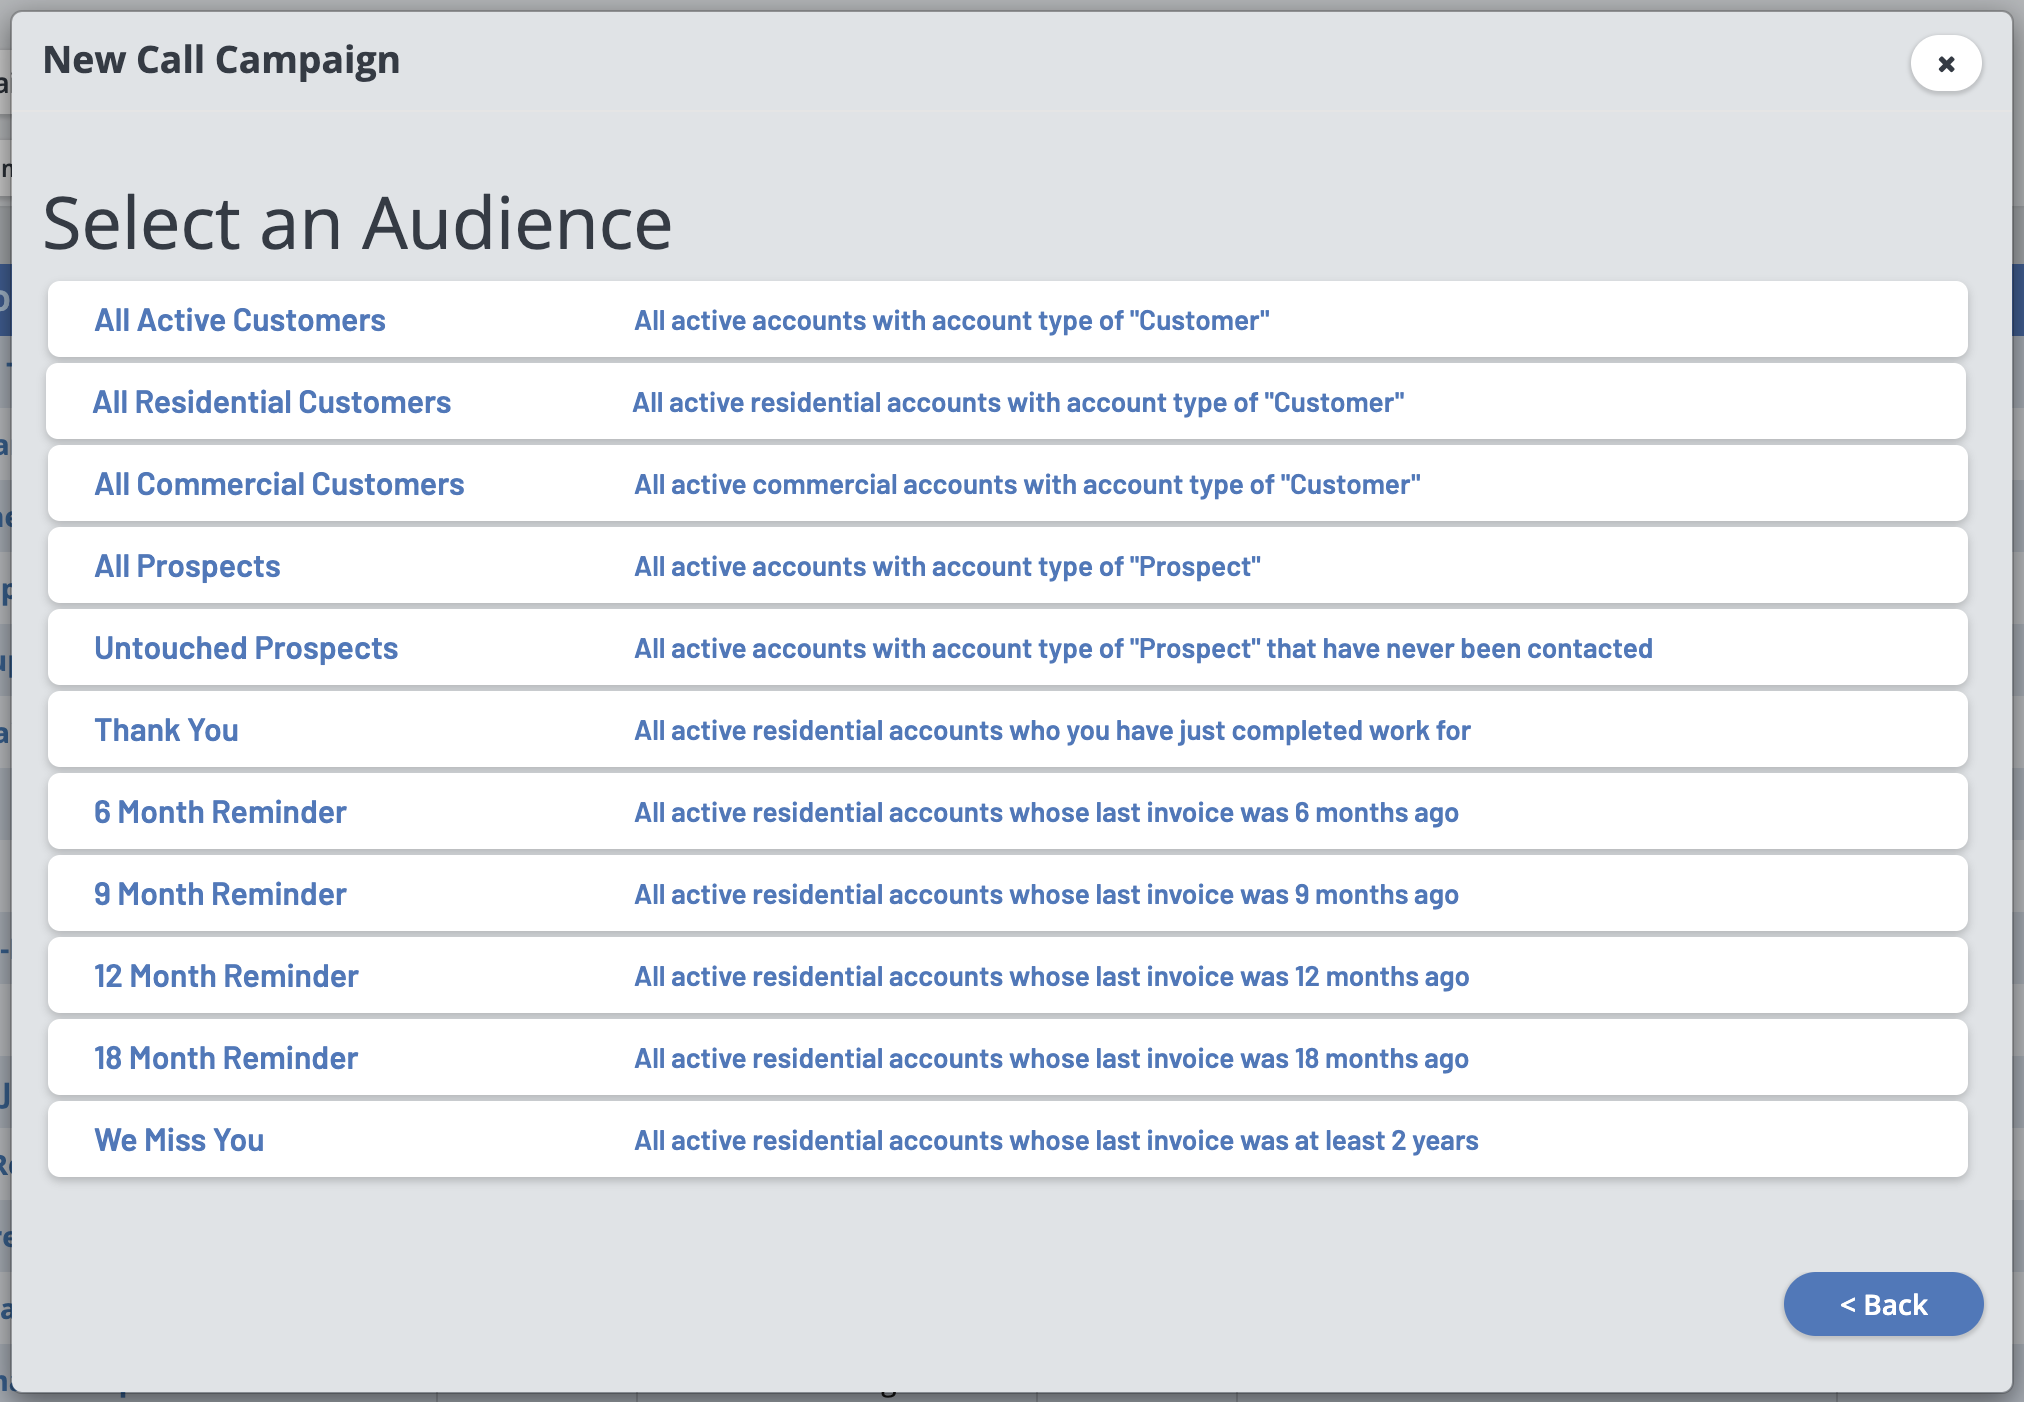
Select your specific target audience for this campaign.
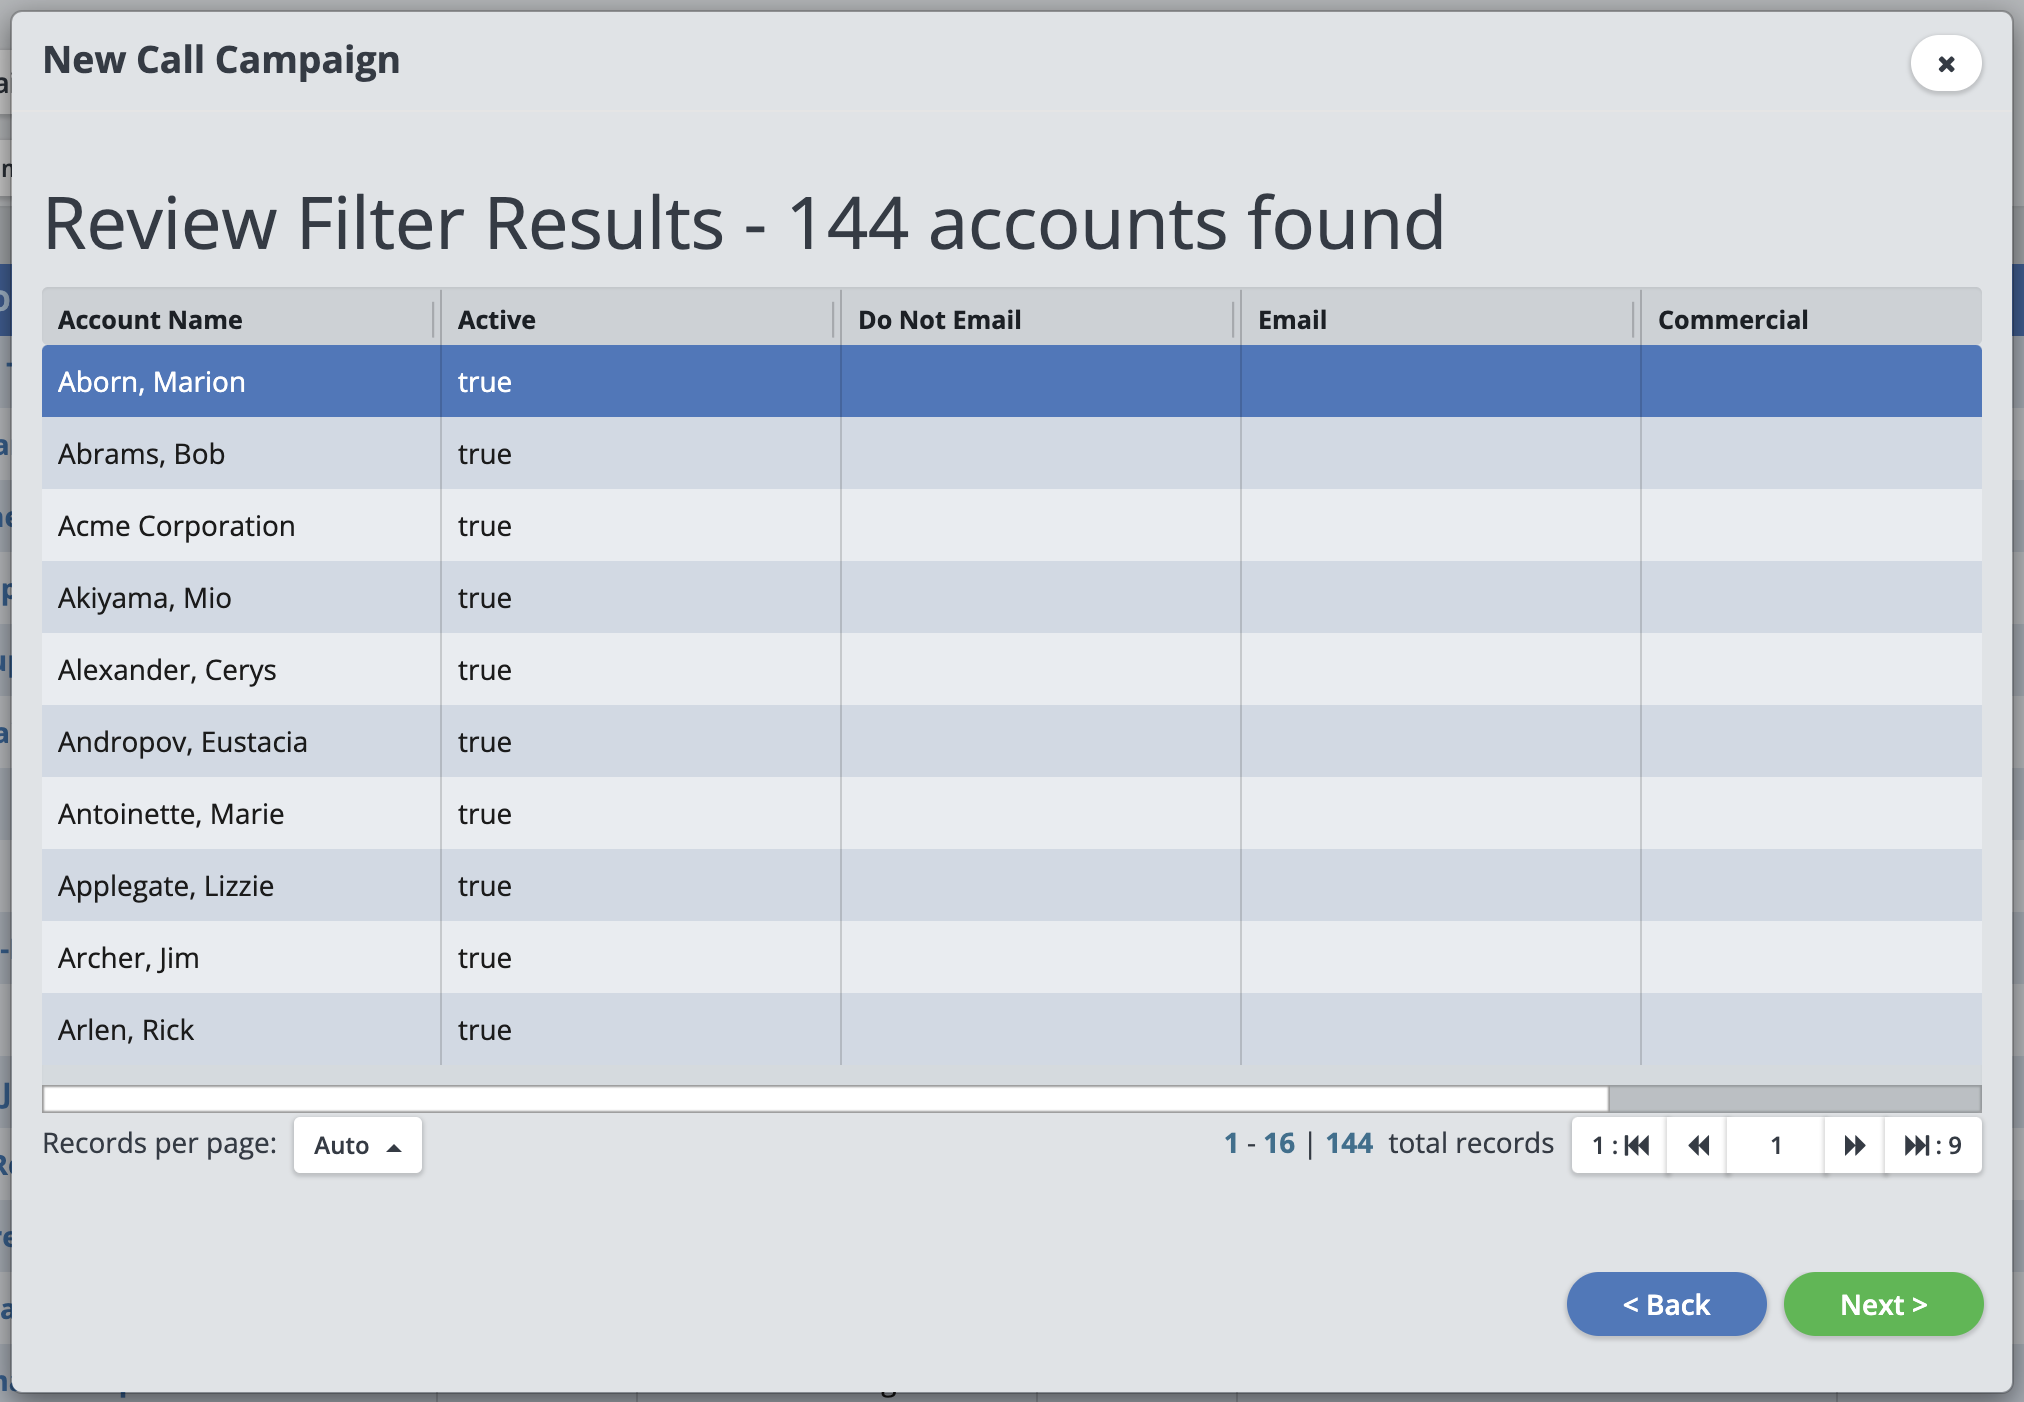
This is the full list of your chosen accounts to target. Click the "Next >" button.
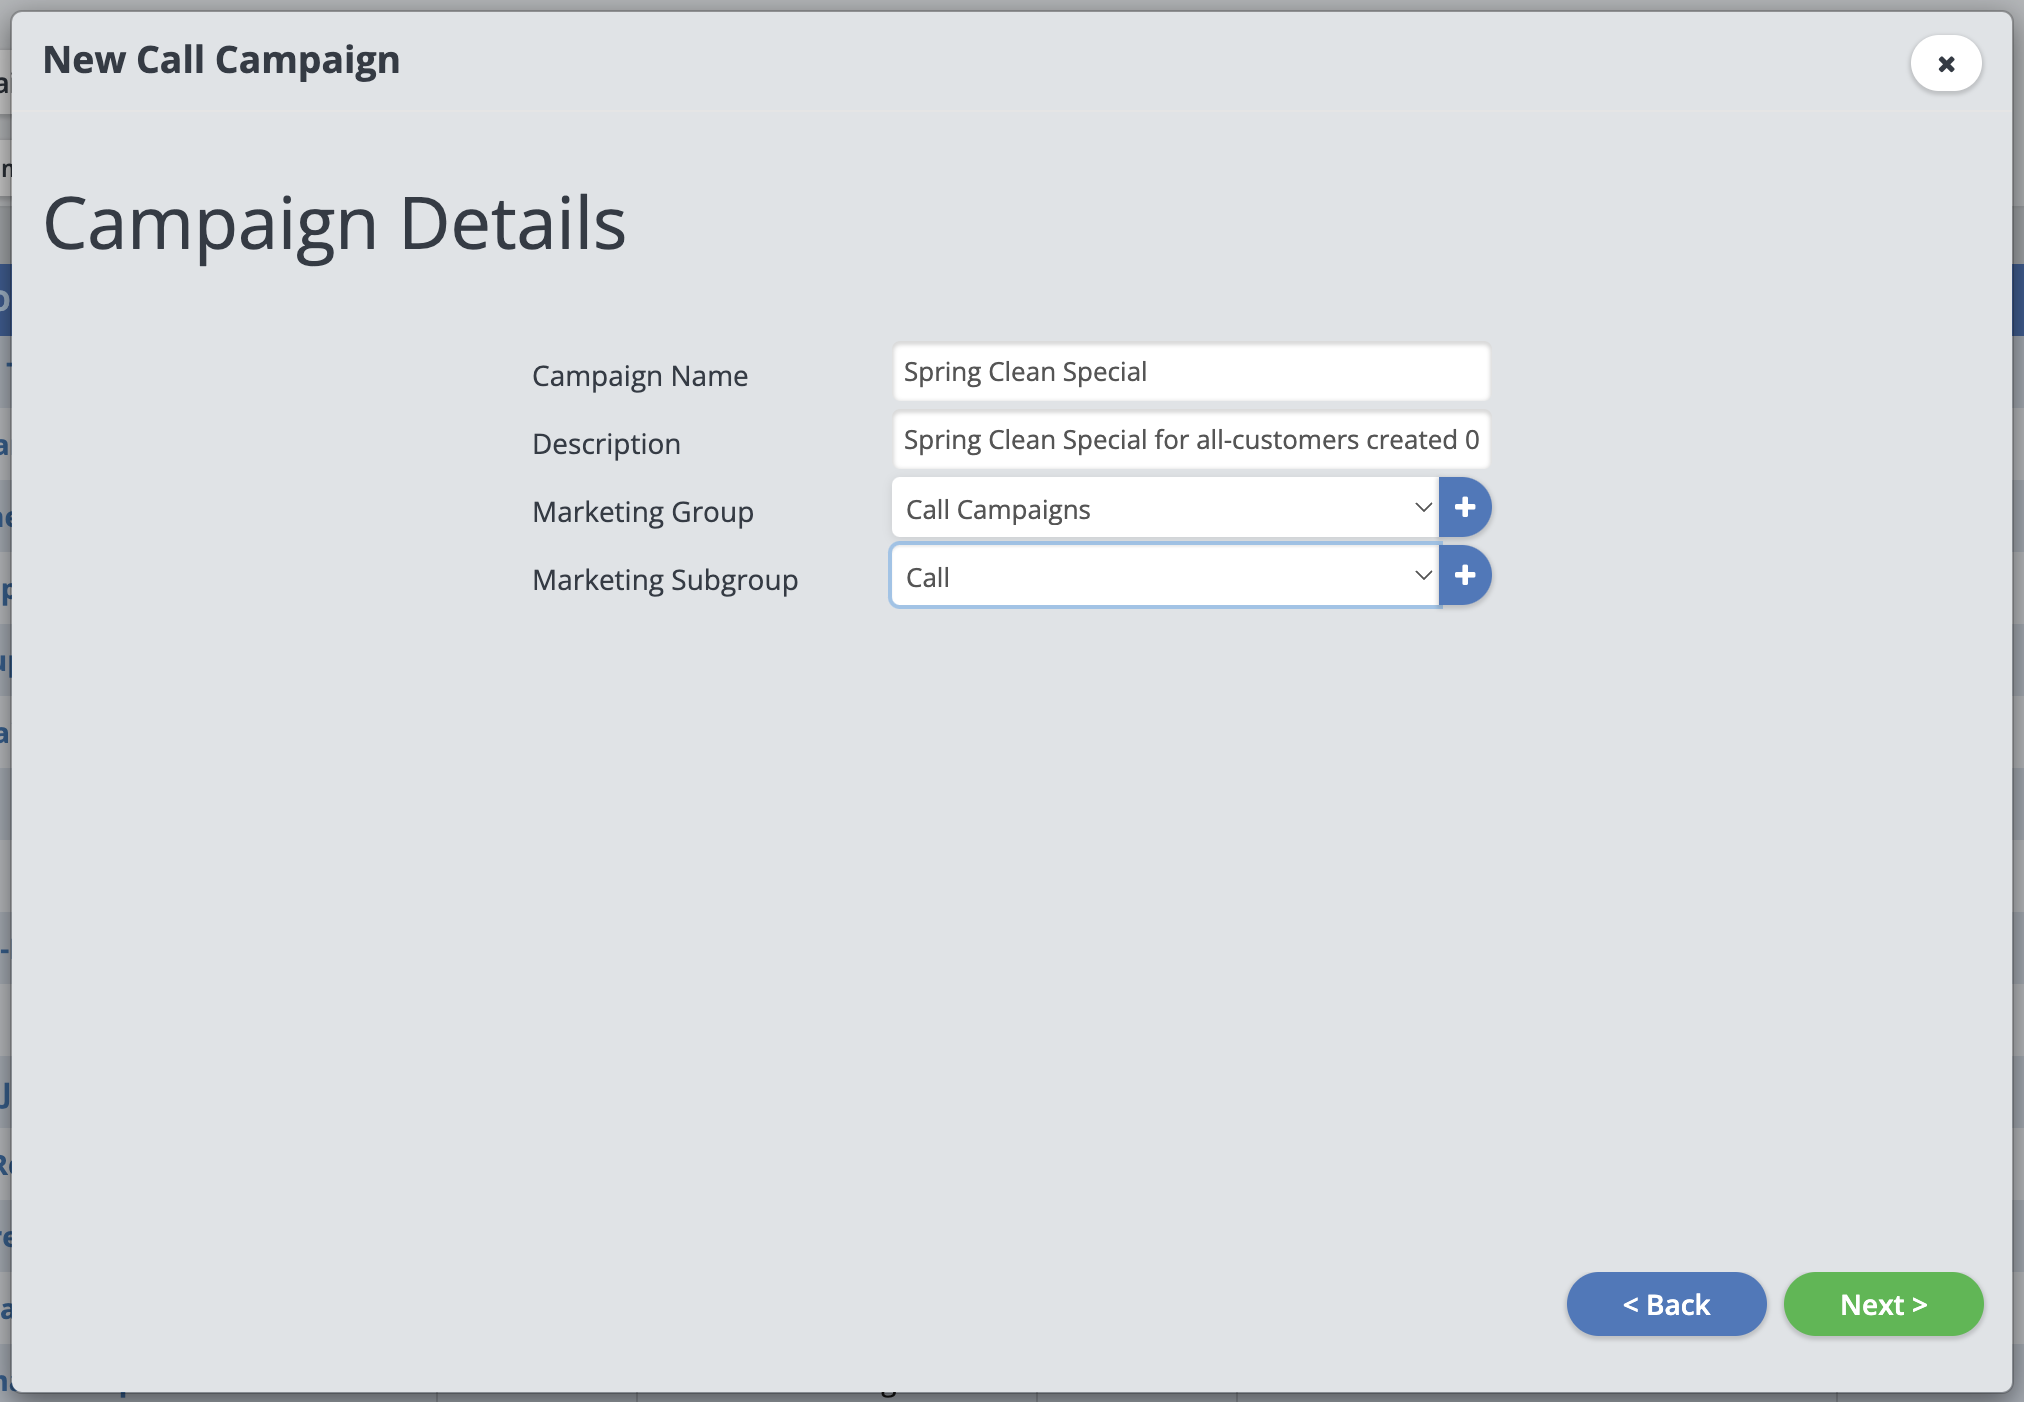
Give your campaign a name and a description, and assign a group and subgroup from the drop down menu if you wish. You can create a new group or subgroup by clicking the blue "+" button to the right of the field. Click the "Next >" button.
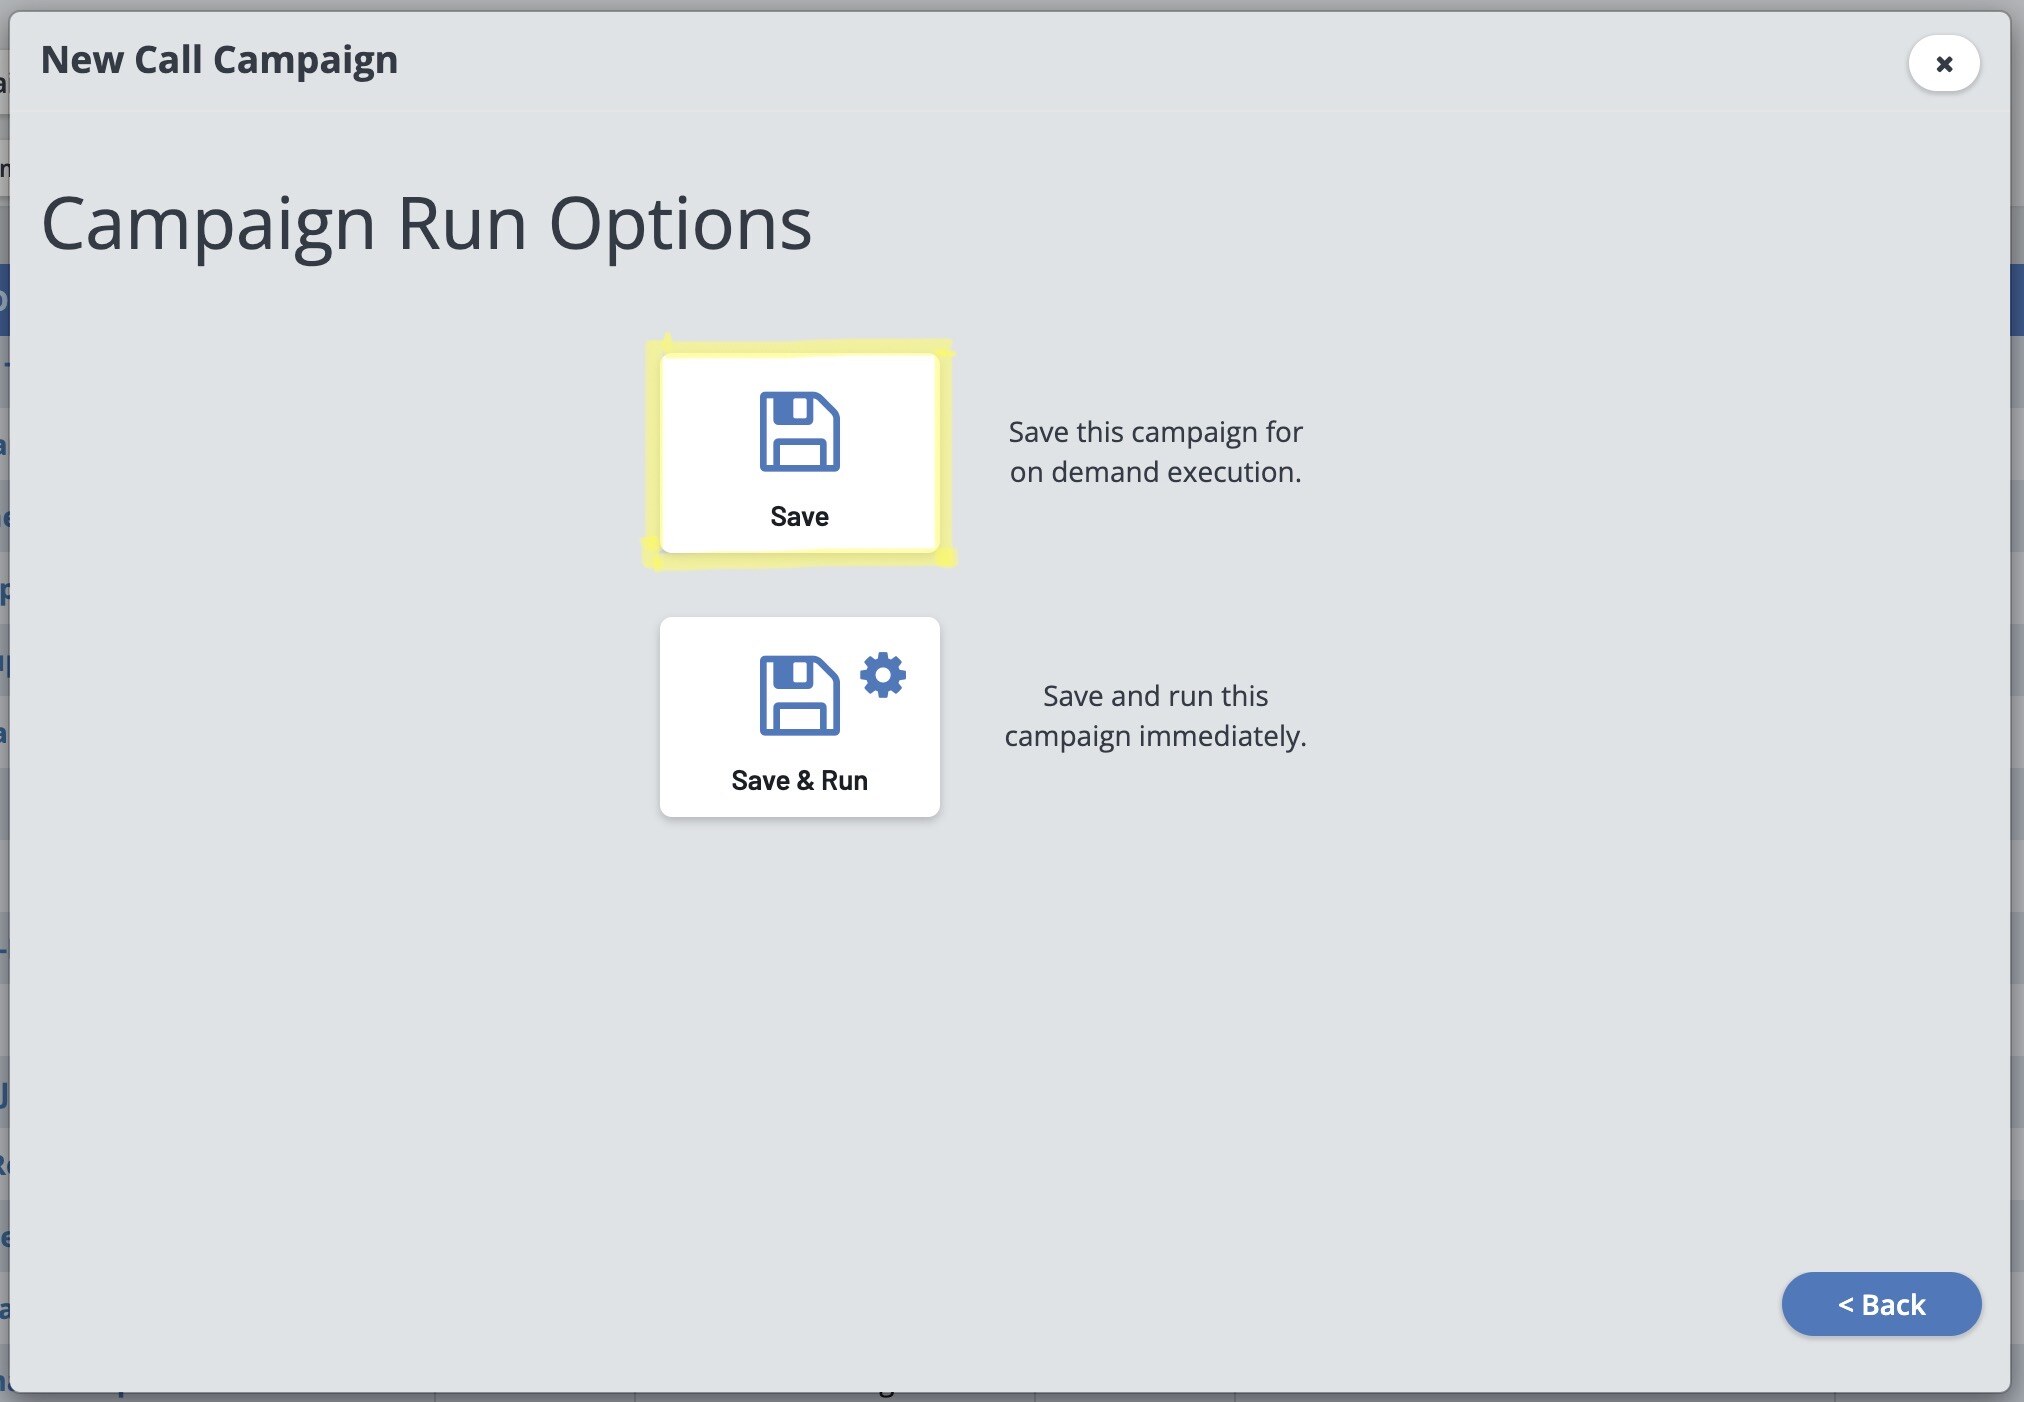
Now you can choose to just "Save" which will take you to the page for that campaign, or "Save & Run" will take you to the campaign page and open up the box to set the settings for the campaign to run. This will look a little different for every campaign type. For this example we will select "Save".
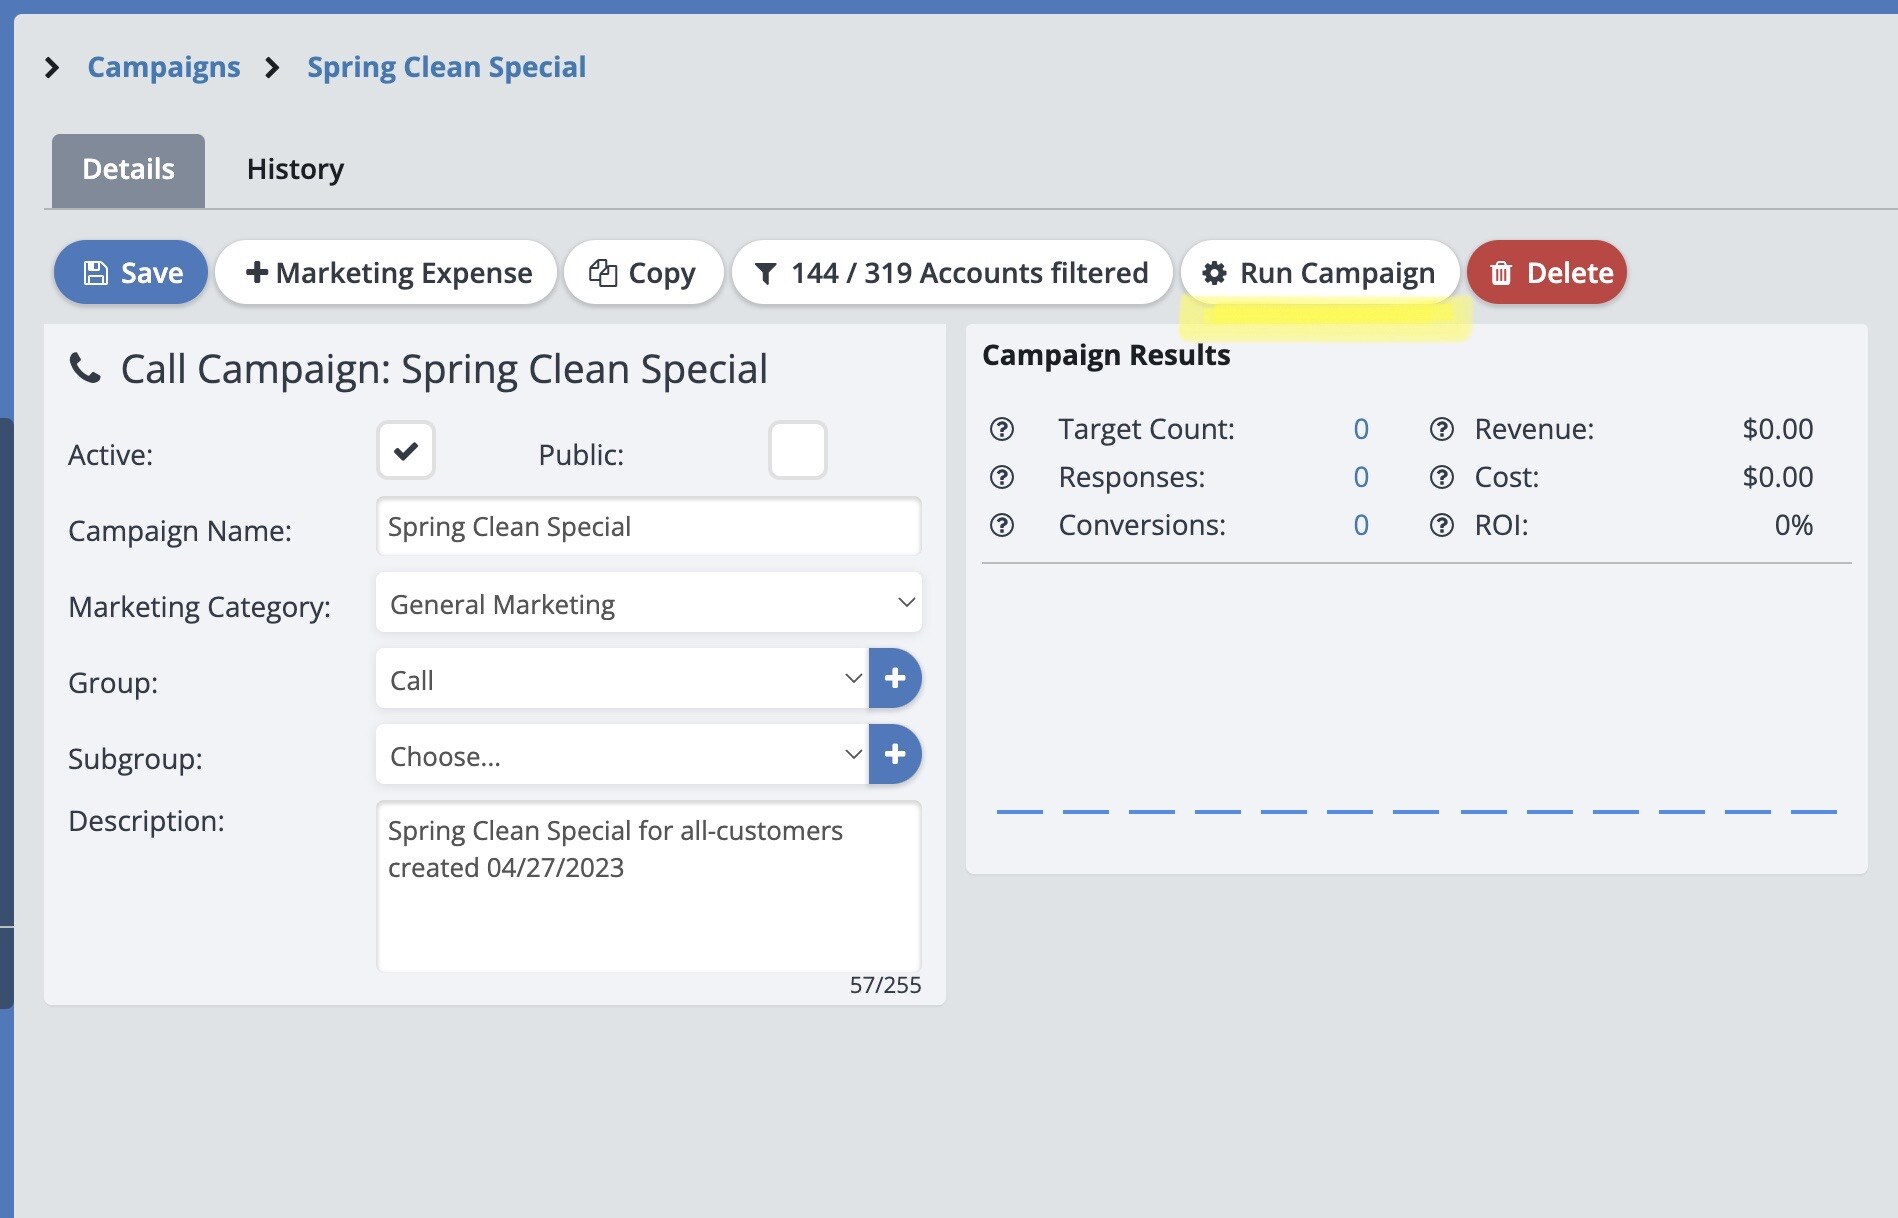
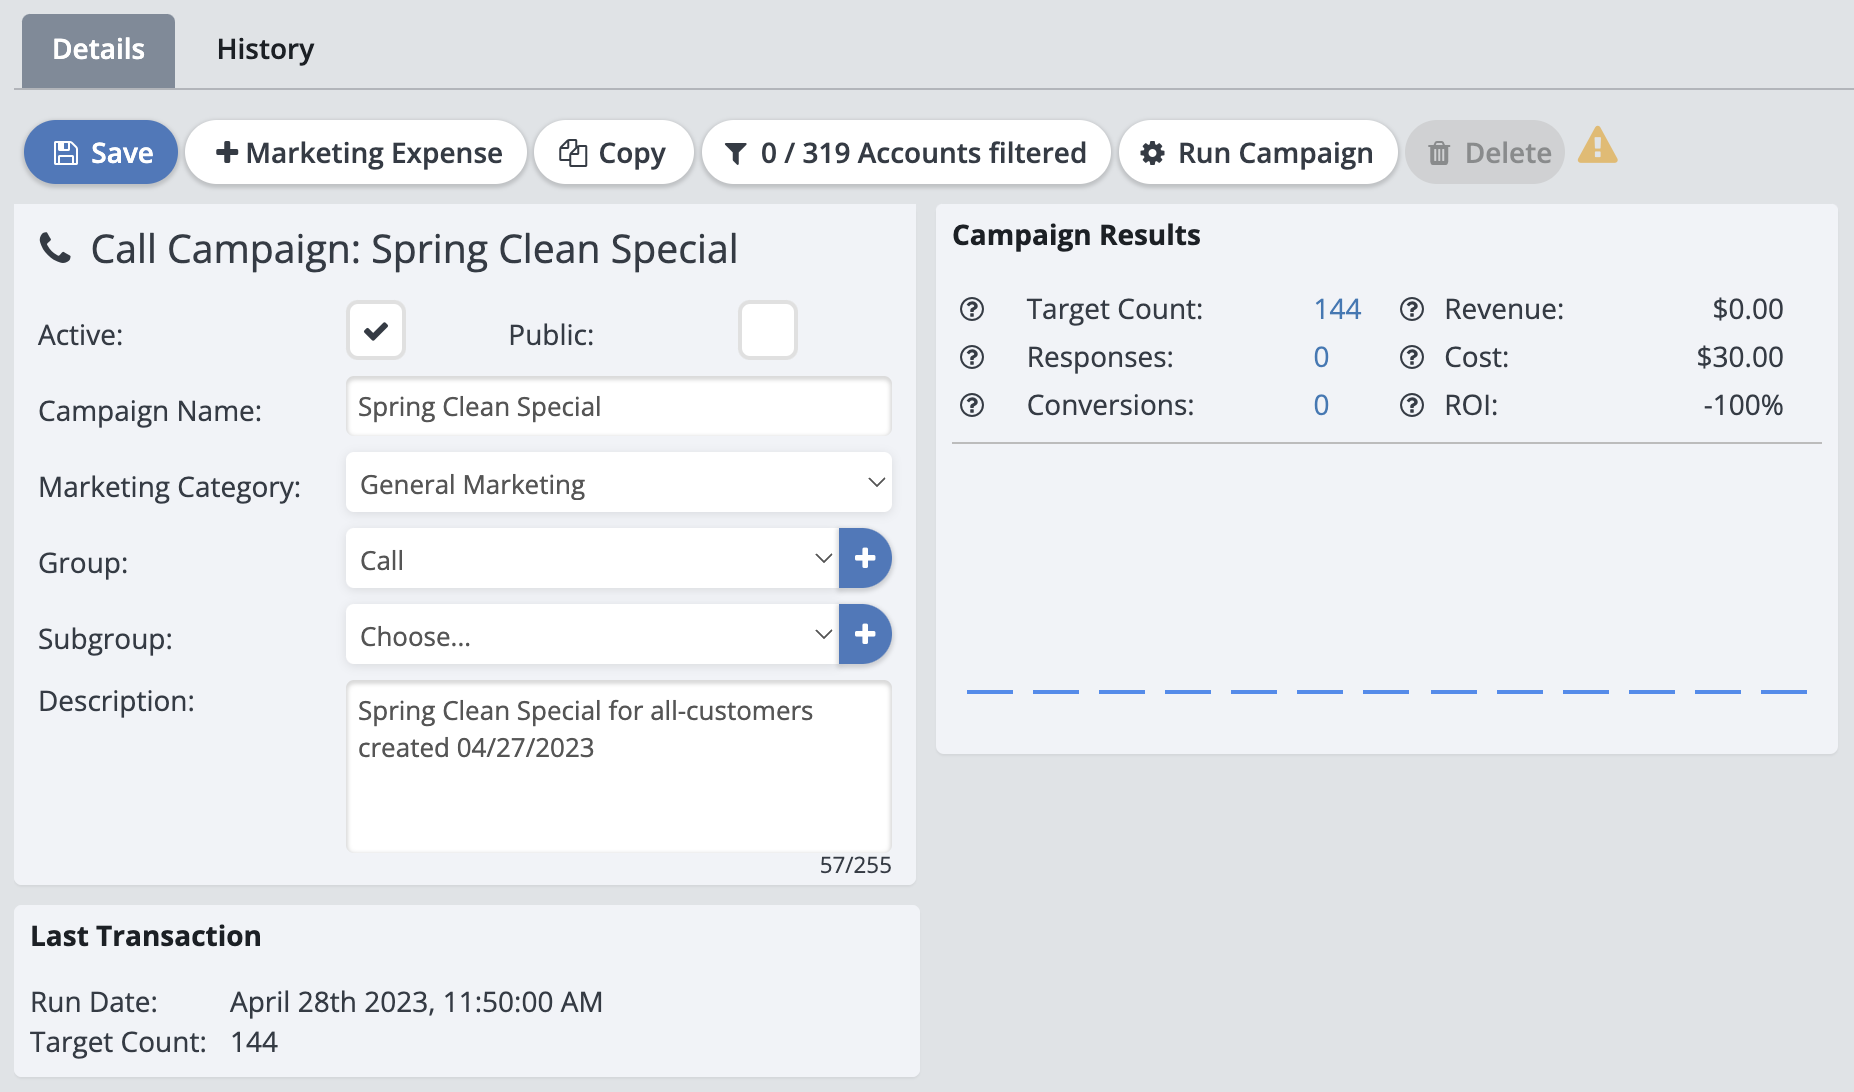
Now you can see your new Call Campaign! Here you have the options to add a Marketing Expense, make a copy of the campaign, check the filters that are on the campaign or add in new filters, run the campaign, and delete the campaign.
You may also edit the details of the campaign and view the Campaign Results. The "History" tab provides details of all the past times that the campaign has run.
Running A Call Campaign
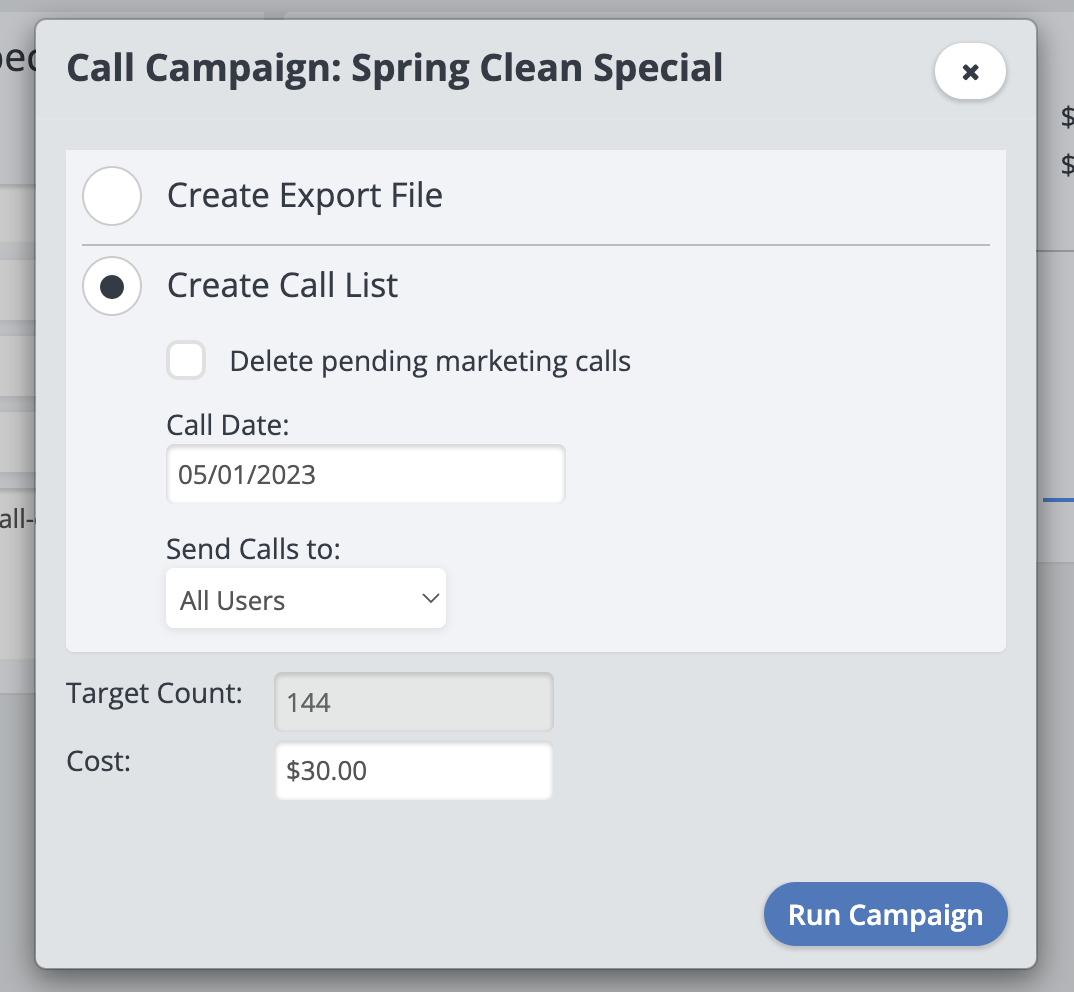
From the Campaign Details Page, select the "Run Campaign" button and choose to "Create Export File" or "Create Call List".
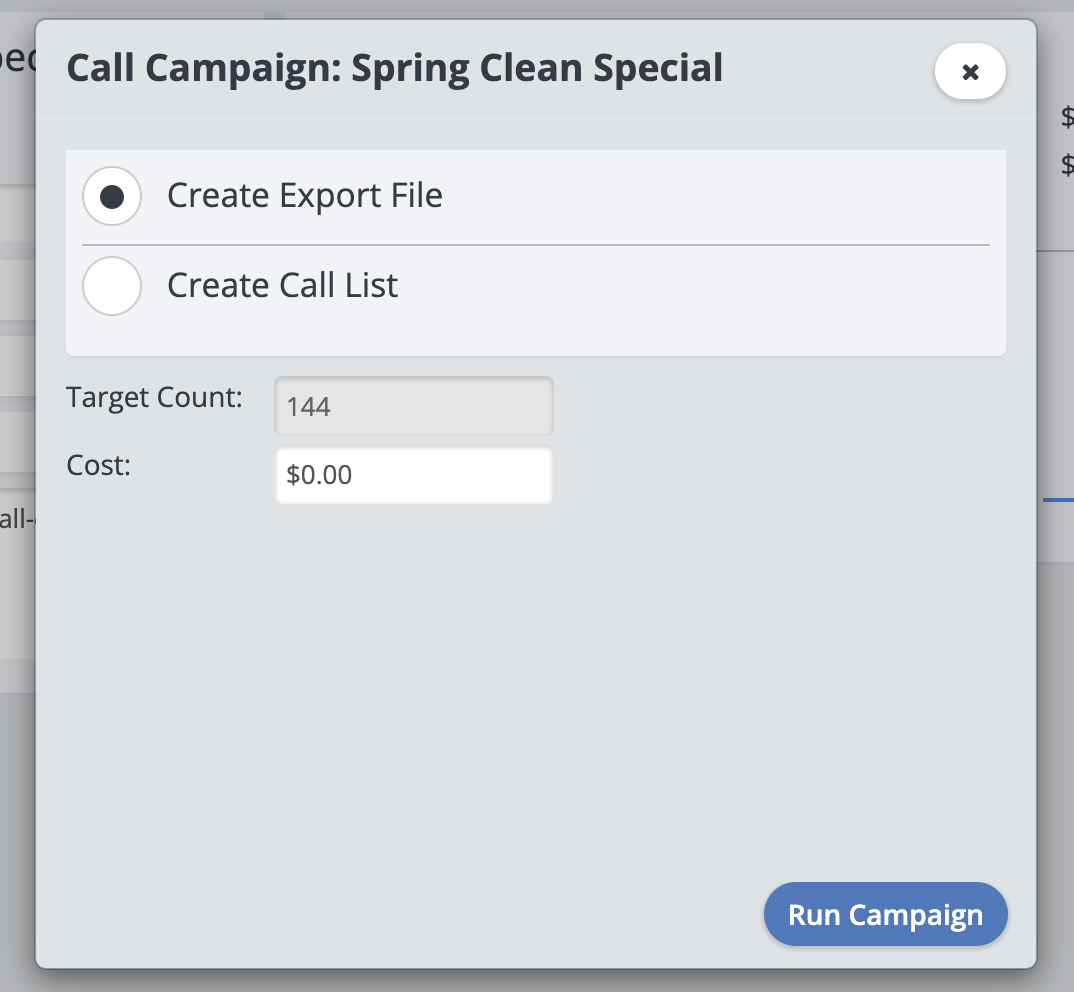
To create a Call List, you have the following options:
Delete pending marketing calls: This will help to clear out your activities and remove past marketing calls that have not been completed.
Call Date: Choose the date the call should be done on.
Send Calls to: You can either select All Users, or specify specific users in ServiceMonster who should be handling the calls.
Target Count: The number of clients who are being sent this call.
Cost: This is an optional box where you can enter your cost information about a campaign. This may be helpful if you're running campaigns outside of ServiceMonster that have an associated cost.
Once you click “Run Campaign“, it will process the campaign and change to say "Complete" when it is done.
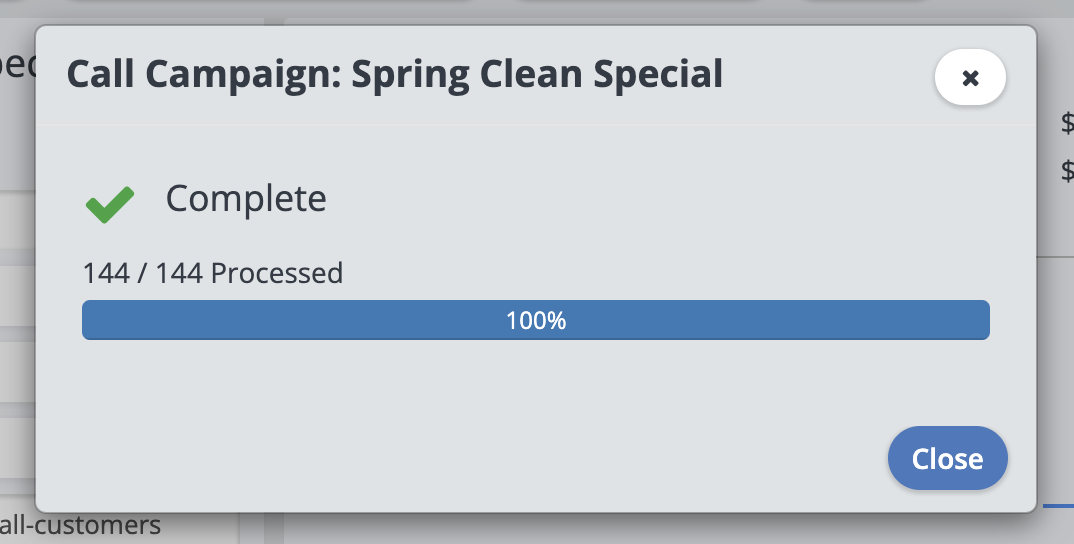
Once you click "Close", the Campaign Page will update to include information about the last campaign run at the bottom of the page, and the Campaign Results will update as the campaign is used as a lead source for orders.
Tracking Call Campaign Activities
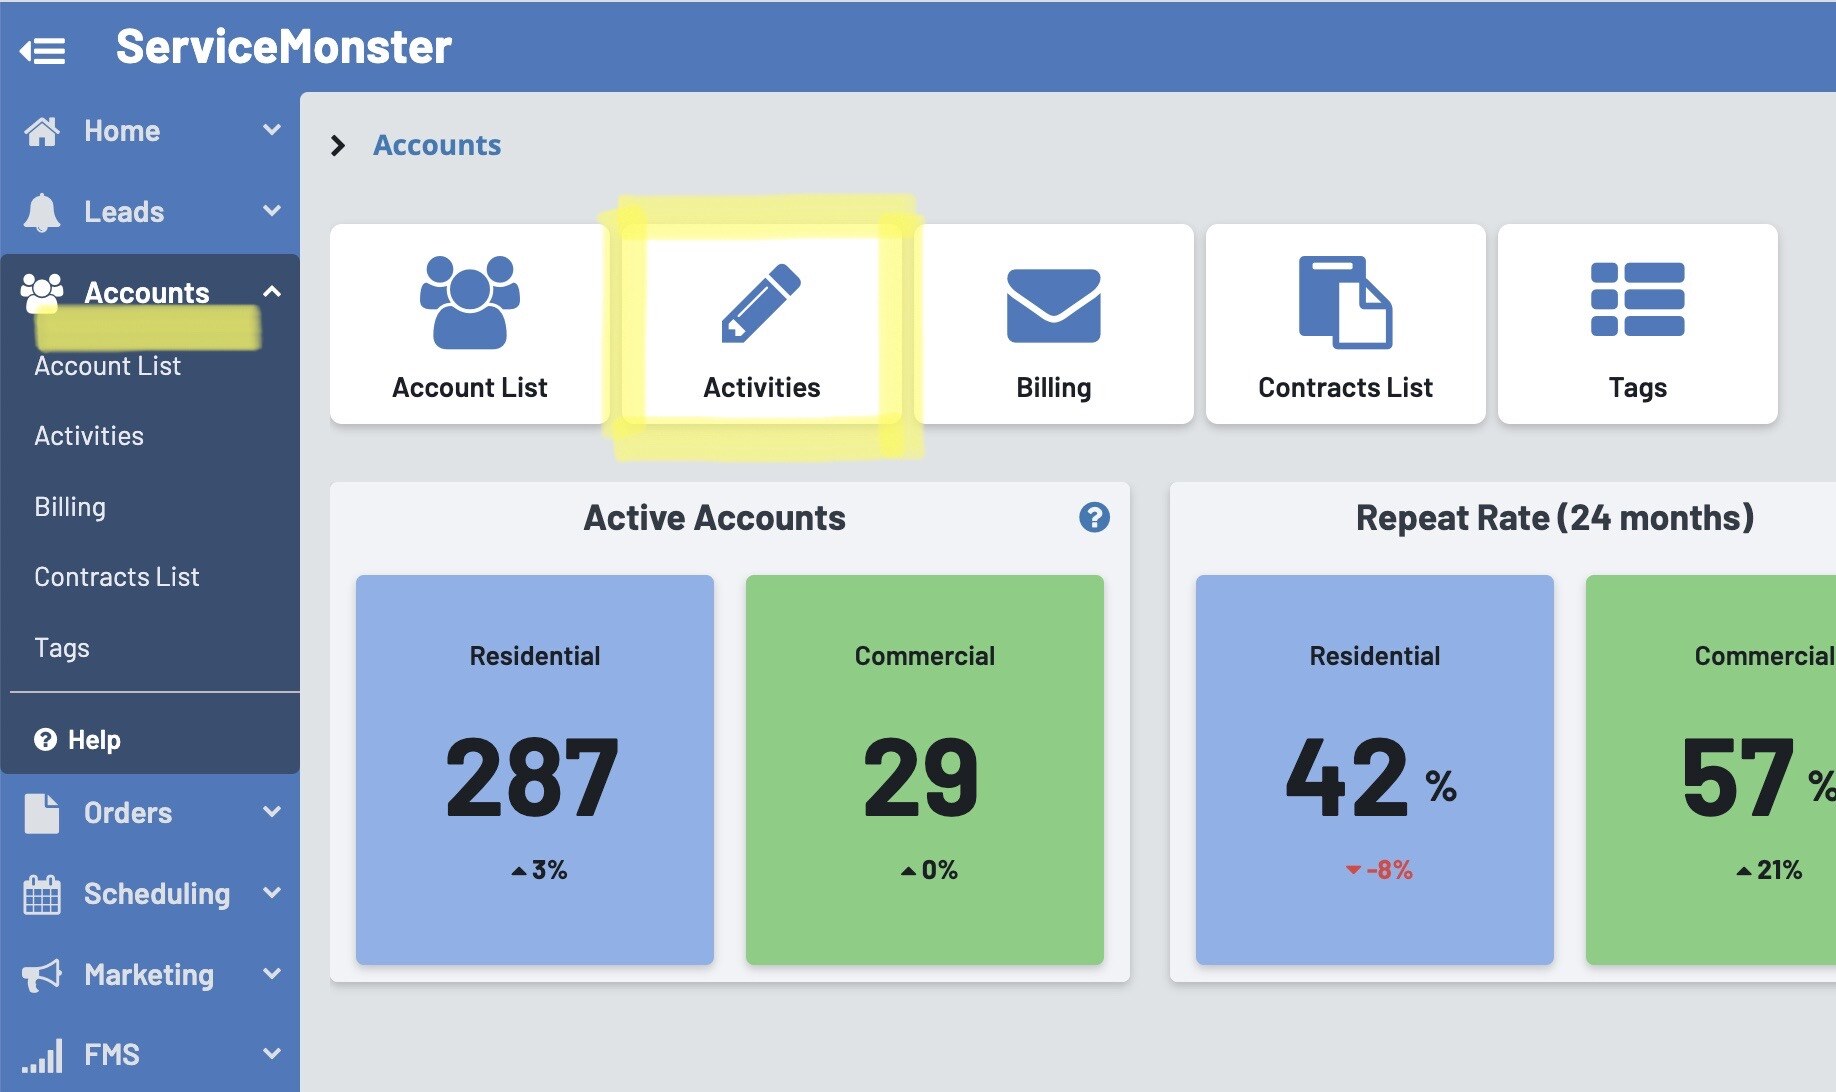
You can track these call activities by going into "Accounts" in the Main Menu, then selecting the "Activities" icon.
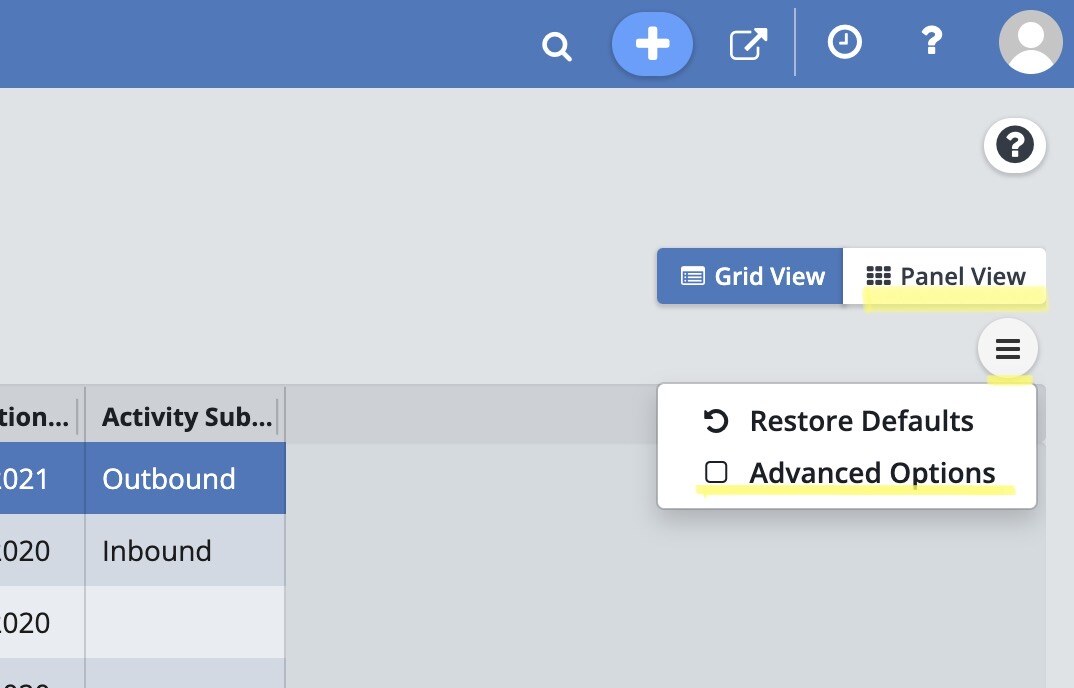
Here you can see a list of all your activities, which you can filter to just show Pending Activities, or Call Activities by using the drop-down menu.
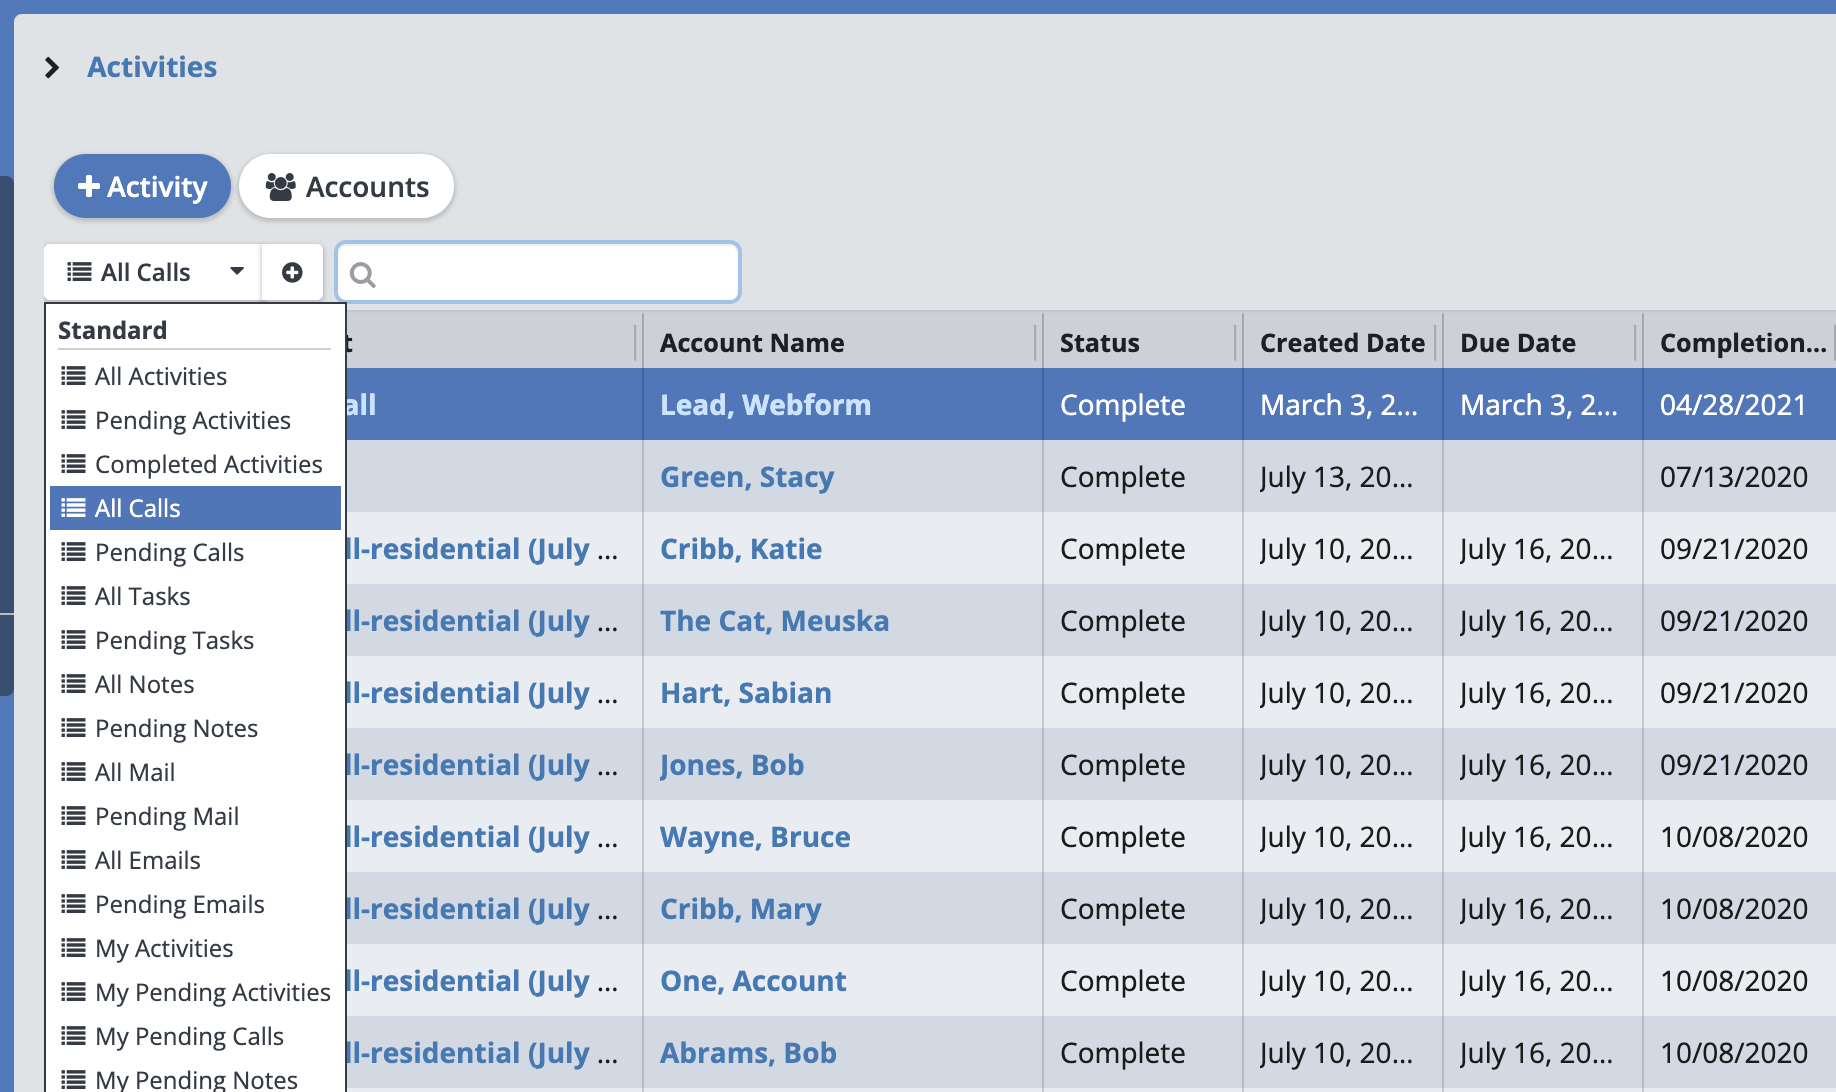
Please note that you may change the Activity List view from the "Grid View" default to the "Panel View". You may also use the "Advanced Options" from the more options menu to customize your grid view columns. Click here for more information on customizing Grids.