
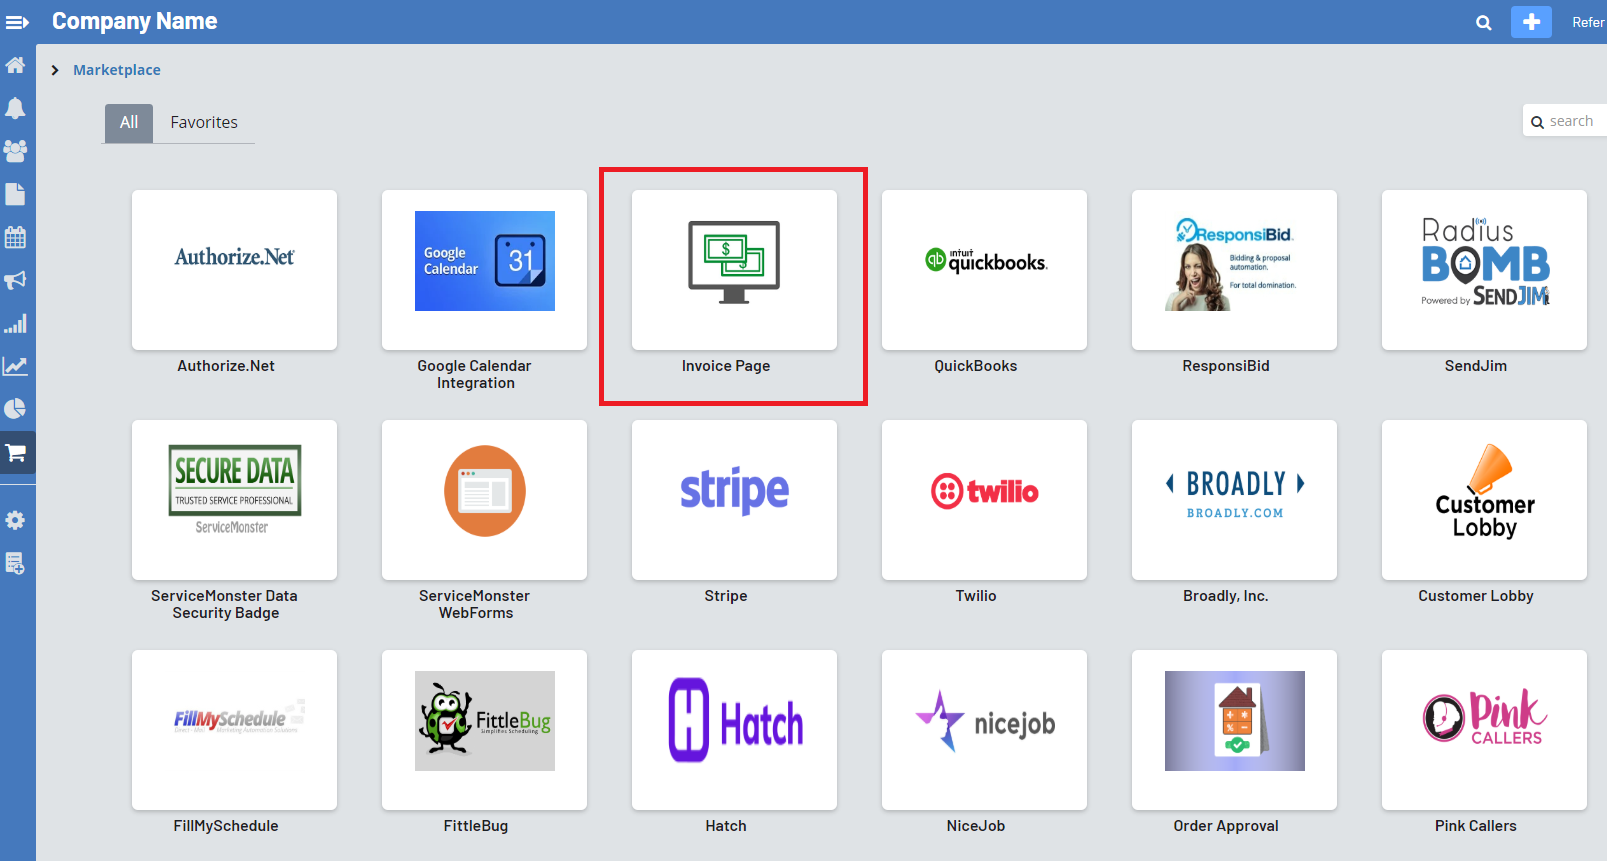
Enabling the Invoice Page
Go to the Marketplace and click on ServiceMonster Invoice Page
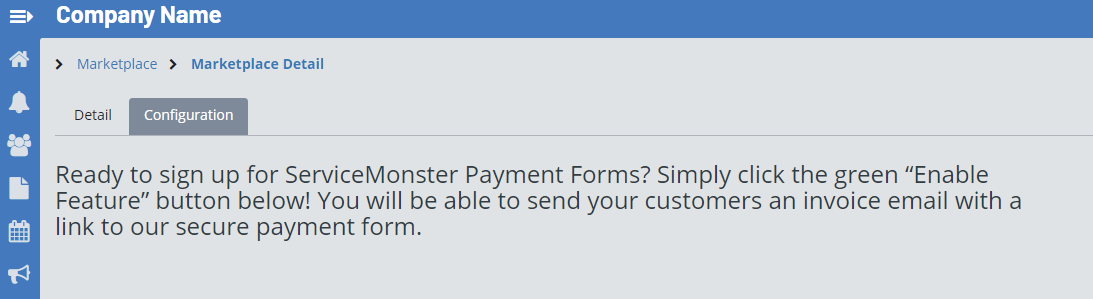
Go to the Configuration tab and click on the "Enable Feature" Button
Once enabled, you'll have various configuration options.
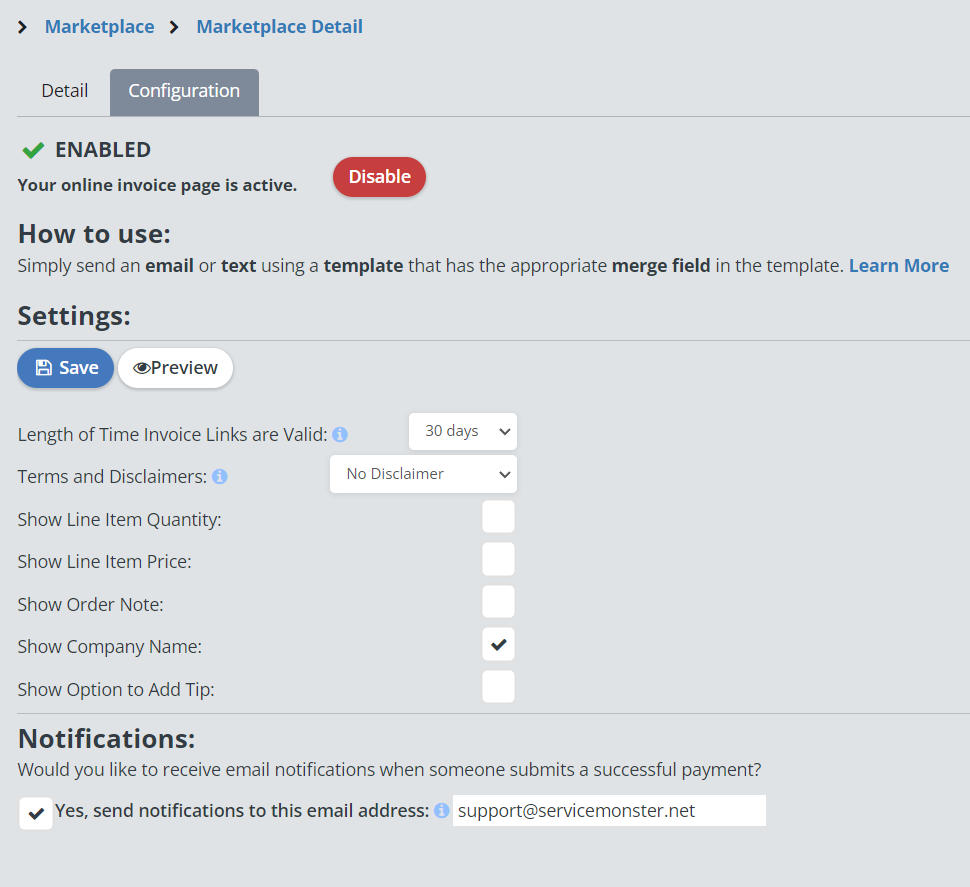
Enabled/Disable: This shows that the online approval links are enabled. If you choose to Disable, you'll deactivate the tool and disable any existing approval links you've sent out.
Preview: Clicking this button will open an example form with your currently selected config settings.
Length of Time Approval Links are Valid: How long the form will remain active after sending to a user.
Terms and Disclaimers: Choose to show disclaimers of your choice at the bottom of the form (no disclaimer by default). To learn more about setting up disclaimers, click here.
Show Line Item Quantity: Toggle hiding the Quantity column on the form (off by default).
Show Line Item Price: Toggle showing the Line Item unit price column on the form (off by default)
Show Order Note: Toggle showing the order note/memo on the form (off by default).
Show Company Name: Toggle showing the written company name at the top of the form (on by default). Note: There MUST be a logo uploaded to your company settings in order to toggle this off.
Show Option to Add Tip: Toggle showing the "Add Tip" option when presented to your customers.
Notifications: Toggle on to send email notifications when orders are approved or declined. Multiple email addresses can be used, separate with a semicolon.
The 3 Options for Setting Up the Link
Option 1- Send Email from a template
Create an email template to send to customers using the ‘ORDER: PAYMENT LINK’ merge field.
The merge field will send a link that says ‘Click here to make a payment’ to the customer with their invoice information, and a page for them to fill out their credit card and billing info.
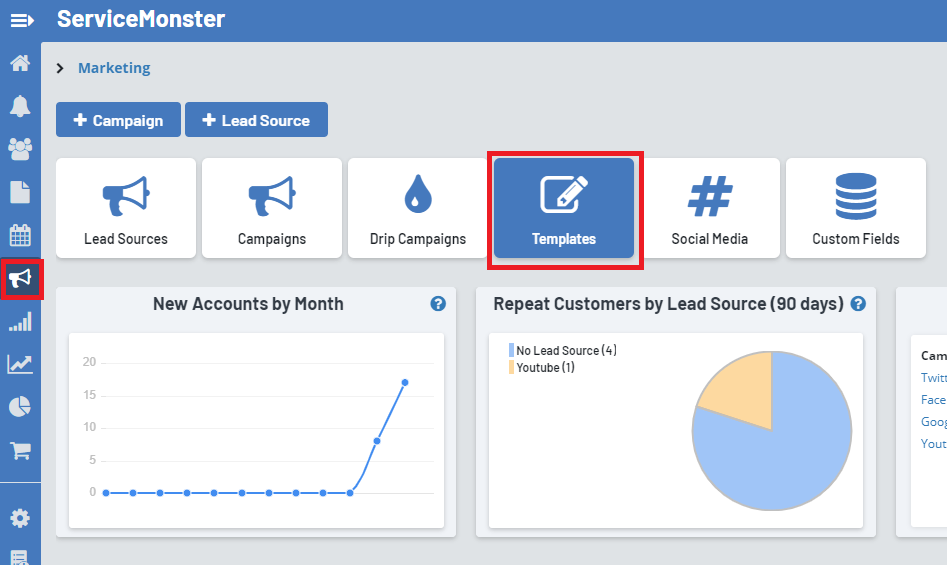
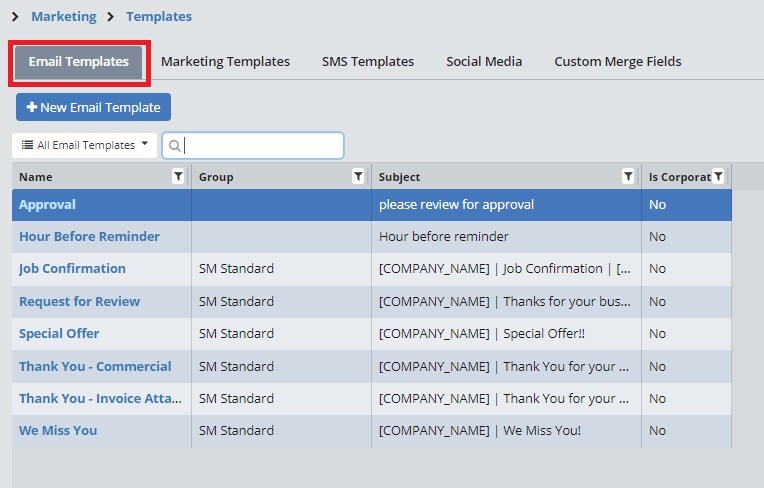
Go to the Marketing or Settings Tab > Select Templates
Select the Email Templates tab, click on an email template you would like to edit (or create a new template).
Create or modify your phrasing to introduce the payment button

Leave your cursor in the desired spot of your template
Select Advanced Options (looks like a tag)
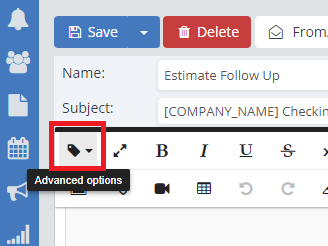
From the drop-down, select Order: Payment Link. The merge field will be inserted into your template.
Feel free to preview your changes and remember to save once you're satisified with your template.
Option 2 - Send Email without a pre-made template
If you choose not to create an email template, you can just add the same merge field [PAYMENT_LINK] directly to an email from the order screen, and it will email the customer with a link that says ‘Click here to make a payment’.
Open up an invoice and click on the "Email" button
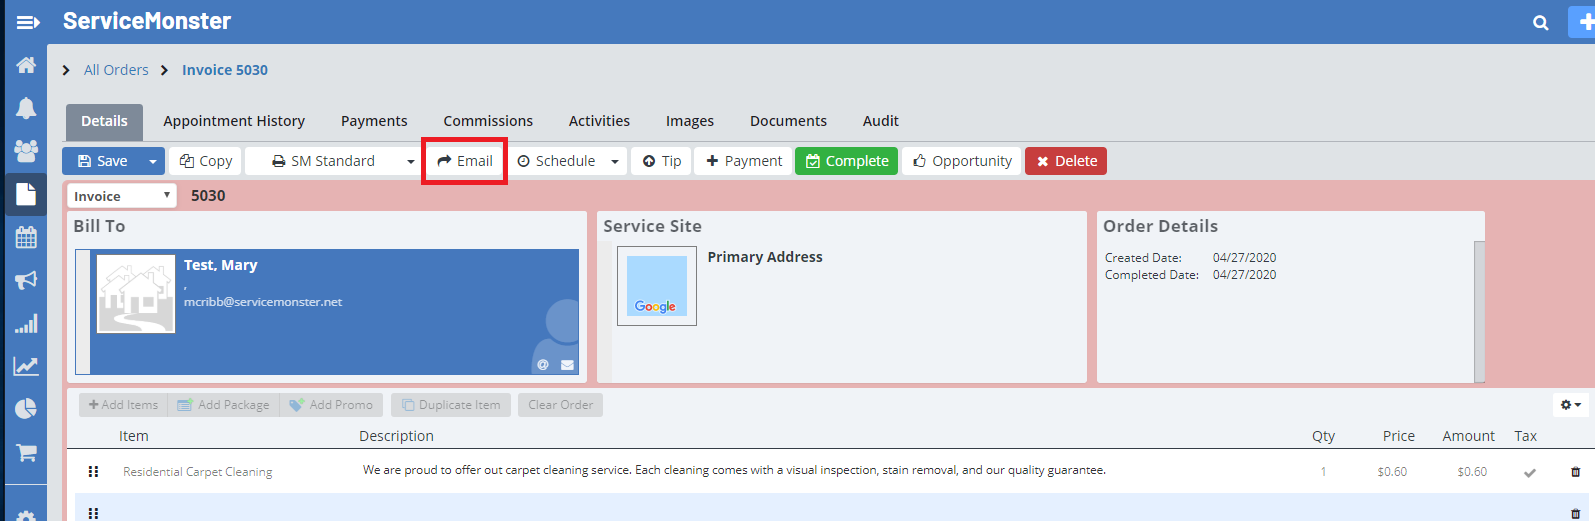
Add in any text you would like there to be included in the email, as well as the payment link merge field.
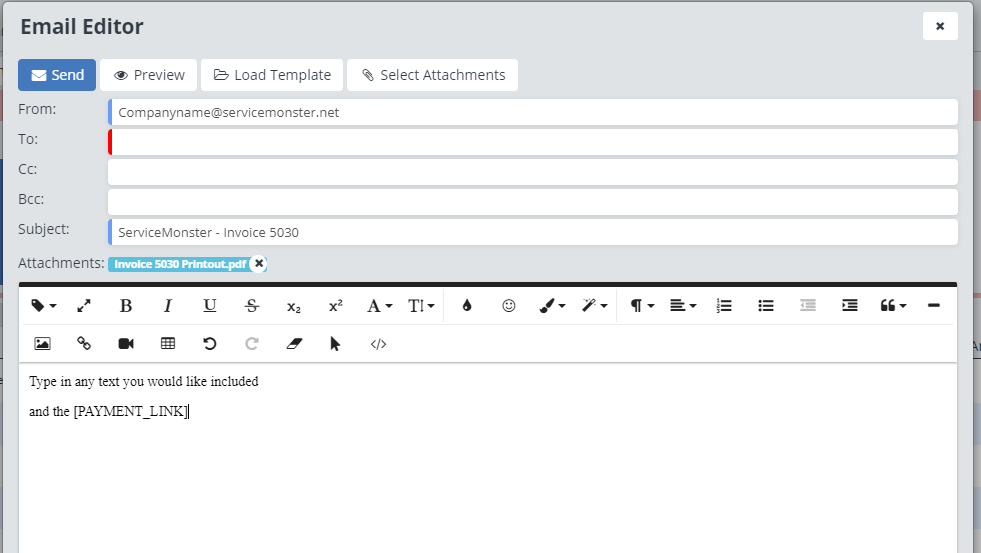
Click "Preview" to see a preview of the email before you send it, and if you like it click "Send"!
Option 3 - Send SMS with templates
With this option you can simply send a text (SMS) to clients with a payment link.
Go to Settings and click on the Templates button
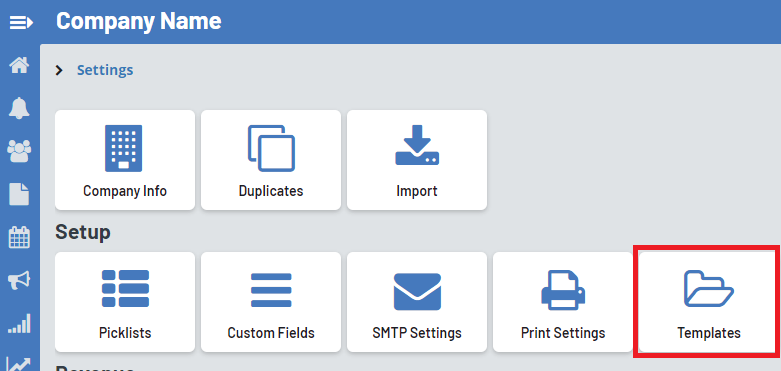
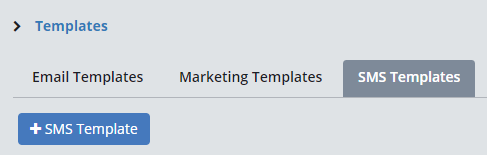
Select SMS Templates Tab, then click the "+SMS Template" Button (or edit an existing template).
Add a name to the template, type in your message, and then be sure to add the SMS Payment Link use: [PAYMENT_LINK_SMS]
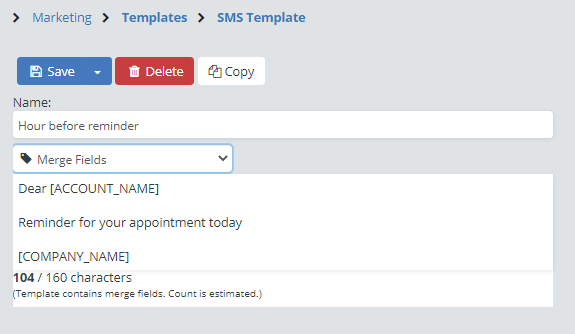
or copy (Ctrl + C) this messaging from here into your template: Thank you for your business, [FIRST_NAME]. Click on the link below to view and pay for your invoice.[PAYMENT_LINK_SMS]
Save!
There you have it! Your SMS template is all set to go.
How to Send the Templates to Your CustomersHere are the locations where you may send the templates from.
Desktop: Send from the Order or Schedule (appointment window or the sidebar)
Mobile App: send using the email template from the Order or the Appointment pages
SMS Texting
Desktop: From the Order or Schedule (appointment window or the sidebar)
Mobile App: From the texting module select your SMS template
Sending Email or Text Automatically You may also set them up to be in the After the Job Reminder Notifications that go out automatically. To learn how to do so, click here.
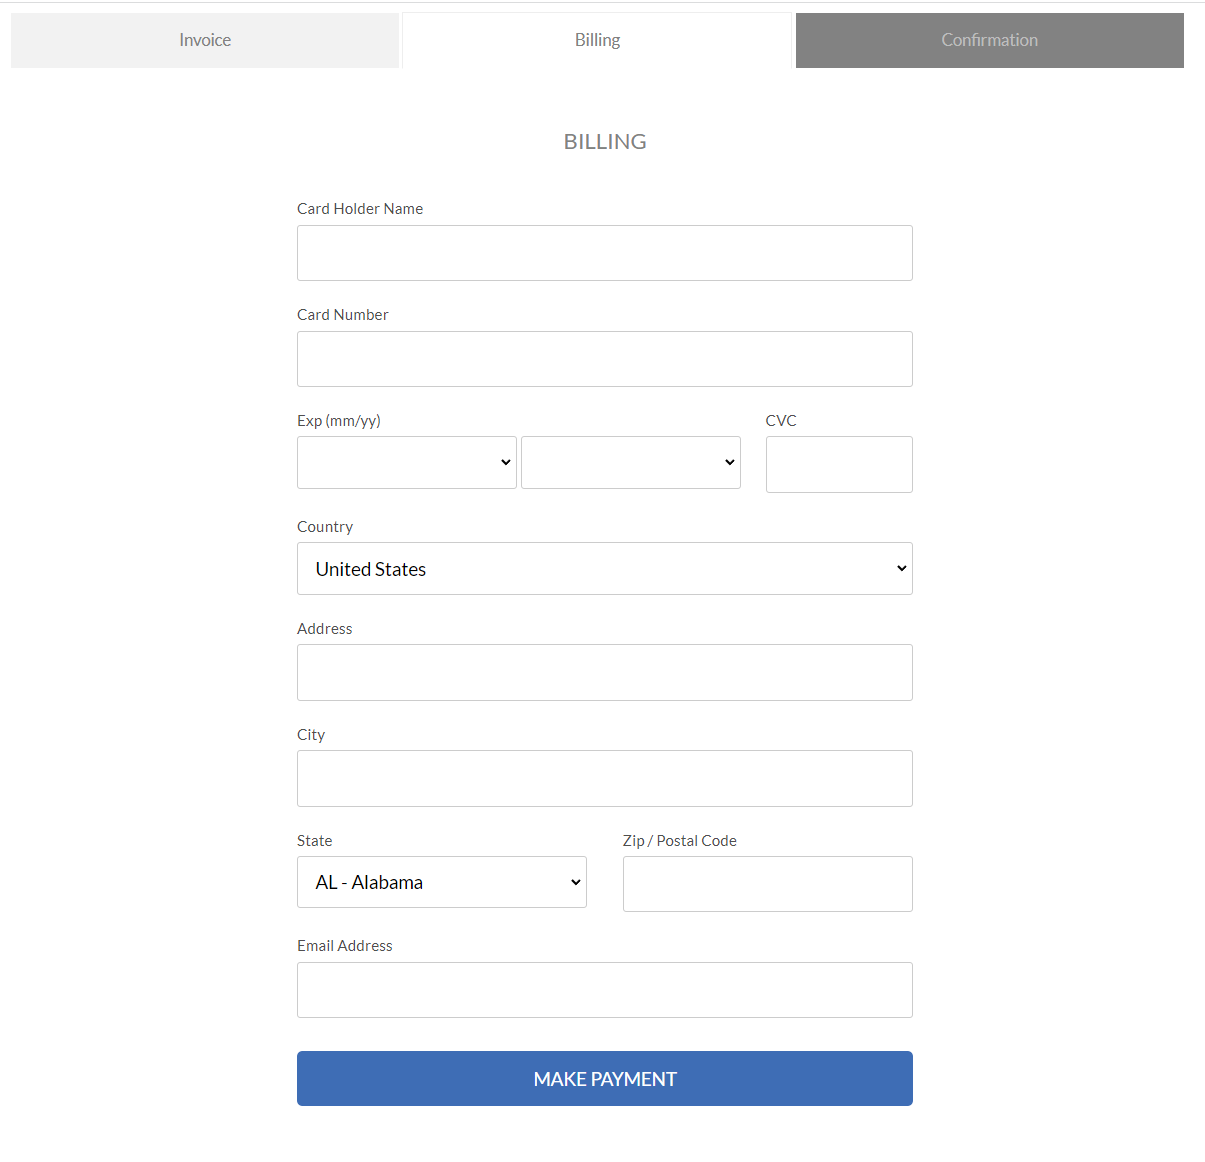
What Happens After You Send The LinkWhen the customer receives the email, they are able to click a link that will take them to a page showing them their invoice, which will include any discounts and tax, if applicable. They will have the option to add a tip. They can enter their billing information and submit payment.
Once a payment is submitted, the customer will get an email notification of the amount they paid and for the order they paid towards.
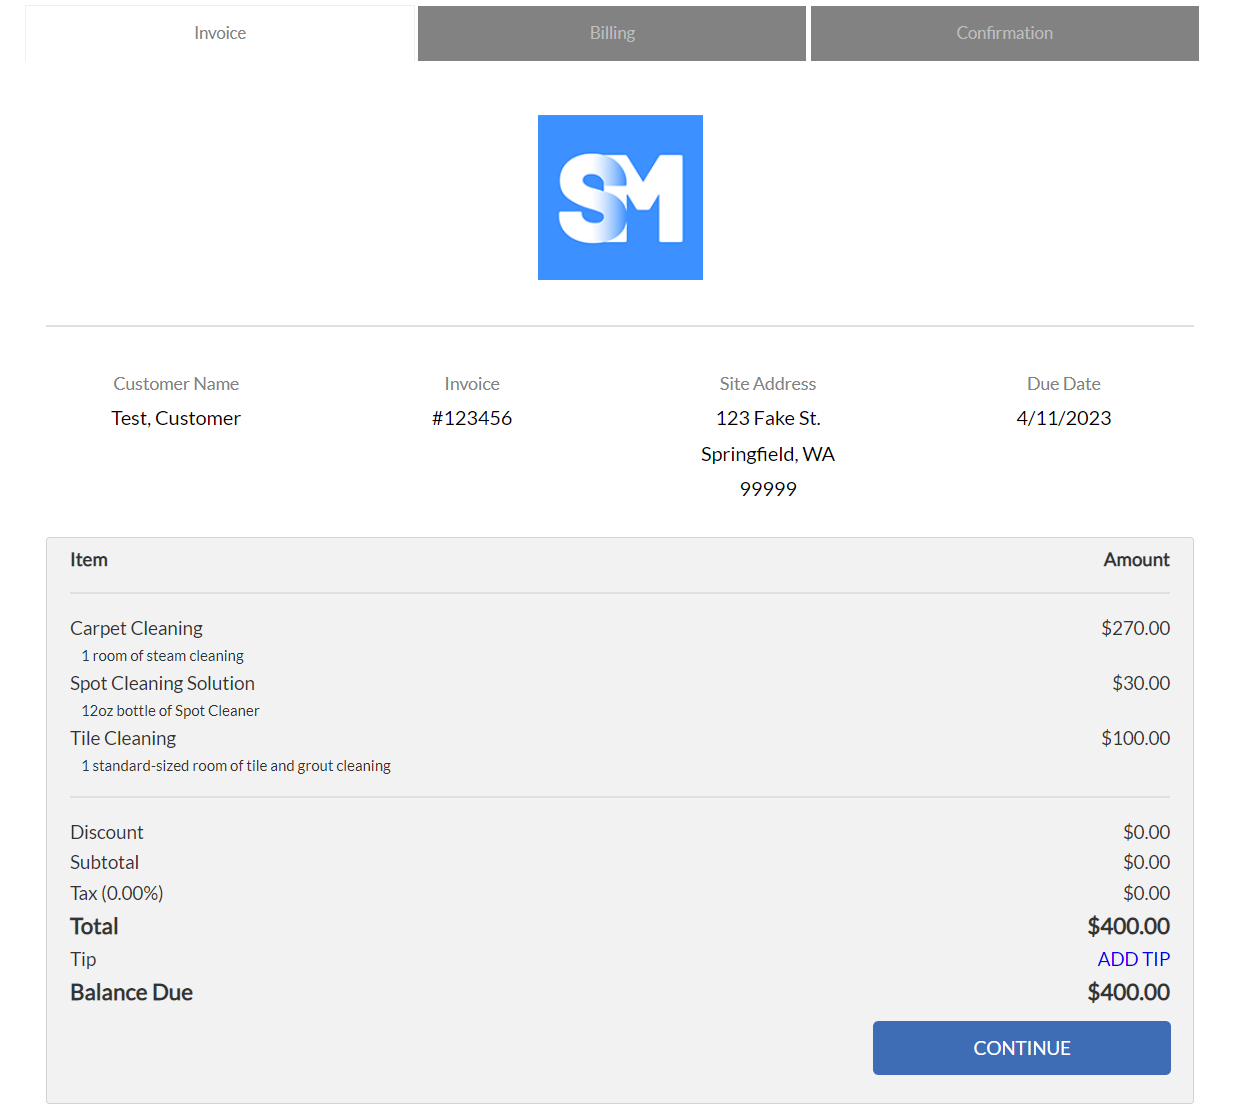
Your company email will get a notification that a customer has made a payment and it will have the payment amount and what order it went towards. The invoice will automatically have the payment applied to it, and it will add a tip to the invoice if the customer decided to do so.
You are good to go! Now your clients can pay their invoices with ease, and it saves you valuable time that can be spent expanding your business!