
Company Info Location
To access the Company Info page, simply click on "Settings" at the bottom of the Main Menu, then on "Company Info".
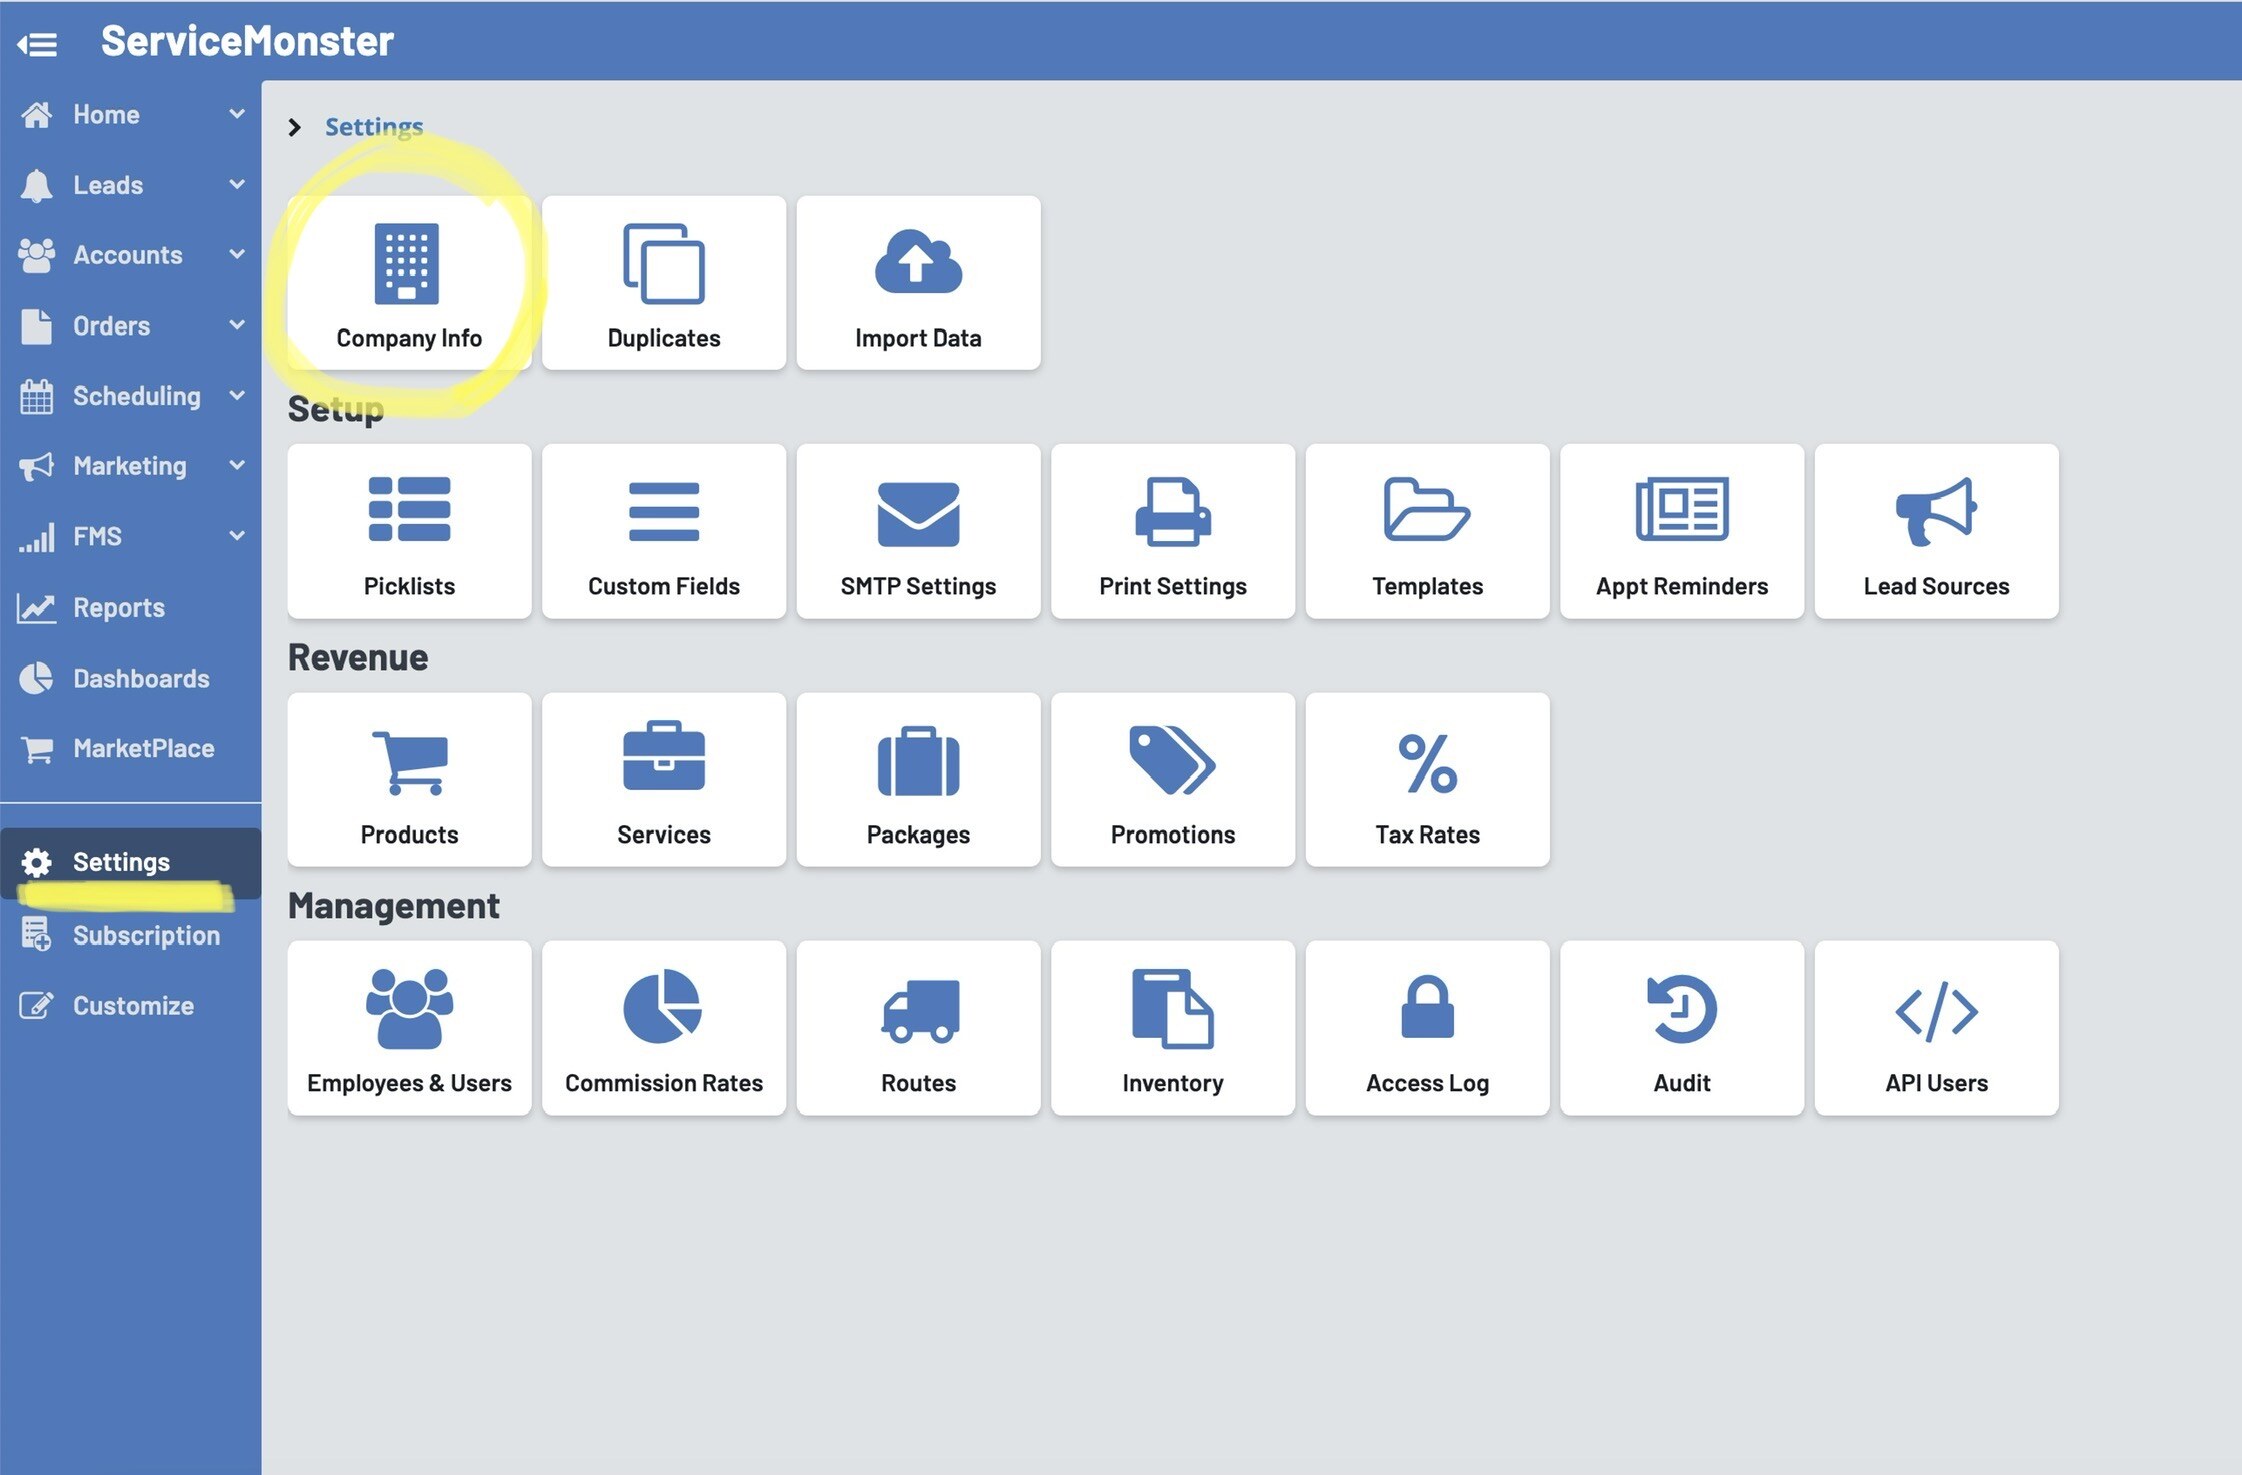
This is the Company Info page. Please remember to save your changes by clicking the blue "Save" button at the top.
You can also quickly access your Schedule Settings by clicking on the "Schedule Settings" button.
.png)
Company Details
Under "Company Details" you can enter the following information:
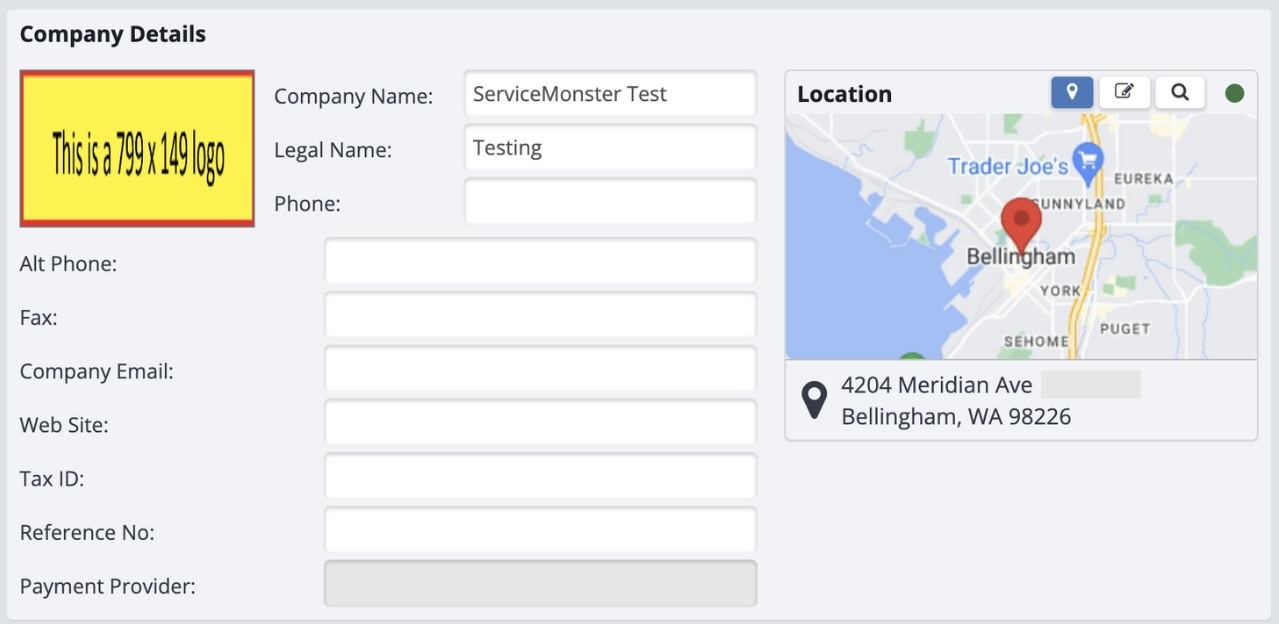
Add Logo: Add a logo by clicking on the logo icon, and then clicking "Choose File" to find your company's logo within your desktop files. The logo should be one of the internet recognized image file formats like .bmp, .jpg, or .gif. The maximum allowable dimensions of your logo are 800 pixels by 800 pixels, 300 dpi. Once you have uploaded your company logo, it will be displayed automatically on all orders and billing statements.
Company Name: Write your company's name here.
Legal Name: If your company has a specific Legal Name, enter it here. This will be the name that prints on default forms, otherwise if this field is blank the Company name will print.
Phone: Add the phone number you would like clients to contact you at here. This number will print on default forms.
Alt Phone: If there is another phone number you would like to use as well, enter it here. This number will not print on default forms.
Fax: Add your fax number here.
Company Email: Add the main email address for your company here, choose one you would want clients to contact you at. This will be used as the "Reply to" email address on emails sent out from ServiceMonster.
Web Site: Add your businesses website, or main social media site.
Tax ID: Add your company's Tax ID, this will show up on your default forms.
Reference No: This is a spot you can use for either a license number your business has or any other information you might like to include. This field will print on the SM Standard and SM Standard No Lines forms.
Payment Provider: If you choose to link a payment provider via the MarketPlace, this will show your connection.
Location: In the location box, use the address helper to start typing in your business's address. Once you see your address from the drop-down list of options click on it. This will show up on your default forms.
Think of the information in this section as client-facing, as it is used on the forms created through ServiceMonster.
Customer Default Settings & Required Fields
Under "Customer Default Settings" and "Required Fields" you can enter the following information:
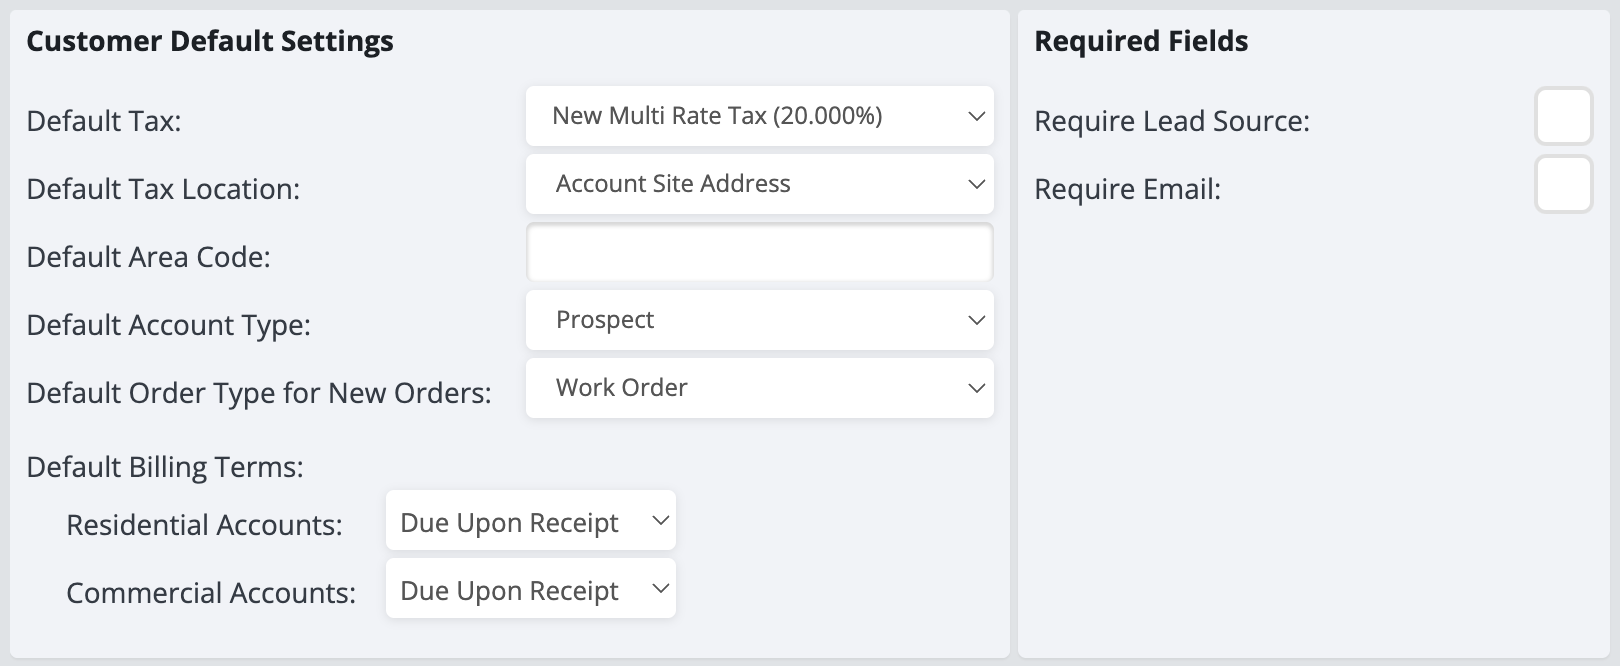
Default Tax: Here you can pick what the default tax on all new accounts that are set up in the system will be.
Default Tax Location: The Default Tax Location is used to assign the tax rate to the orders that are created based on the choice in that field. If you choose Shop Address, every order that you create will use whatever is in the Default Tax field as the tax rate. If you choose Account Billing Address, it will default to the tax rate that is on the account and if you choose Account Site Address, it will default to the tax rate that is assigned to the service Site on the order.
Default Area Code: Here you can choose a default area code for phone numbers. This will be auto-added into the phone number field when entering phone numbers into the system.
Default Account Type: Choose if new accounts created should be labeled as prospects or customers by default.
Default Order Type For New Orders: Choose if new orders should default to a work order or estimate status.
Default Billing Terms: Residential & Commercial: Set default billing terms for newly created residential and commercial accounts.
Require Lead Source: Check this box to require that Lead Sources are added to accounts and work orders.
Require Email: Check this box to require the email field to be filled in for new accounts.
The information in this section will be used as company defaults for within your ServiceMonster system.
General Settings
Under "General Settings" you can enter the following information:

Account Name Format: Choose how Account Names show up as LastCommaFirst (Example, Name) or FirstSpaceLast (Name Example).
Date Display Style: Choose between many options for how dates display.
Time Zone: Choose the time zone for your location.
Auto Attach Order to Appt Emails: Choose if you would like a PDF of the Estimate, Work Order, or Invoice information to be automatically attached to appointment emails.
Auto Commissions: If commissions are assigned to a tech, they will automatically be applied for any jobs that tech works.
Auto FMS Tracking: When a new order is created, if the related account has had an FMS card sent to them within the last 90 days, it will automatically select the FMS Campaign as the order's lead source.
Observe Daylight Savings: If your area observes Daylight Savings you can choose to have it automatically adjust accordingly.
Sort Service-Items Alphabetically: Choose whether Service-Items should be sorted alphabetically.
Remember to click the blue "Save" button at the top when you are finished.