
Click here to learn more about ServiceMonster Pay!
Click on a link to hop to a specific section on this page:
Manage Payment Methods on File
Add a New Credit Card/Bank Account Without a Charge
Create Auto-Charge Service Contracts
Applying Credit Card Payments
Applying credit card payments is simple with ServiceMonster Pay. Simply navigate to anywhere in ServiceMonster where a payment can be completed (Account screen, Order screen, Schedule sidebar, Completion Wizard, etc). Once inside the "New Payment" screen, simply click the "Apply Credit Card Payment" button at the bottom of the window.

From here you'll need to either enter in new card info or select a card on file.
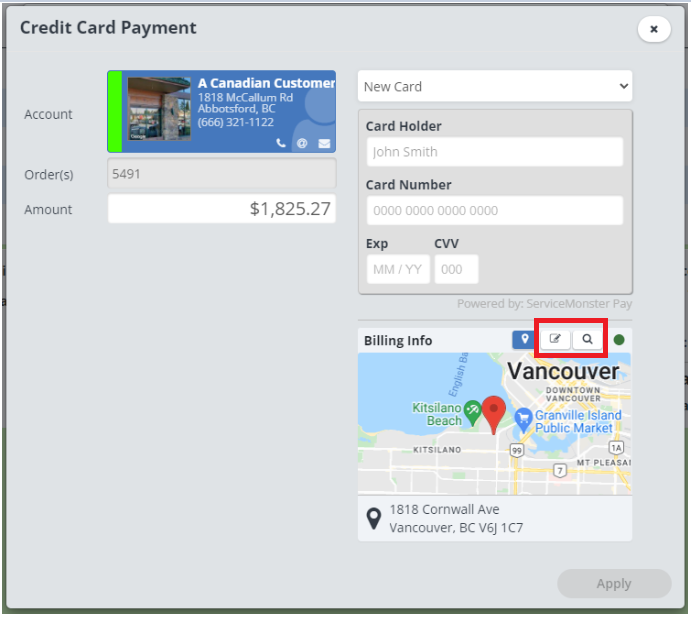
If entering a new card, simply enter the credit card information and then verify that the billing address for the account matches the address on file for the card. If you need to make a change to the address, use either the address lookup (for looking up a different address completely) or the edit address action to manually make a small edit (e.g. add an apartment or suite number in address line 2). These actions are highlighted in red in the image below.
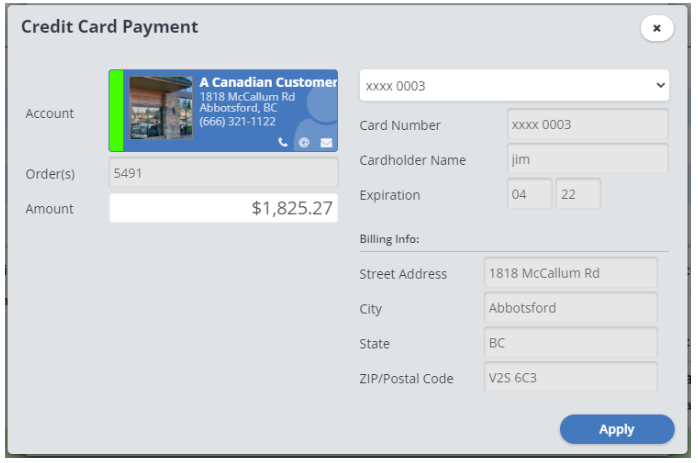
If using a card on file, simply select which card you want to use from the drop down menu and verify that the address information is still correct. If the address needs to be updated, you'll need to manage your payment methods first, prior to making the charge.
Applying Direct Debit Payments
If you aren't familiar with direct debit payments (ACH and EFT), think of them as writing an online check that is simply just transferring funds from one bank account to another. Direct debit payments are just as simple to apply as credit card payments and offer lower fees as well. Simply navigate to anywhere in ServiceMonster where a payment can be completed (Account screen, Order screen, Schedule sidebar, Completion Wizard, etc). Once inside the "New Payment" screen, simply click the "Apply Direct Debit Payment" button at the bottom of the window.

From here, the process is similar to applying credit card payments, either enter in a new bank account or select one on file.
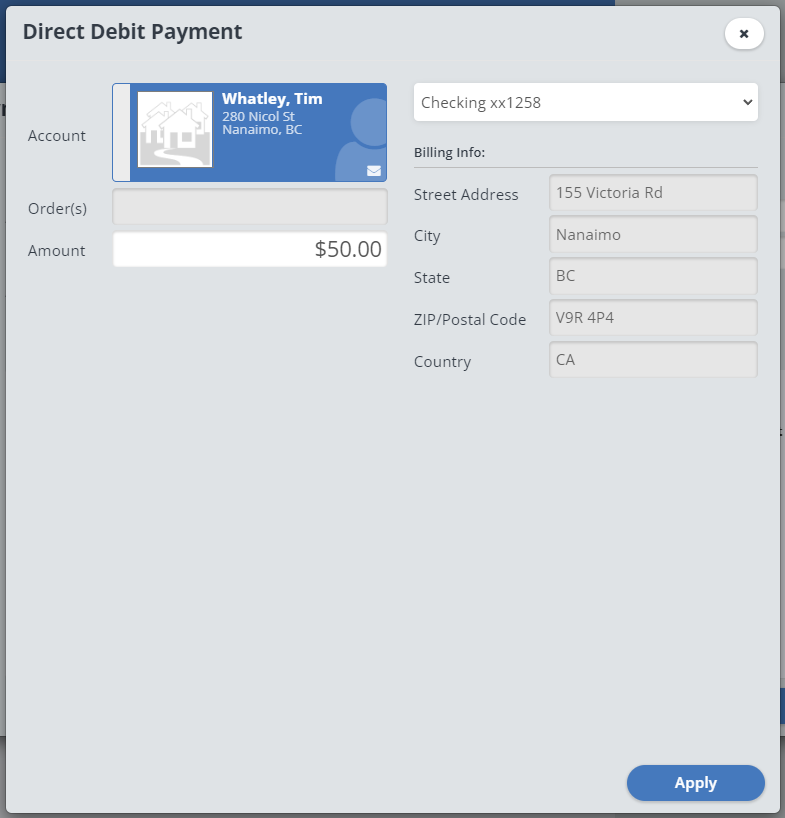
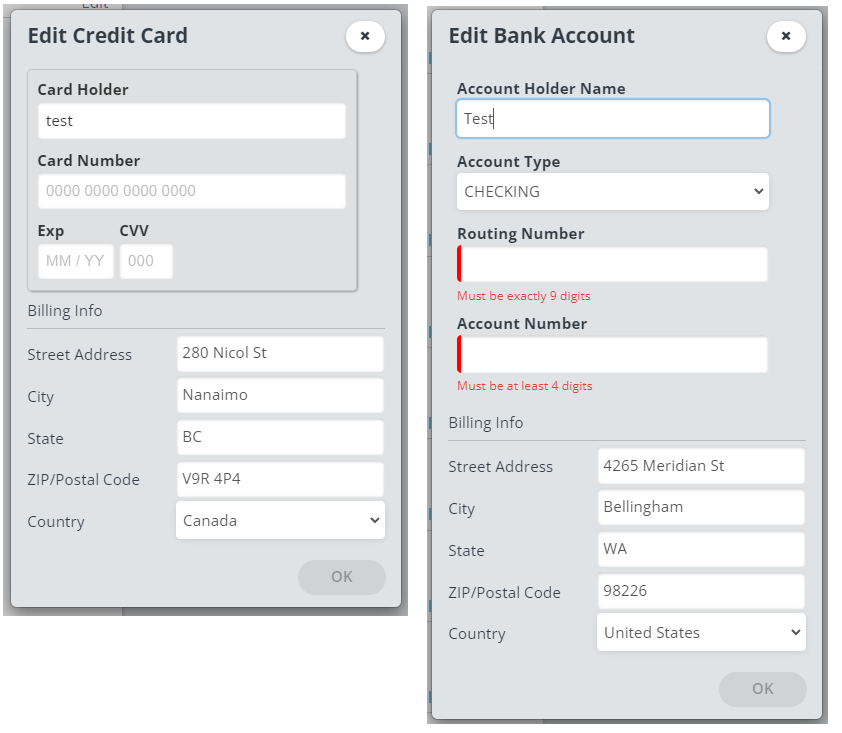
If entering a new bank account, simply fill out the fields and verify the address information is correct. US users will see the form on the right, Canadian users will see the form on the left.

If selecting an account on file, again the process is similar to applying a credit card. Simply use the drop down menu to select an existing bank account and verify the address info hasn't changed. If the address info needs to be updated, you will need to exit the payment screen to manage your payment methods first, make the address edit, and then return to enter the payment.
Managing Payment Methods
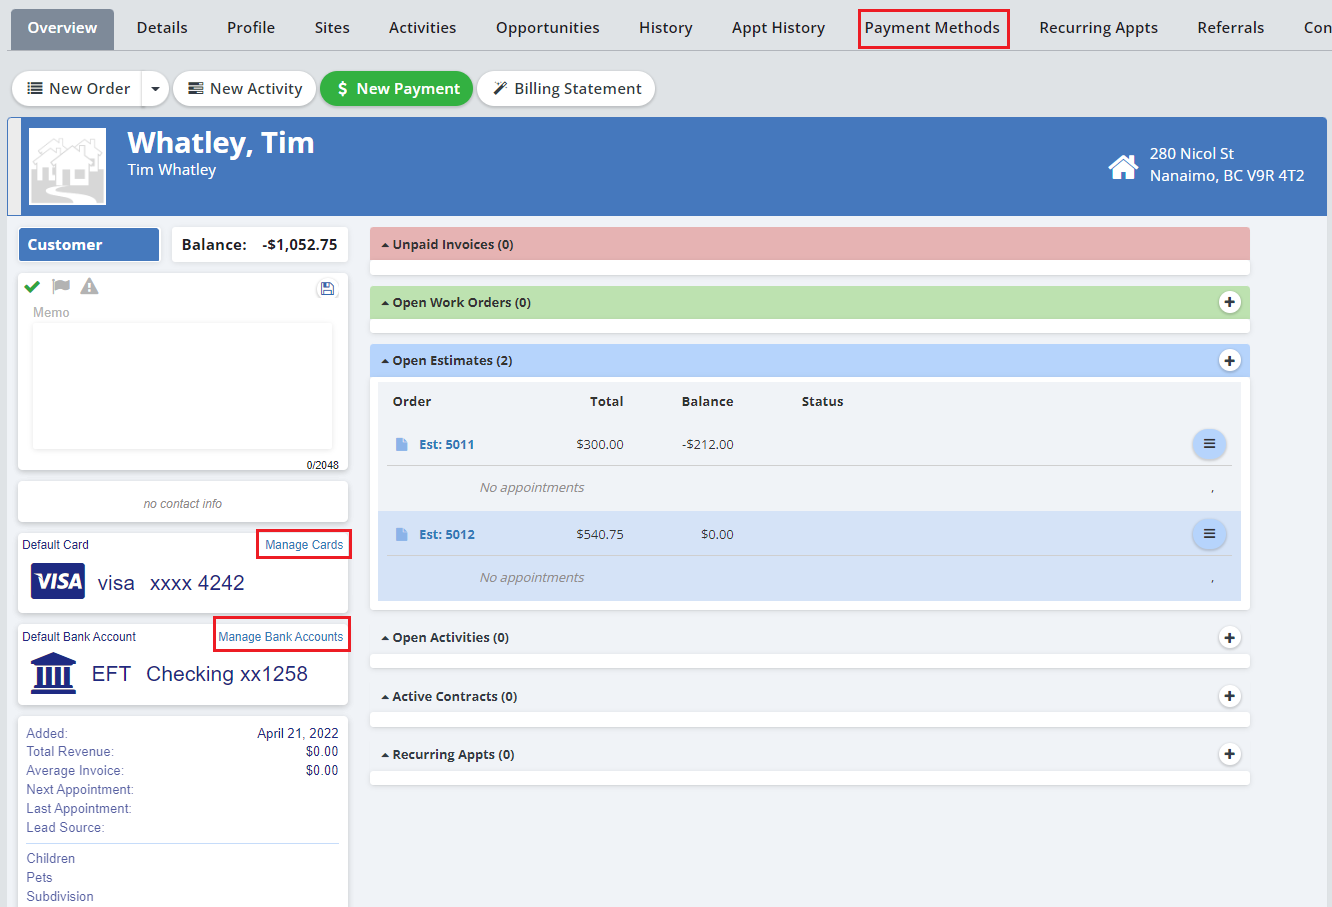
ServiceMonster Pay allows you to easily manage/edit the payment methods attached to an account. There are two primary ways to access the stored payment methods, clicking the "Payment Methods" tab on the Account Page or clicking the "Manage Card/Bank Accounts" link from the Account Overview Page specifically.
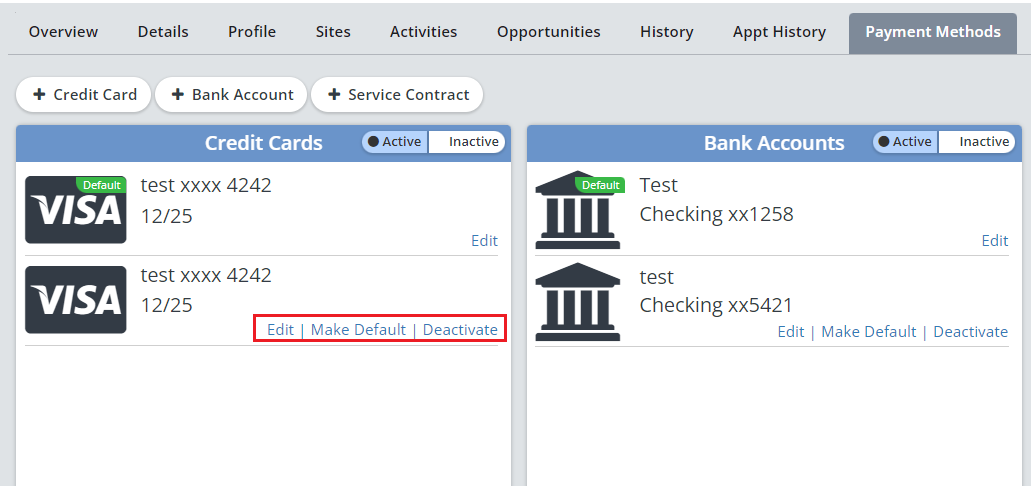
Once on the Payment Methods tab, you will see two columns with credit cards on the left and bank accounts on the right. From here you can deactivate a payment method (removes it from the drop down list for future payments), update a payment method (opens up a screen to update the address or change the card info), or make a new payment method the default (makes it the first payment method in the drop down list when making future payments).
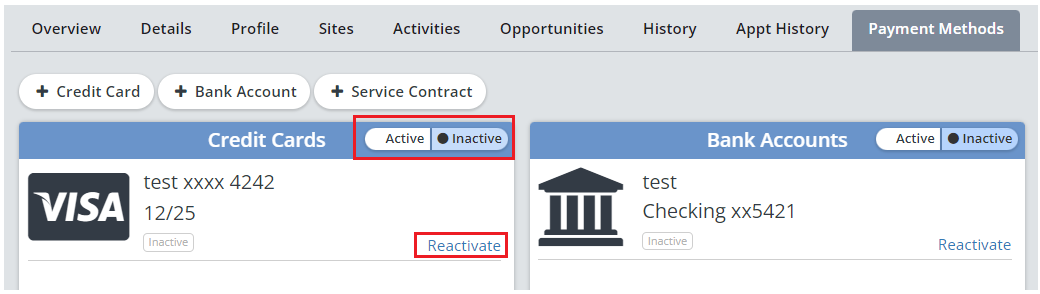
Another important thing to note here is that you can toggle between the active and inactive views for both credit cards and bank accounts. This will let you see deactivated payment methods, and also reactivate a payment method if needed.
If you wish to edit a payment method on file, simply click the "edit" link next to an active payment method. From here a screen will pop up which will allow you to update the billing info or add new credit card/bank account information. We do NOT store the credit card or bank account details on our system so you will be required to re-enter the entire credit card or bank account info when making an edit.
Adding a New Credit Card or Bank Account Without a Charge
If you wish to add a new payment method without making a charge, you can do so from the "Payment Methods" tab as well. Simply click the "+ Credit Card" or "+ Bank Account" buttons located towards the top of the screen.
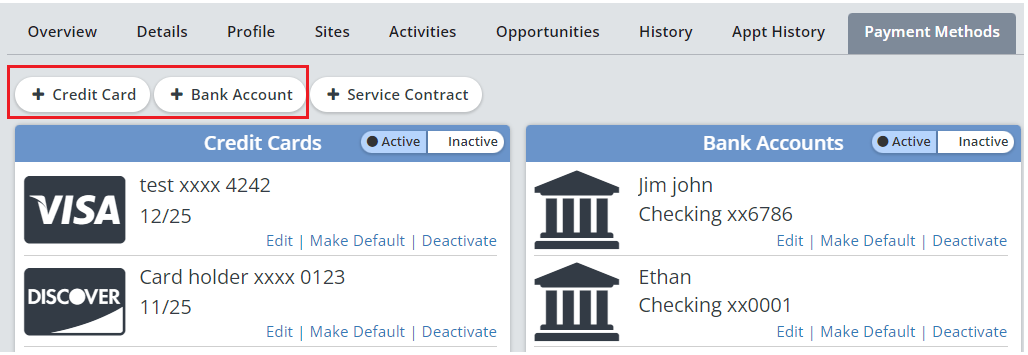
From here, a screen will pop up that will allow you to enter the payment method information just as if you were making a payment. Upon saving, a validation check will also occur to ensure the payment info is valid.

Setting Up Auto-Charge Service Contracts
With ServiceMonster Pay comes a new way to setup service contracts, auto-charge billing! Here's how to set it up and how it works.
To create a new auto-charge service contract you can either click the "Contracts" tab or the "Payment Methods" tab while in an account and then click the "+ Service Contract" button. Alternatively you can view the whole Contracts List from the left navigation menu and proceed from there (you will need to select an account to apply the contract to if you follow this path).

Creating a New Contract will open up a page where you fill out the details of the contract. The main difference in setting up an auto-charge contract, is setting the contract type to "Auto-Charge". Once that step is done, you will need to select which payment method you wish to be billed automatically with the contract and then complete the rest of the contract details (for full details on general contract creation, click here).
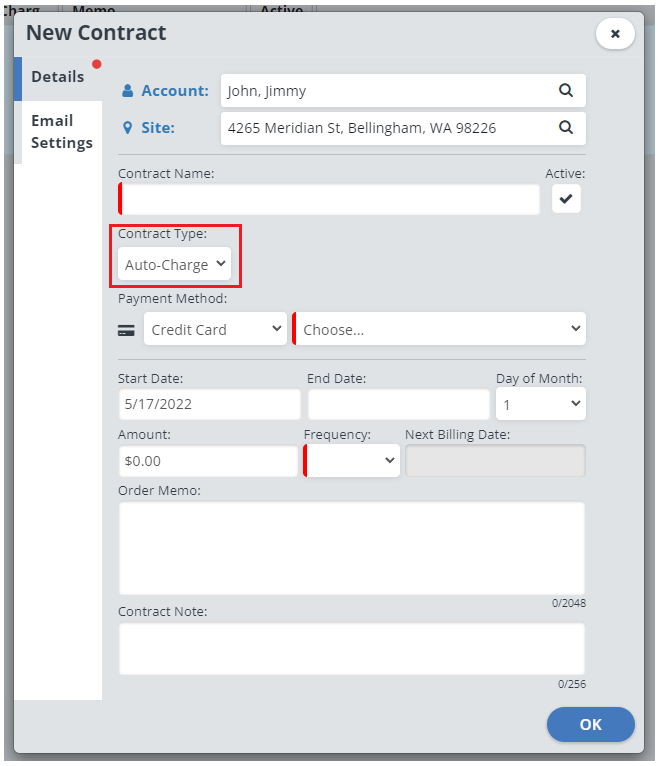
Once the details are filled out, you will want to select the "Email Settings" tab. Here you will want to select the invoice template that the user will be emailed, verify the "to" and "reply" email addresses and then select your preferred notification settings. You can choose to have email notifications sent for all payments (both successful and failed) or choose to only receive notifications for failed payments.

Note that with auto-charge contracts, the email receipts sent are auto-generated by ServiceMonster (which is why that email setting is disabled). The receipts sent out look like the following:
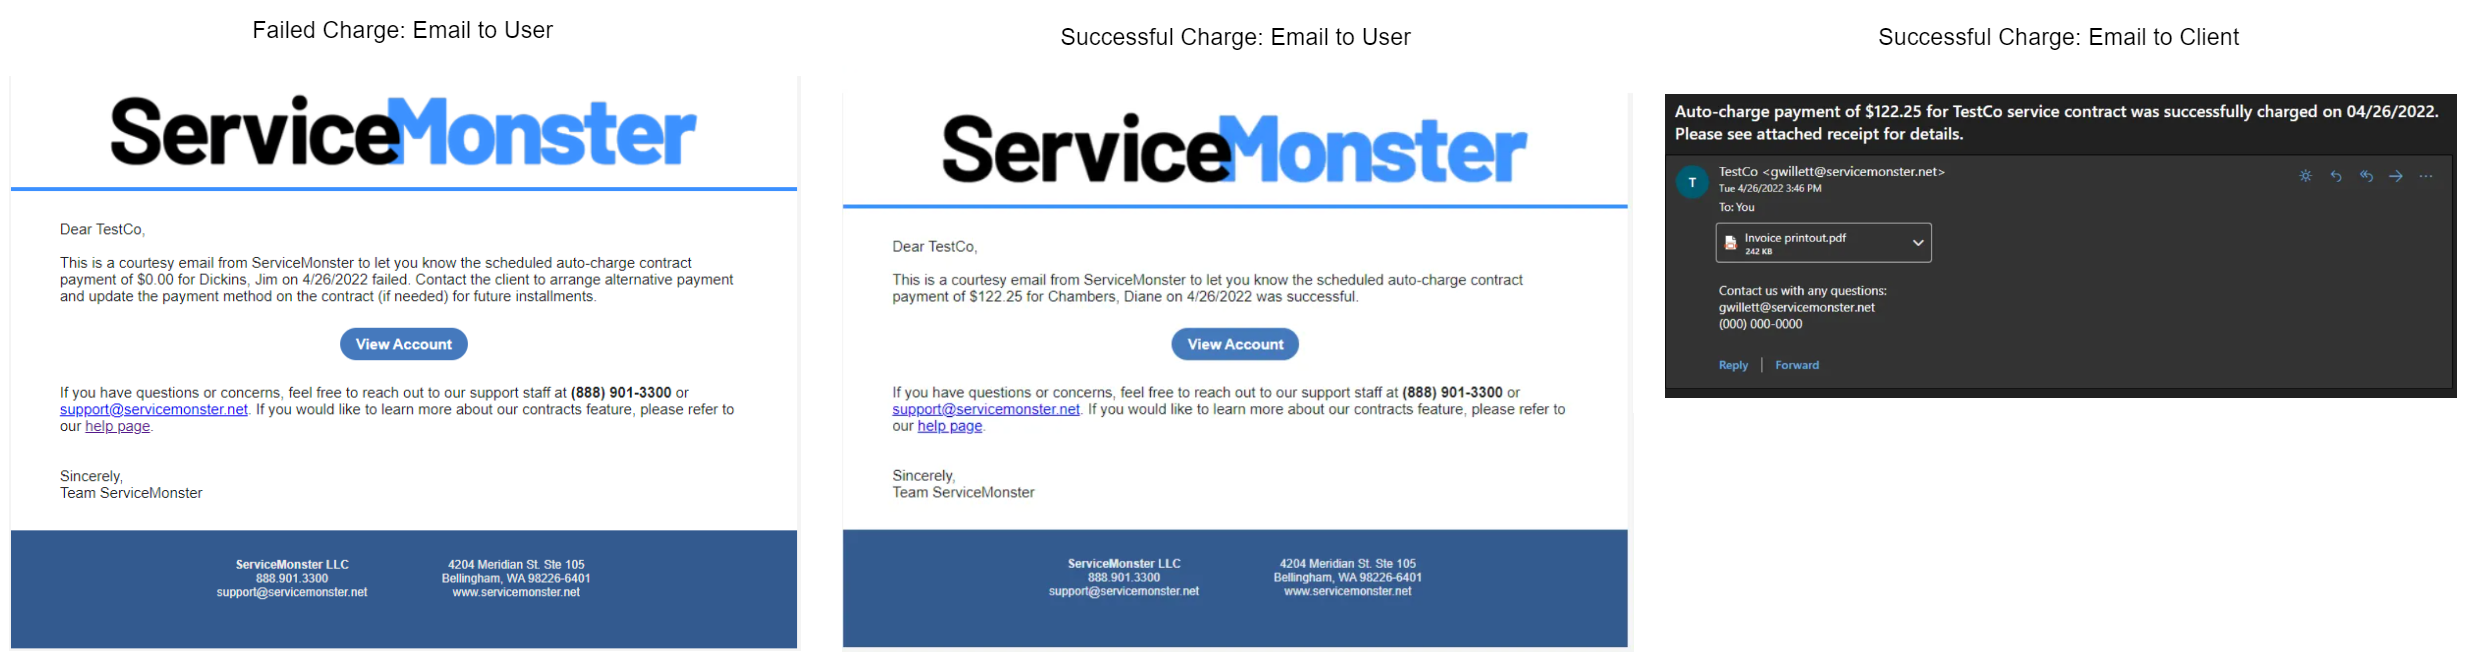
If a charge fails, you will be notified so that you can take corrective steps to address the issue. You will want to reach out to the client, explain the failed charge and either ask to switch to another payment method on file or potentially get new payment information, and then run the charge against the invoice created from the contract to ensure that balance is paid (you will see this in your invoice list under the account). Once that payment is taken care of, then you will want to go to the affected Account, navigate to the "Contracts" tab, and click the contract name to open up the Edit Contract screen. From here, simply update the payment method on file for future payments and click "OK" to save.

Applying Payments on Mobile App
Using SM Pay on the ServiceMonster mobile app is easy as well! Enter new payment methods out in the field when needed or select payment methods on file to make collecting payment a breeze.
Navigate to the Order or Appointment Page within the mobile app and click the "Pay" button on the main menu or use the "Complete" button to open the completion checklist and click "Apply Payment".
Whichever path you choose to take, once the Pay screen is open, you will see your options such as Tap to Pay or manually enter the information in Pay With Card/ACH for online bank transfers. All the following steps begin from the following screen.

Tap to Pay
After clicking Tap 2 Pay, you'll see the following screen which shows the optional surcharging fees if you've enabled them. Click Proceed. If you're using your phone, click Tap To Pay to continue, or click Use Card Reader for the NFC1 Device (required for tablets other than manual entry.)

.jpeg?width=218&height=473&name=3711b8c1-1abe-4b2d-8e6a-f7e417a4b611%20(1).jpeg)
Now you can hold the card to the back of the phone/NFC1 to scan the card.

Using a Saved Credit Card Payment or Manually Entering

From here, the process is the same as on desktop. You can choose to create a new card or select from cards on file. When adding a new card, enter in the credit card information, verify the billing address, ensure the proper amount is being applied (will default to balance due), and then click "Confirm Pay" at the bottom of the form. If using a saved card, simply select which one you wish to use from the drop down and verify the information is correct, ensure the proper amount is being applied, then click the "Confirm Payment" button at the bottom of the form.
 .
. 
Note: when using a card on file, you won't be able to make edits to the card info/billing address so if that information has changed you will need to create a new card on file. Only admin and manager users on desktop can make edits to existing payment methods.
Applying a Direct Debit (ACH) Payment
Navigate to the Order or Appointment page within the mobile app and click the "Pay" button on the main menu or use the "Complete" button to open the completion checklist and click "Apply Payment".
Whichever path you choose to take, once the Pay screen is open, you will want to click the "Pay with Card / ACH" button, then "New Direct Debit" to move forward.


When adding a new bank account, enter in the account information, verify the billing address, ensure the proper amount is being applied (will default to balance due), and then click the "checkmark" button at the top of the page. If using a saved account, simply select which one you wish to use from the tab "Existing Account," verify the information is correct, ensure the amount proper amount is being applied, then click the "Checkmark" button at the top of the page.
As bank accounts are sensitive information, it might be easier to collect this information via a voided check or to allow the client to input the bank account details to make them more comfortable.
Note: When using an account on file, you won't be able to make edits to the account info/billing address so if that information has changed you will need to create a new bank account on file. Only admin and manager users on desktop can make edits to existing payment methods.