
What are the limitations?
It is unable to apply exported payments to invoices in QuickBooks that were not set up by the QuickBooks Online Export.
It is also unable to apply exported payments to exported invoices that have been overpaid in ServiceMonster. (Payments will export into QuickBooks as an unapplied credit for that customer, which can then be applied manually to their outstanding invoices).
Click on one of these links to hop to a specific section on this page:
Setting Up Taxes in QuickBooks Online
Setting Up Classes In ServiceMonster
Setting Up
Follow these instructions to get started setting up QuickBooks Online.
If you charge sales tax, your first step will be to set that up. Keep in mind that it will set you up with DEFAULT sales tax if you already have your Quickbooks set up. If not, you’ll have to ENABLE it in order for the transfers to be successful
Set-Up Taxes in QuickBooks Online
Open QuickBooks Online and select the Taxes tab (left-hand side).
Select ‘Set Up Sales Tax.’
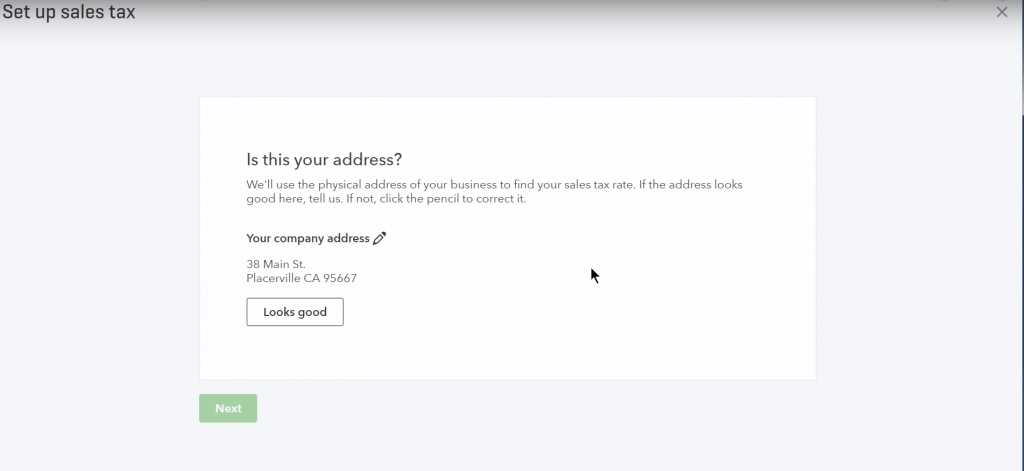
Next, QB Online will prompt you to input your address. If you’ve already done so, it will remember the address (click ‘Looks Good’), but if not, enter it here. Click ‘Next.’
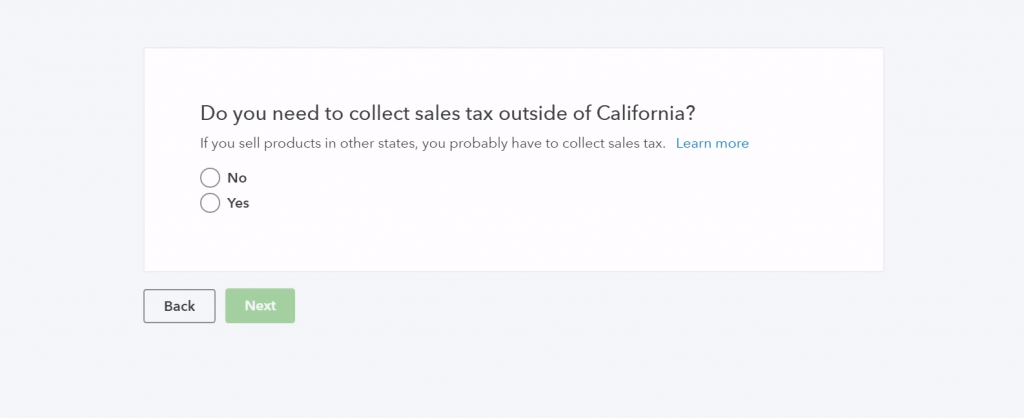
QB asks if you need to collect sales tax outside your state. Select your answer. In this example, our answer was ‘No.’
Next, select from the following drop-down menus:
When does your current tax period start?
How often do you have to file a tax return for this agency?
When did you start collecting sales tax for this agency?

Once that’s done, click ‘Next.’
Sales tax is now set up! Be sure to click ‘Got It.’
If you don't charge sales tax
During set-up, keep your TAX RATE at 0.0%.
Marking Your Taxable Services
Step two in this process is making sure all your products & services and customers are set to taxable if applicable.
Click ‘Sales’ in the left-hand column.
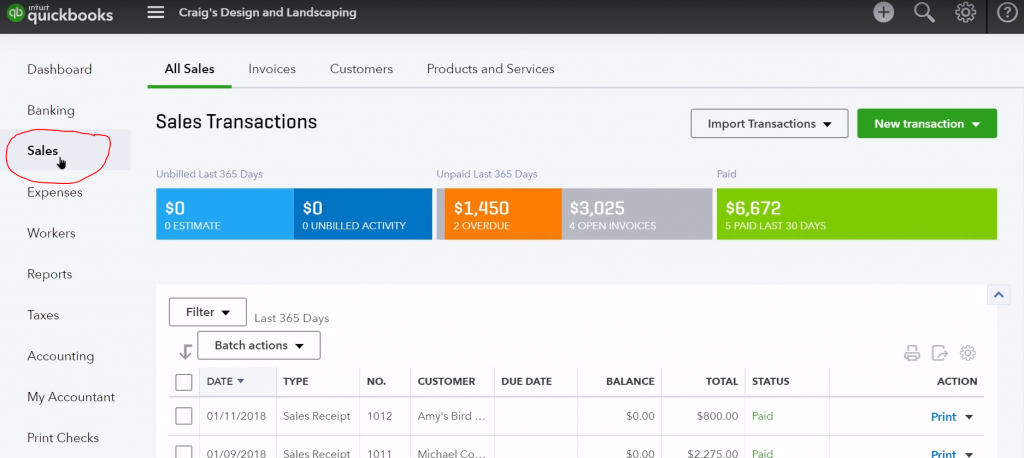
Click on ‘Products & Services’ in the upper row.
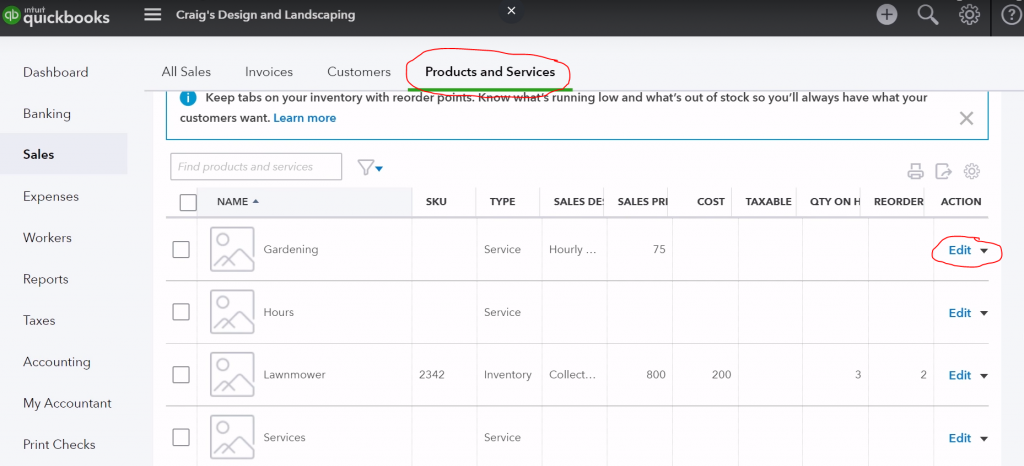
Click the blue ‘Edit’ button by any product or service that needs to be taxable.
Scroll down in the sid car and check ‘Is Taxable.’
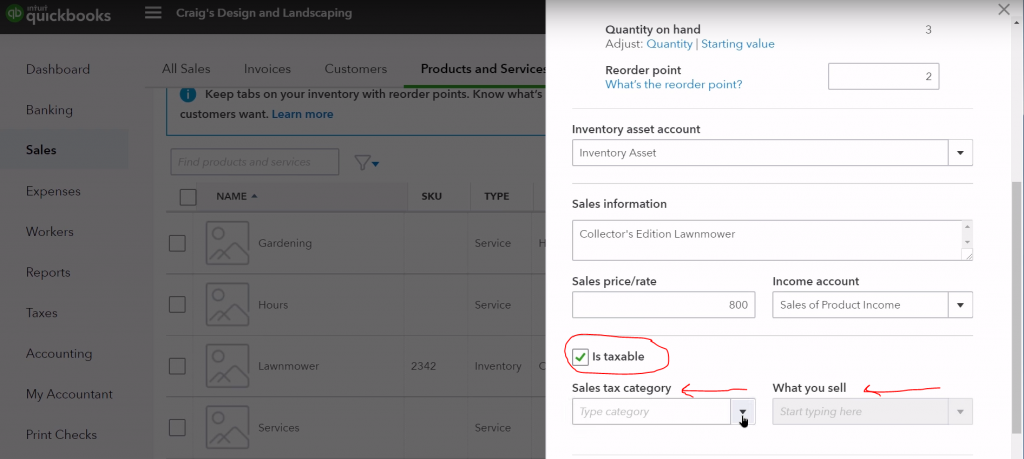
From the drop-downs, select the ‘Sales tax category’ and ‘What you sell.’
Click ‘Save and close.’
For Non-Taxable Companies or Customers
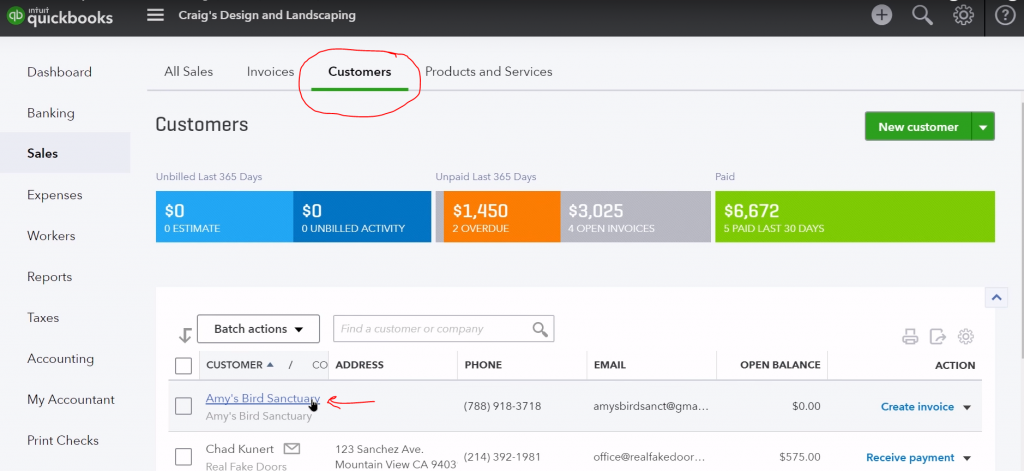
Click ‘Customers’ in the upper row, then click the name of the customer.
Select ‘Edit.’

Under Tax info, select ‘This customer is tax-exempt.’
You can also select the ‘Reason for exemption’ and write in ‘Exemption details.’
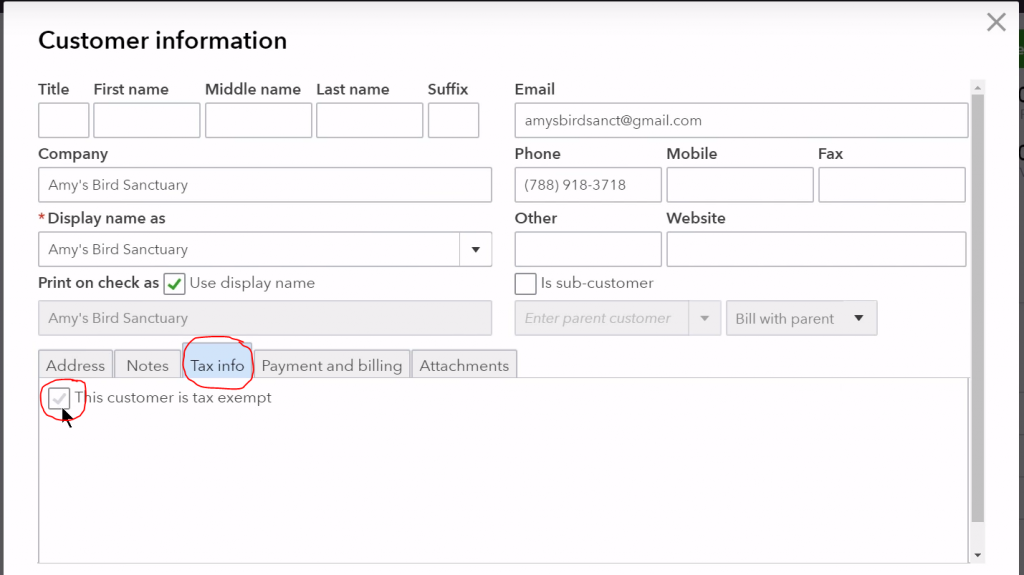
Click ‘Save.’
Connecting With Quickbooks
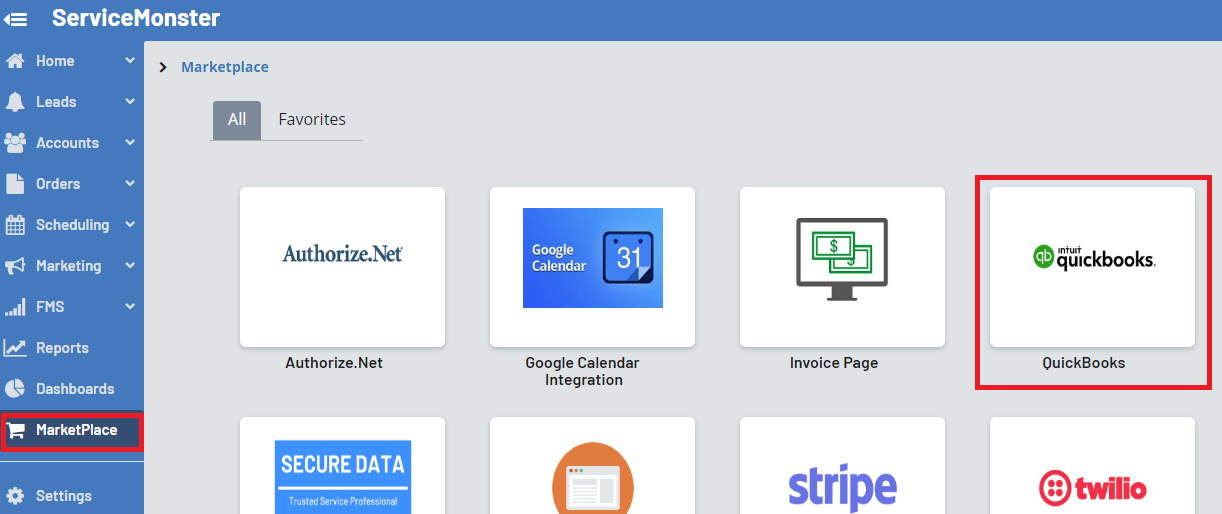
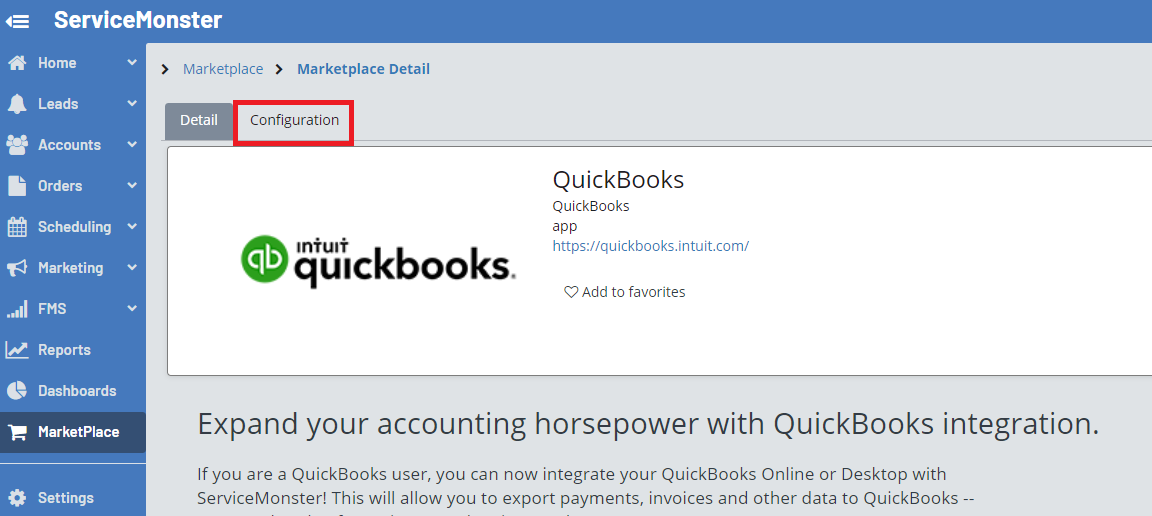
In ServiceMonster, go to the Marketplace and select the QuickBooks icon
From the QuickBooks page, go to the configuration tab.
In the Export Method, use the drop-down menu to select QuickBooks Online, then click Save.
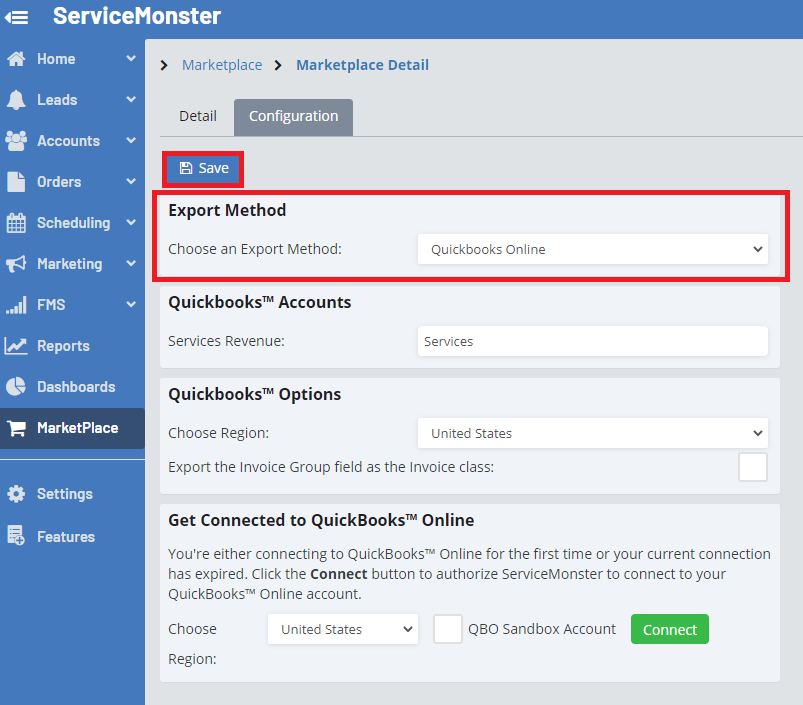
Then, click on the green "Connect" button that is within the "Getting Connected to QuickBooks Online" box.
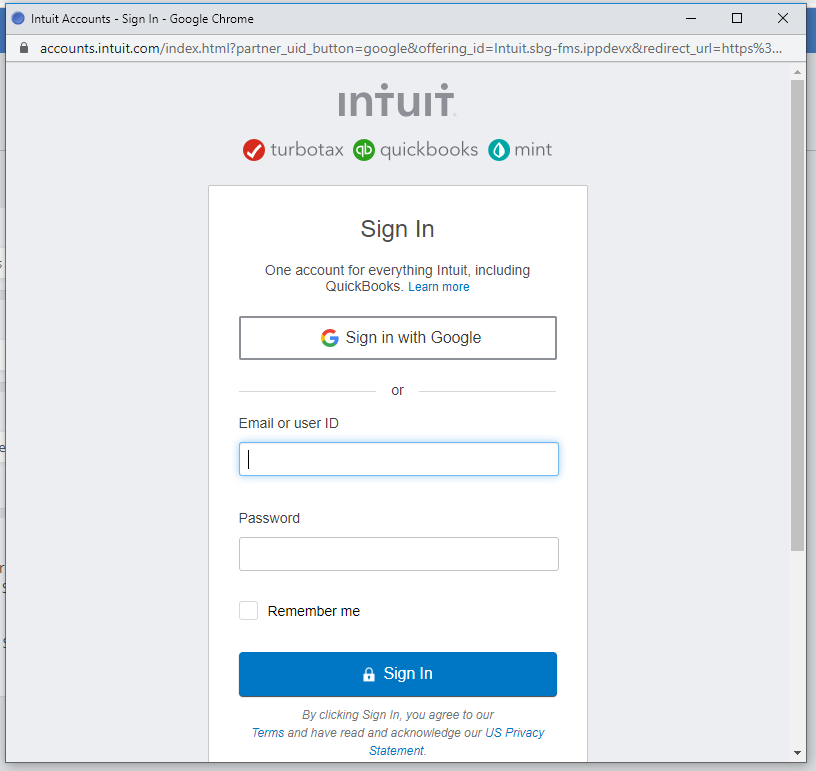
A box will appear for you to sign into Intuit and approve the connection between ServiceMonster and Intuit. Select yes.
Once the programs are CONNECTED, it will show “Connected” in green
Running The Export Wizard
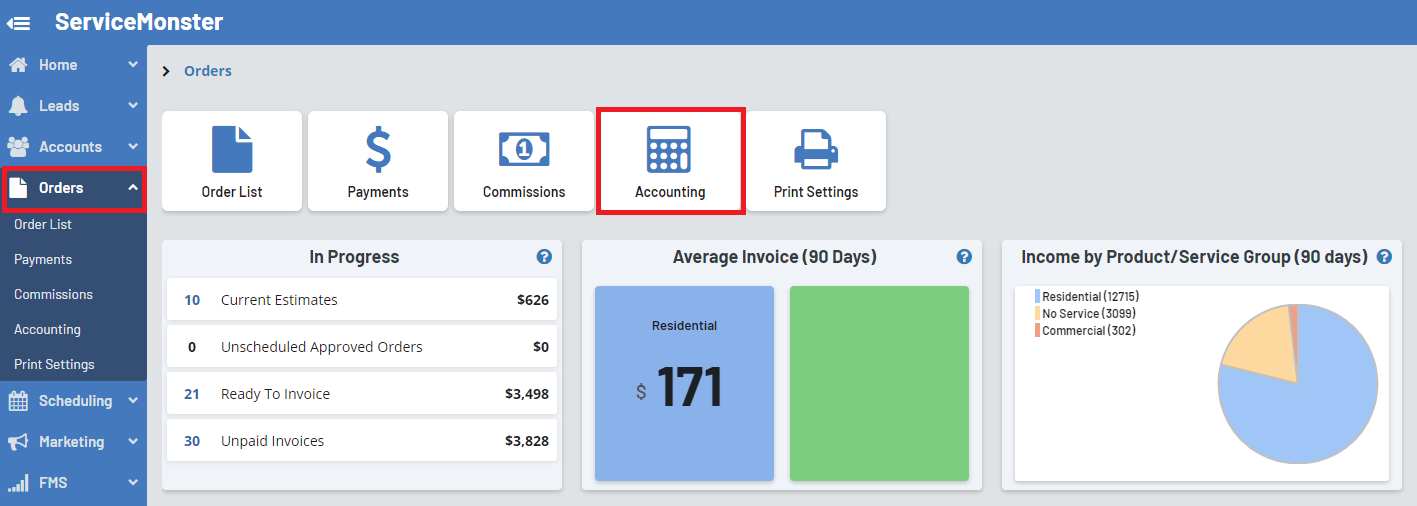
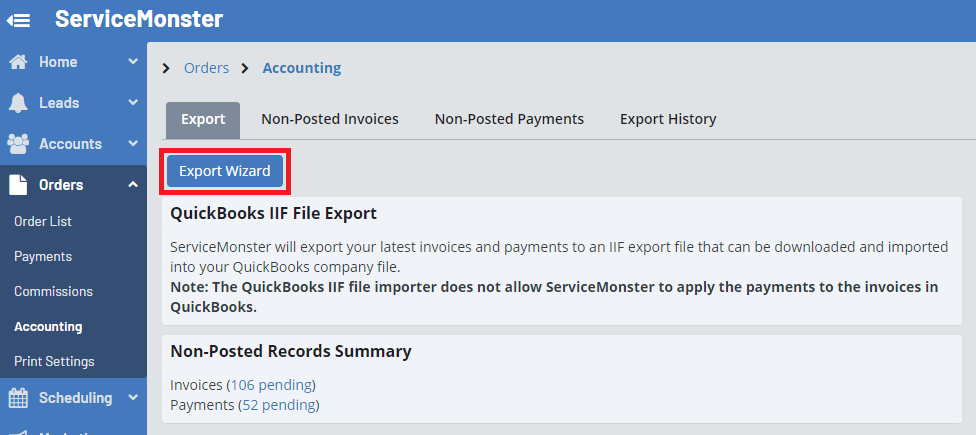
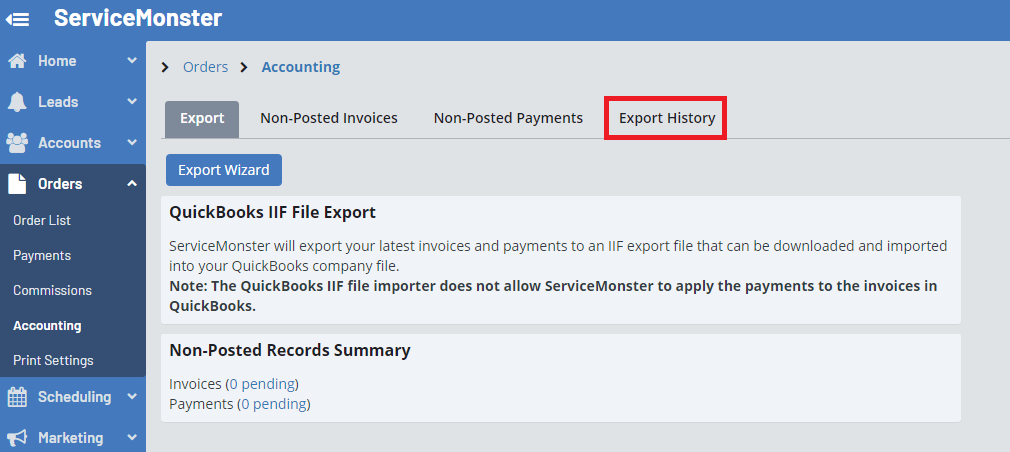
To run the Export Wizard, to go the Orders tab and select "Accounting"
Click on the "Export Wizard" button
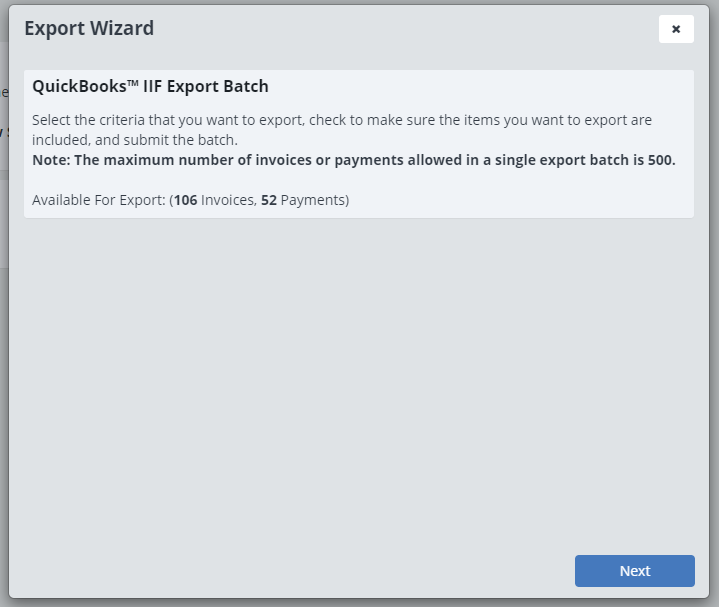
This will open up the Export Wizard, click next to get started.
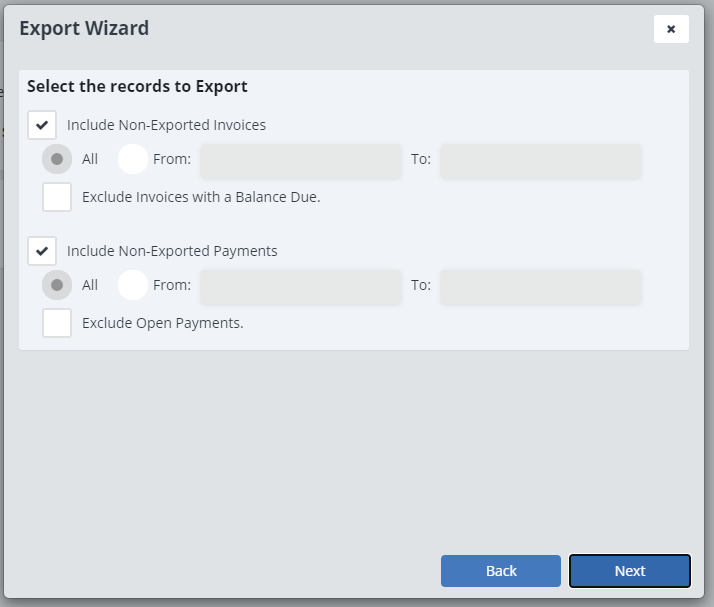
Select what records to export, you can choose if you want Invoices and or payments, and from what time period.
You will then see a list of all invoices and payments that can be moved over.
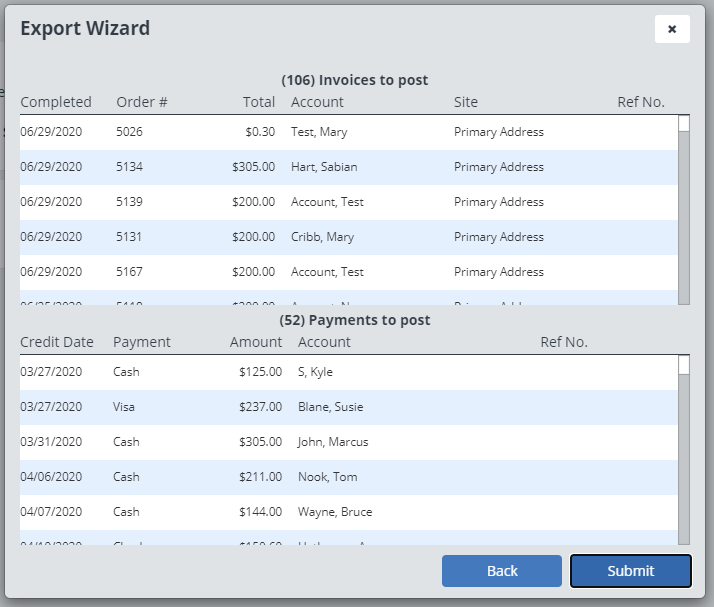
Click "Submit" to send these payments and orders to QuickBooks.
Go to the Export History tab to view transfer history, do rollbacks, or download/print an export file.
Open INTUIT/QuickBooks Online and select ACCOUNTING tab (left-hand side).
Click VIEW REGISTER (right side) under ACCOUNTS RECEIVABLE (about third from the top).
Just a note – payments should be applying to invoices automatically, but if a payment is sitting as a credit on an account, you’ll have to apply it to its invoice manually.
Setting Up Classes In ServiceMonster
Important Notes:
- What QuickBooks distinguishes as “classes,” ServiceMonster 6 distinguishes as “order group.”
- Make sure that you keep the name of your class and group the same in both QuickBooks and ServiceMonster 6. (Ex: If you name a class “Plants & Trees” in QuickBooks, be sure you name your group “Plants & Trees” in ServiceMonster.)
Go into the QuickBooks Page on the Marketplace and select QuickBooks.
Go to the Configuration tab.
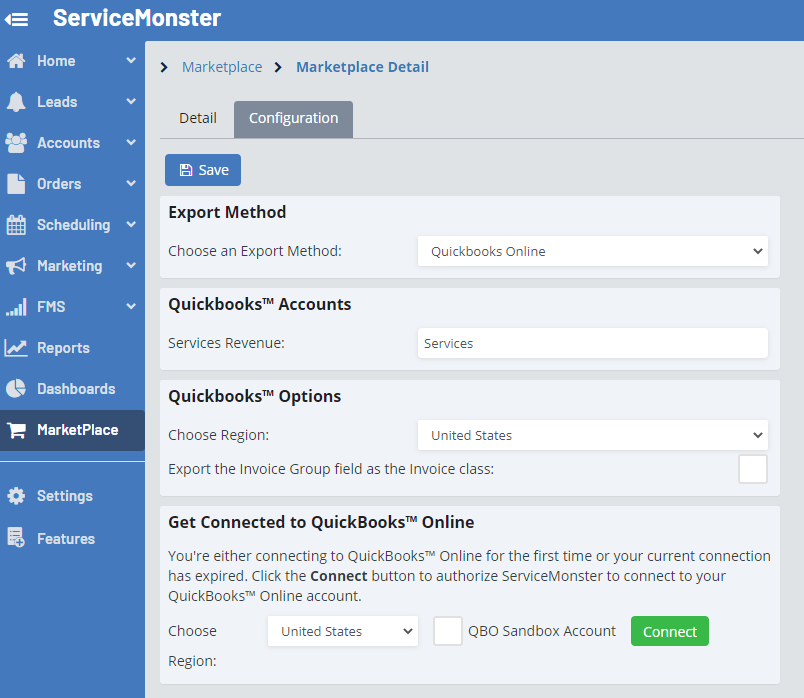
In the QuickBooks Options box, check the box next to "Export the Invoice Group field as the Invoice class". This enables ServiceMonster 6 to transfer your data to QuickBooks under a specific order group/class
Assigning Specific Order Groups
When creating an order, or looking at the detailed order page, look for the drop-down menu group.
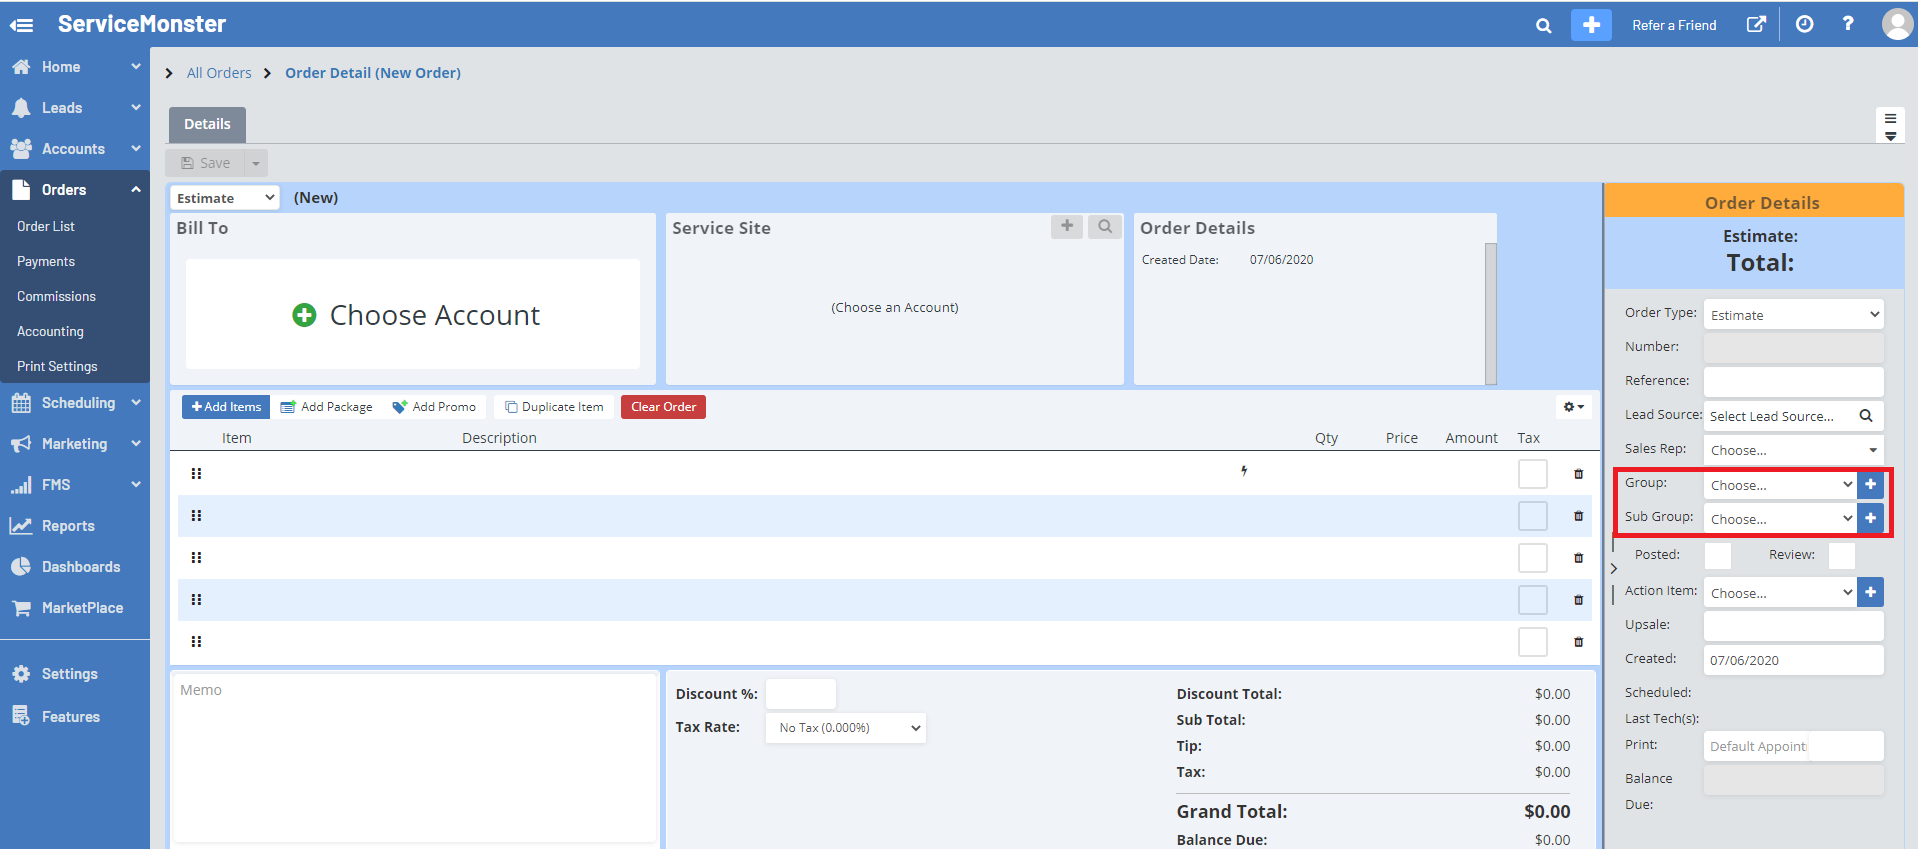
Select a group, or make one by clicking on the blue "+" next to the drop-down menu. Make sure that you keep the name of your class and group the same in both QuickBooks and ServiceMonster.
The Sub-Group option will also organize that order into a sub-class.
Click SAVE. The order will be categorized in that class when brought over into Quickbooks.