
Click on one of these links to hop to a specific section on this page:
Setting Up the Web Connector (QuickBooks Side, ServiceMonster Side)
Assigning Classes in ServiceMonster
In order for QuickBooks Desktop to connect with ServiceMonster, we will need to set up the Web Connector. This is a Quickbooks-provided program that allows communication between your copy of Quickbooks and ServiceMonster's server.
QuickBooks Side
Before setting up your web connector, open up your company’s QuickBooks file. Make sure you are logged in as an administrator and are in single-user mode.
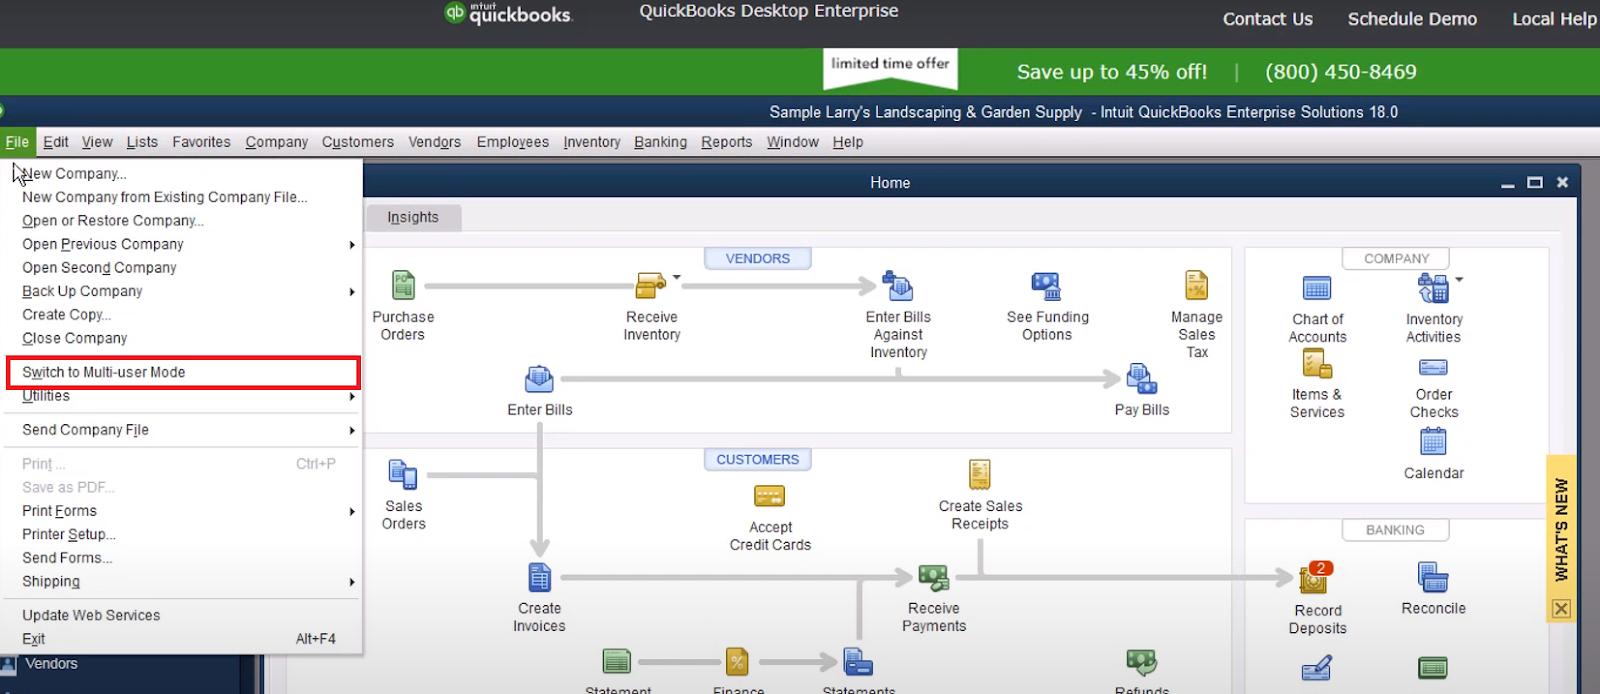
To check if you are in single-user mode: Go to “File” and scroll down.
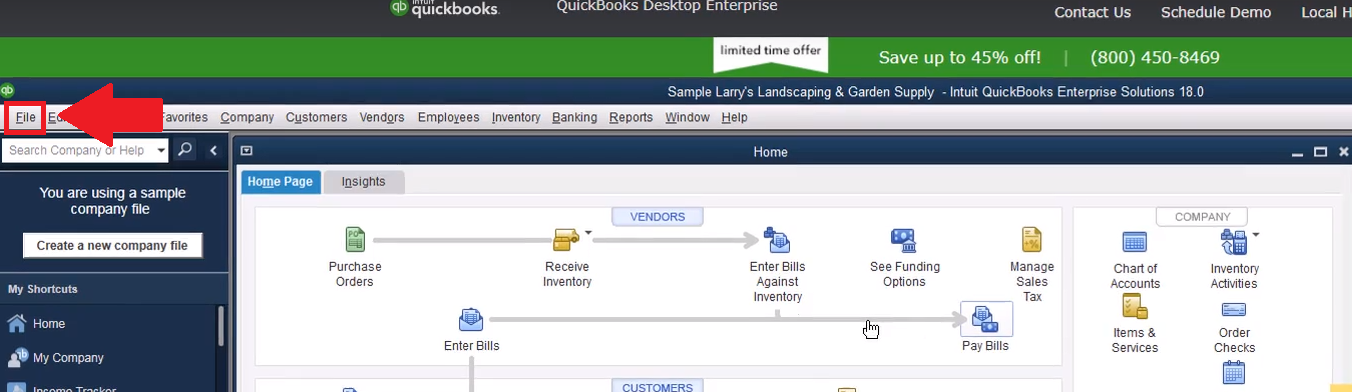
If you see “Switch To Multi-User Mode” that means you are already in “Single-User Mode”.
If you see “Switch To Single-User Mode” then you are in Multi-User mode. Simply click on the “Switch To Single-User Mode” to change it.
Select Specific Preferences:
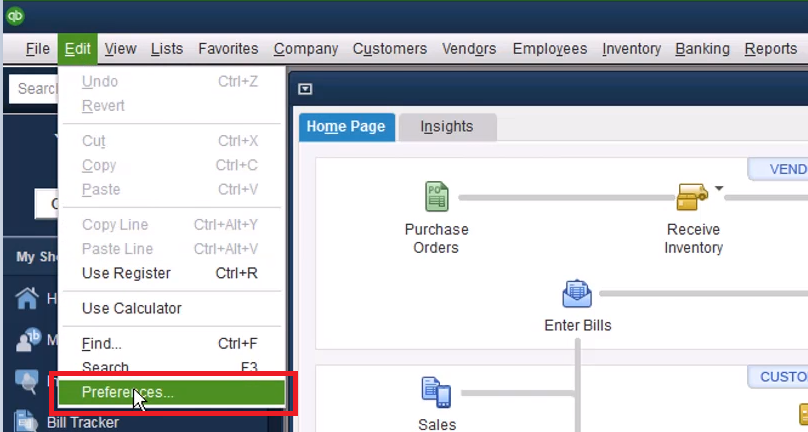
To begin, go to “Edit”
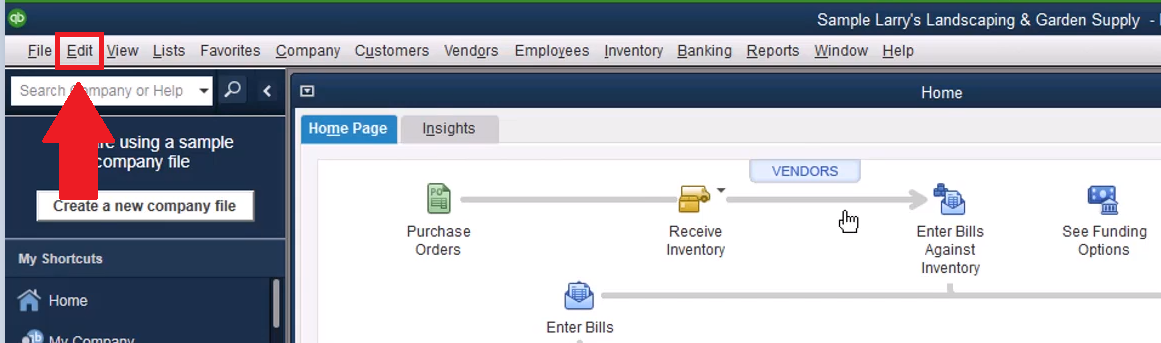
and scroll down and click on preferences.
In the preferences pop-up, make sure you are in “Sales Tax” (left-hand side). Select the Company Preferences subtab (top).

Look for where it asks you if you charge sales tax. You will want to change that option to “Yes”
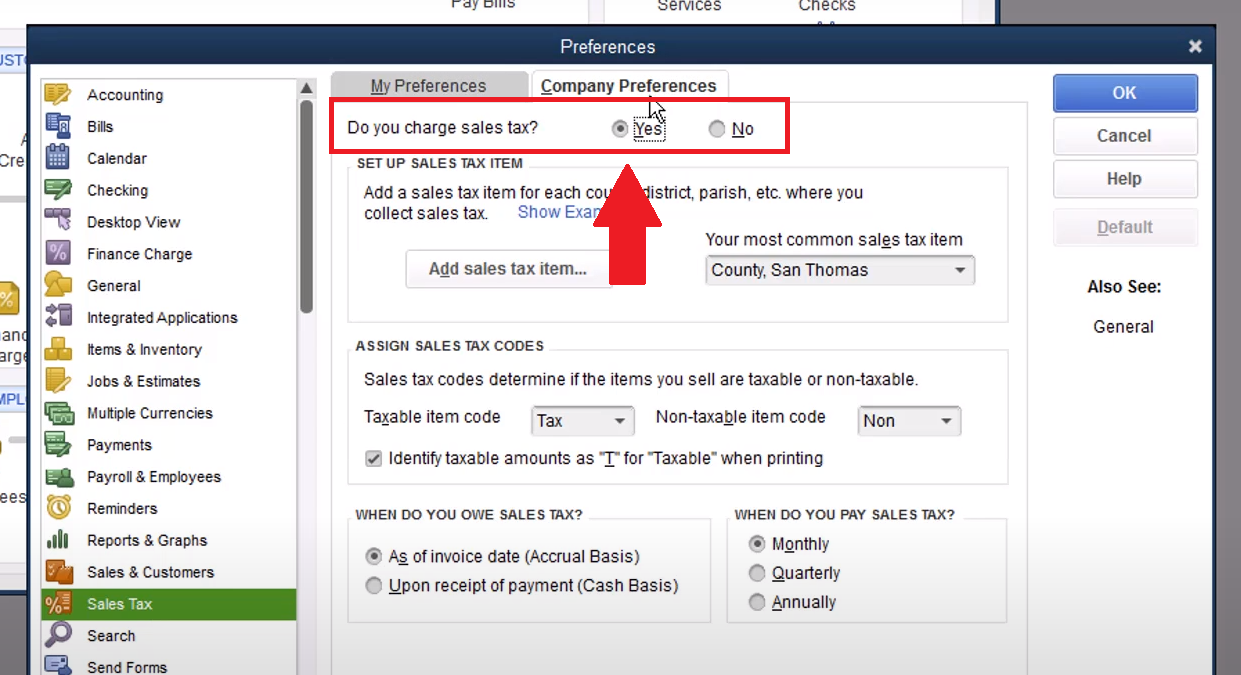
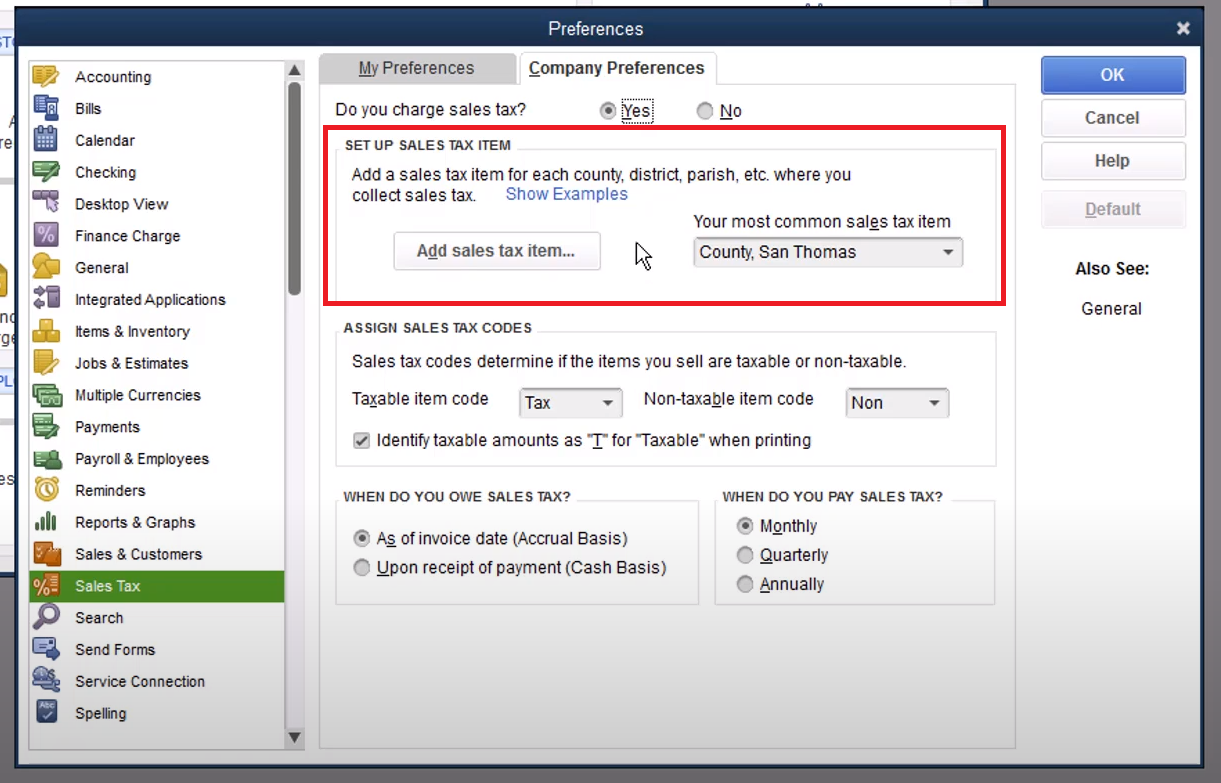
In the box directly below, select your most common sales tax item or create a new one.
Select OK.
If you do not charge sales tax:
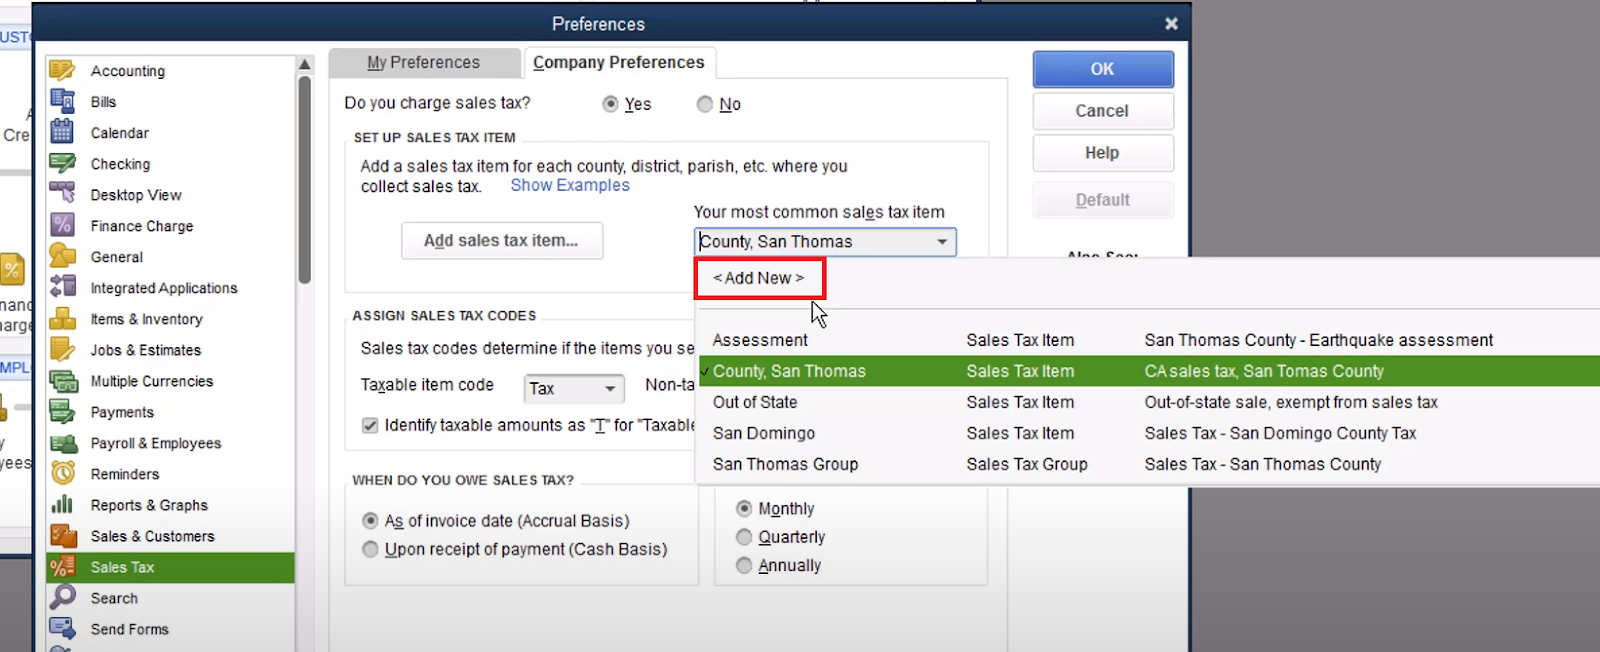
Even if you do not charge sales tax, mark “Yes” where it asks “Do you charge sales tax”.
Then, in the drop-down menu for “Your Most common sales tax item” select “< Add New >”
In the “New Item” window that pops up, leave the Tax Rate at 0.0%
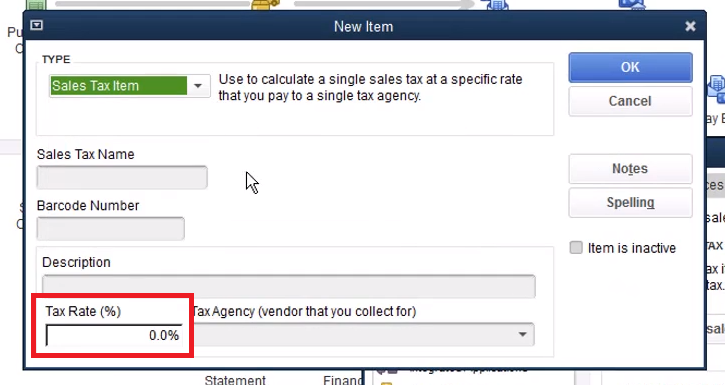
Give it a name, and click okay to create that Sales Tax Item. Select that as your most common sales tax item.
You are now ready to go to ServiceMonster to set up your Web Connector, just be sure to leave QuickBooks Desktop open on your computer.
ServiceMonster Side
Leave your company's QuickBook file open.
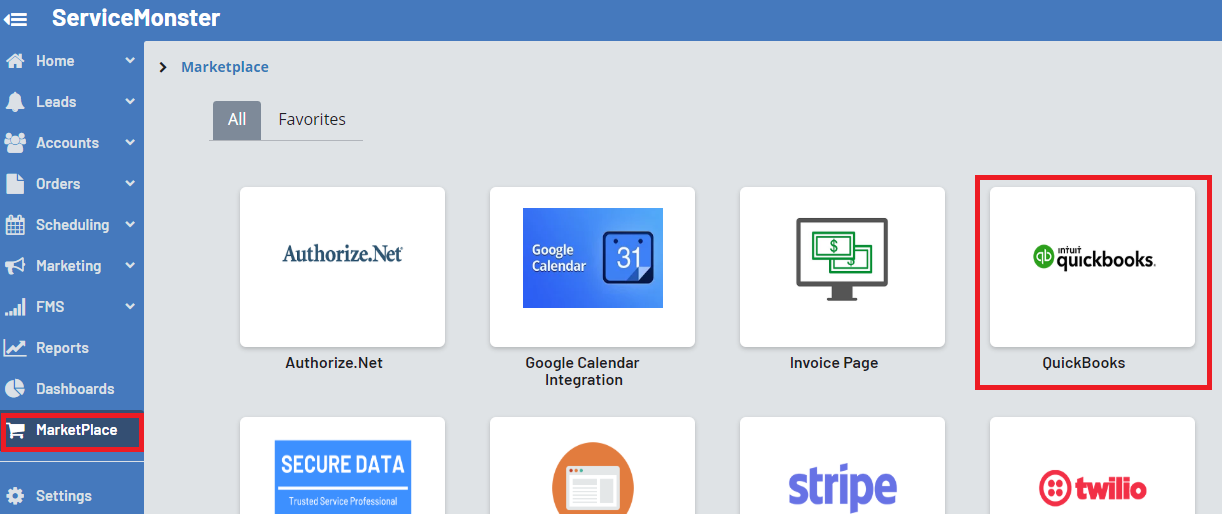
In ServiceMonster, go to the Marketplace, and click on QuickBooks.
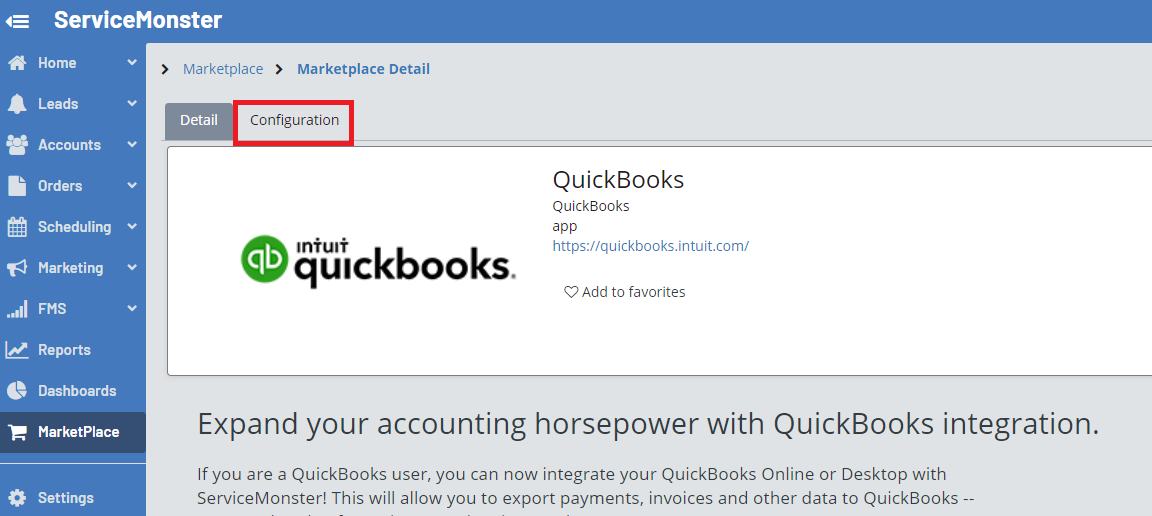
Click on the Configuration tab.
In the drop-down menu, pick an export method, for QuickBooks Desktop we will the use “QuickBooks Web Connector”. Click “Save”
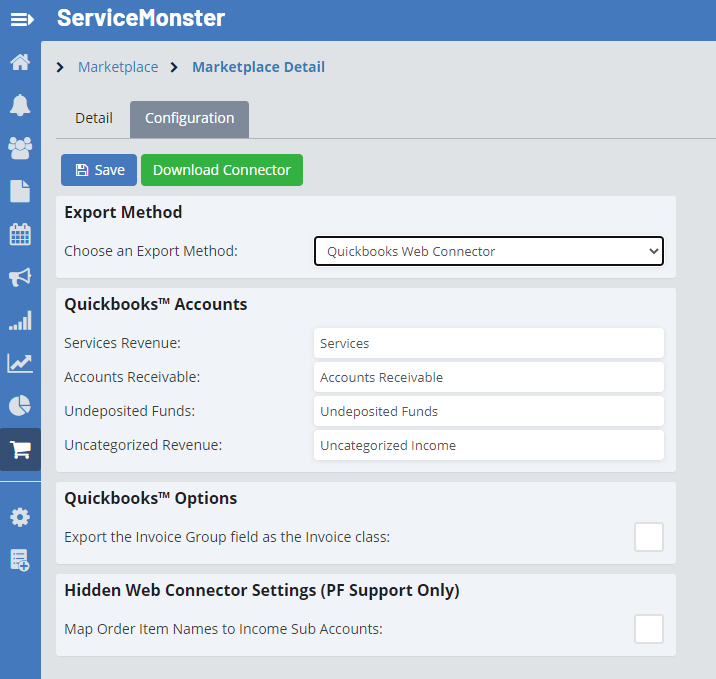
To the right of the “Save” button, you will see a "Download Connector" button, click on it to download the SMQB Service.
Open the SMQB Service file that downloads onto your computer.
Couple notes about SMQB Service file:
This file can be saved or opened at any time
If you choose to save it, save it in a memorable place so you can open it later
If it doesn’t open automatically, check your DOWNLOADS file on your desktop.
SMQB Service
Once SMQB Service is open, some security messages will appear.
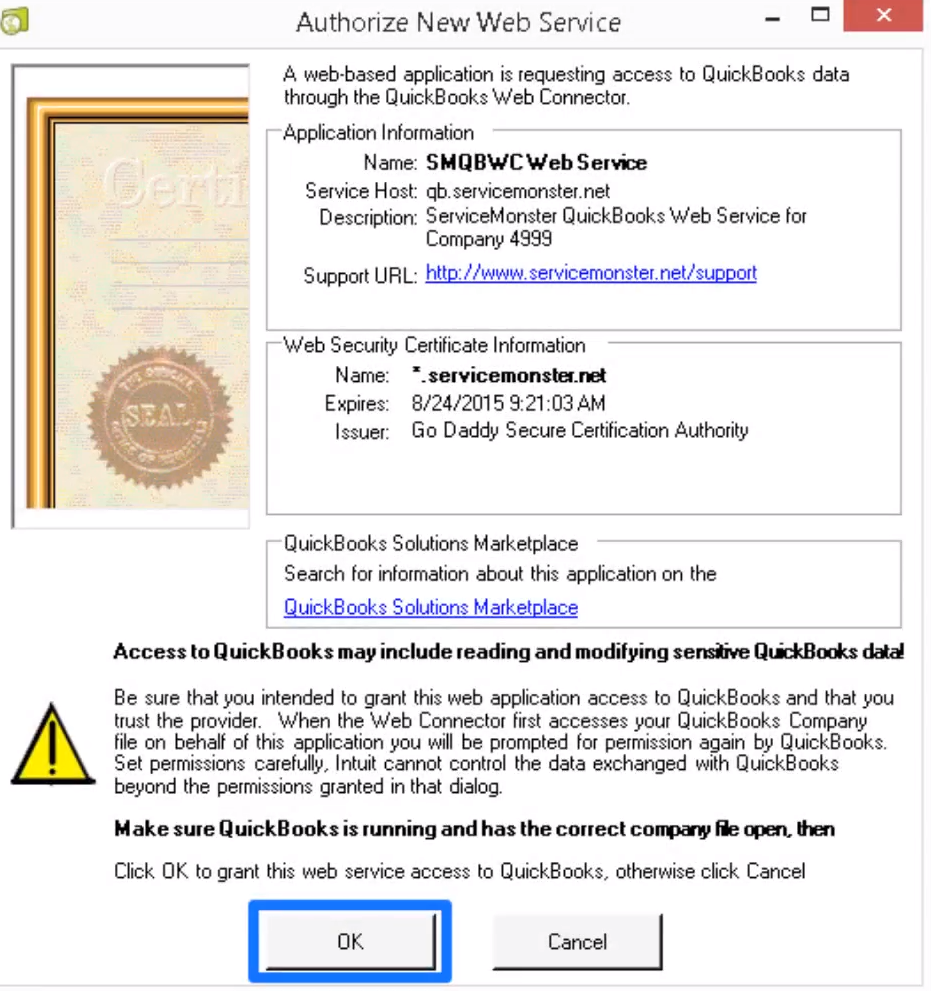
The first one will ask you to Authorize a New Web Service. Its purpose is to give the web connector permission to communicate between QuickBooks and ServiceMonster. Click the OK button.
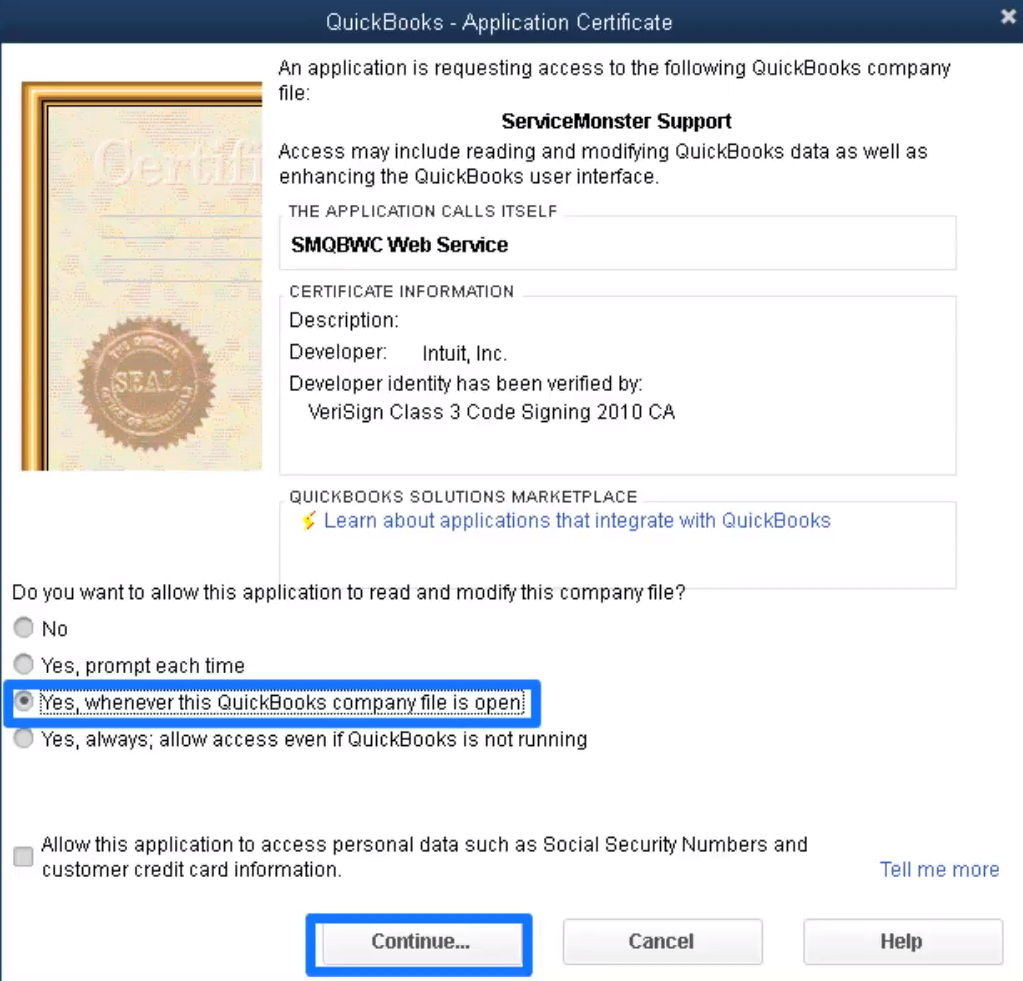
Then, you will see the Application Certificate security message. Select the 3rd option "Yes, whenever this QuickBooks company file is open", then click continue.
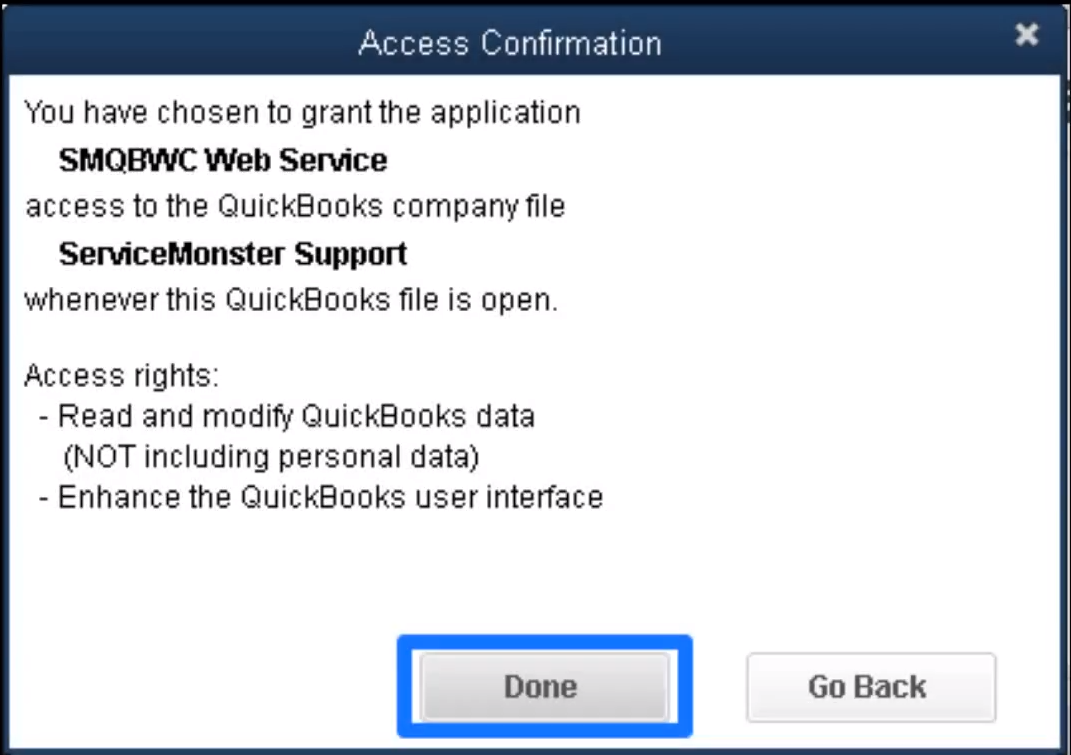
The last message is the Access Confirmation message. This security message is simply confirming web service communication between QuickBooks and ServiceMonster 6. Select “Done”.
After you click "Done" The QuickBooks Web Connector utility screen will appear.
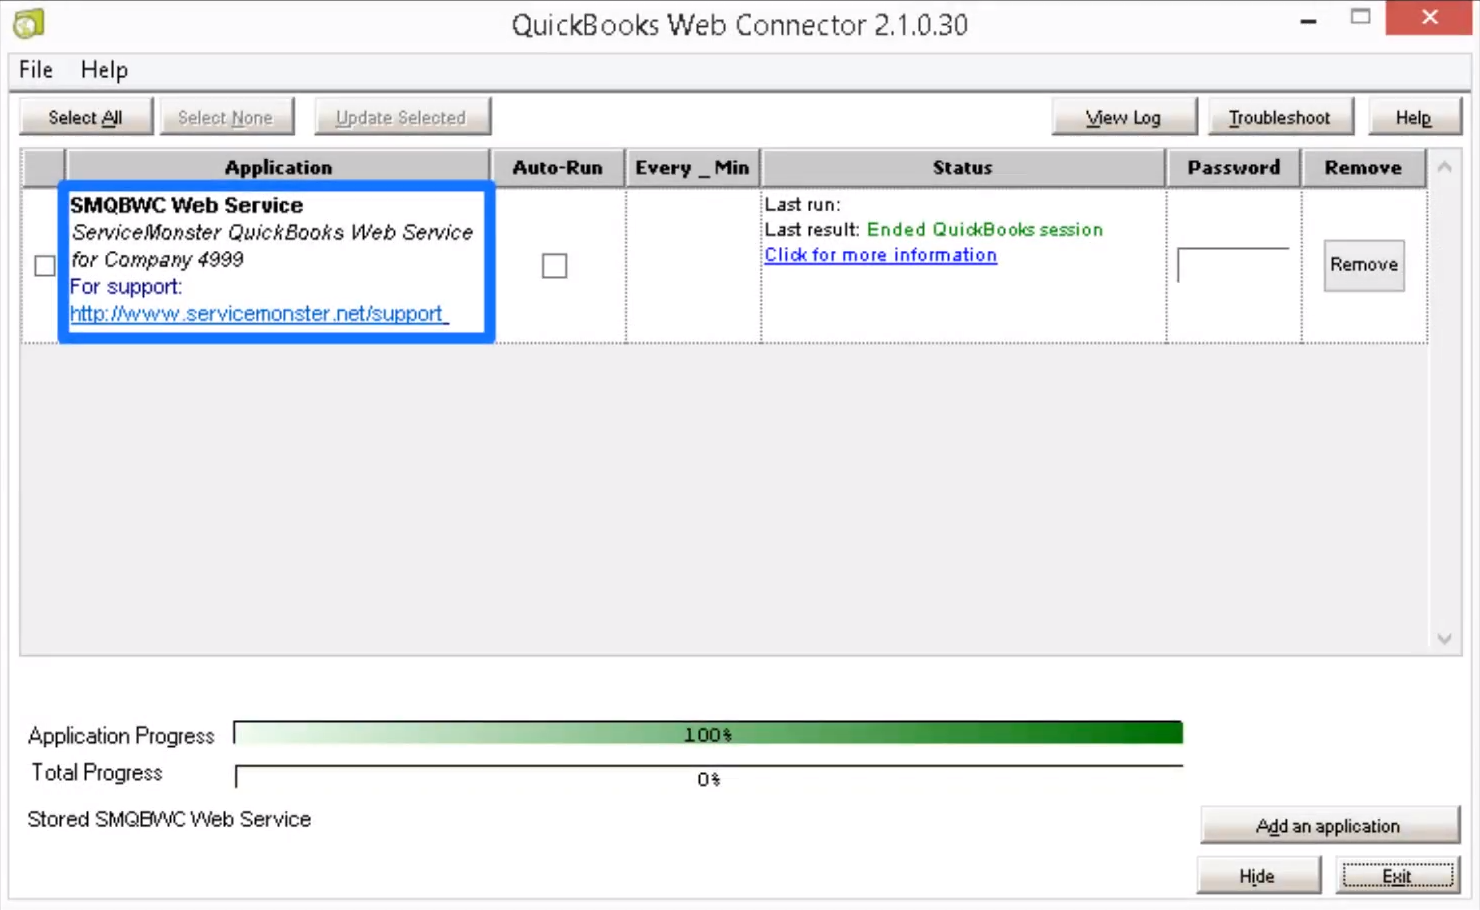
Check the “SMQBWC Web Service” box, In the “Password” box (right-hand side), input your ServiceMonster password, the same password you used to download this file. Then click “Enter” on your keyboard.
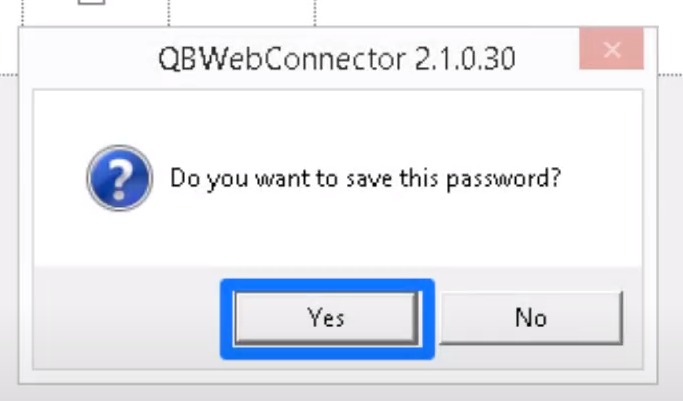
A box will appear asking you if you want to save this password, select “Yes”
The Web Connector is now set up! We can now prepare to run it.
Viewing Pending Transactions
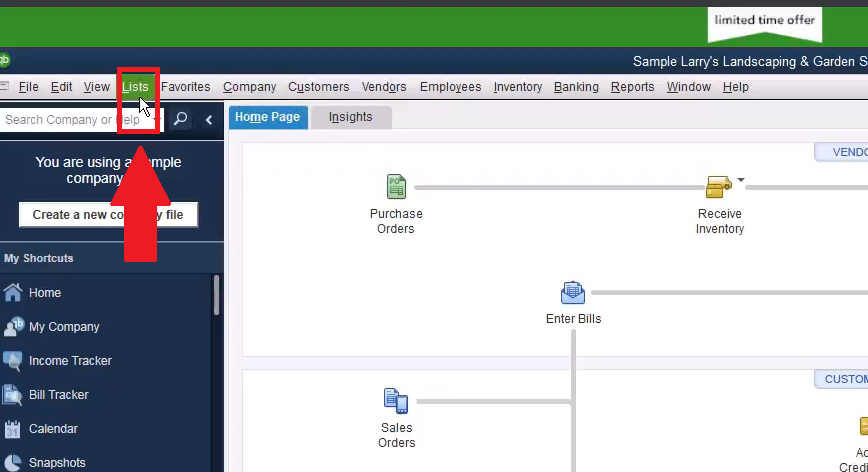
In QuickBooks, go to “Lists”
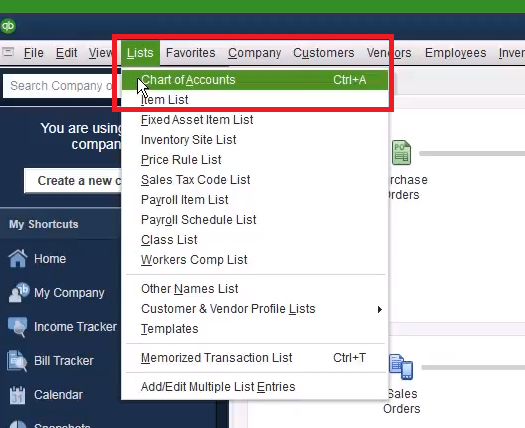
Select “Chart of Accounts”
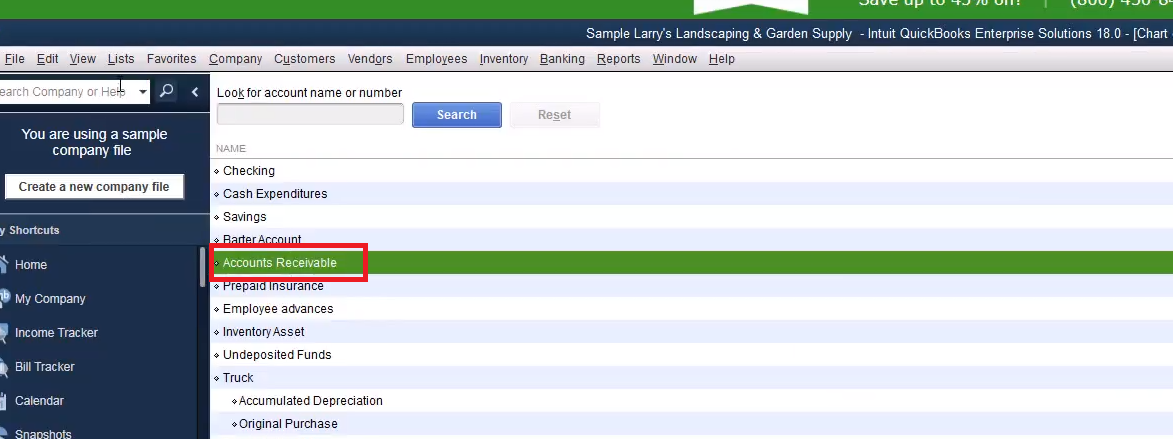
Then double click on “Accounts Receivable”
This is a list of all the Payments and Invoices that have transferred from ServiceMonster. Notice that Payments and Invoices are listed separately.
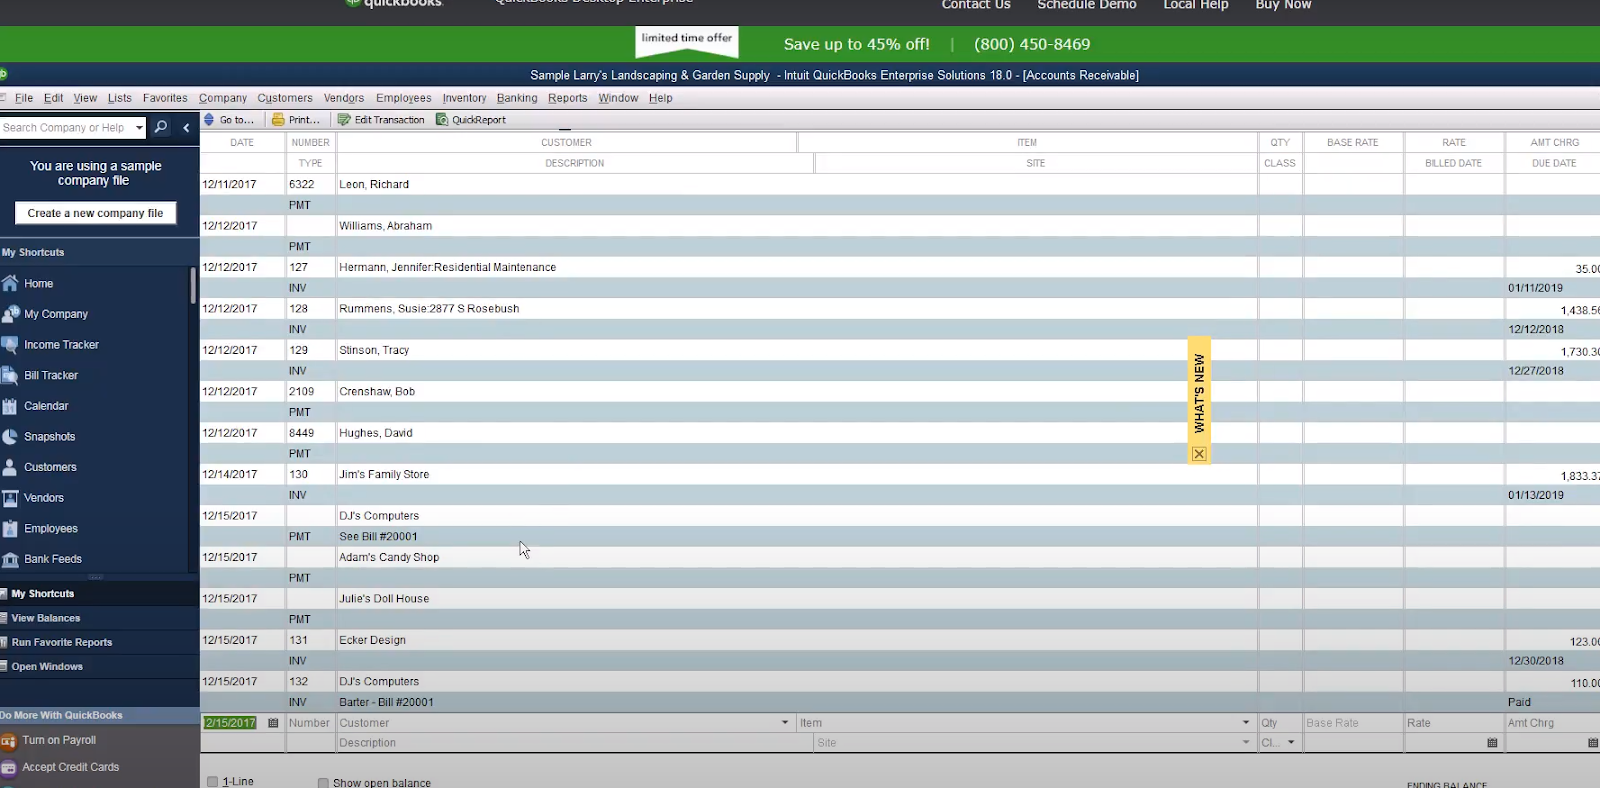
If you transfer invoices with the Web Connector, payments will be applied automatically.
Cleaning Up Your Orders
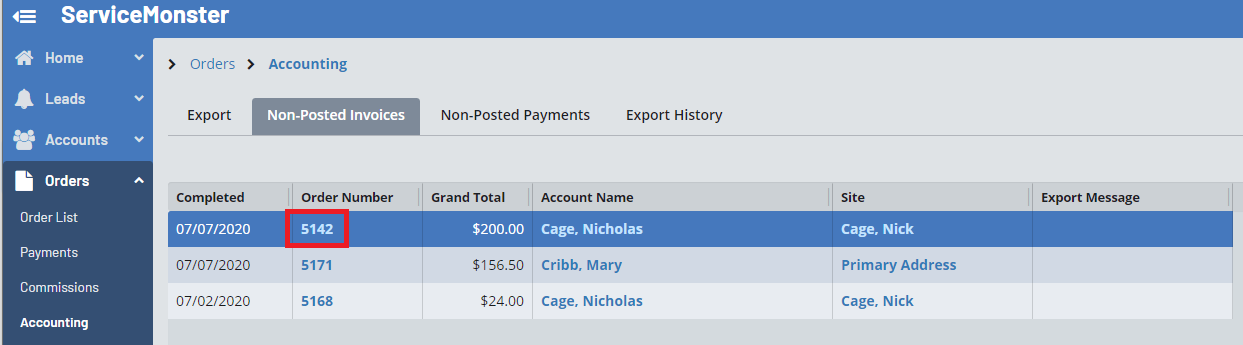
In ServiceMonster, select orders in the Navigator, then select accounting.

In the subtabs “Non-Posted Invoices” and “Non-Posted Payments”, you can view what invoices and payments are about to be sent over to QuickBooks.
In Non-Posted Invoices:
If there is an invoice you don’t want to send to QuickBooks quite yet, select the order number.
Once inside the order, go to the dashboard on the far right-hand side of the screen. Check the “Posted” box and click “Save”
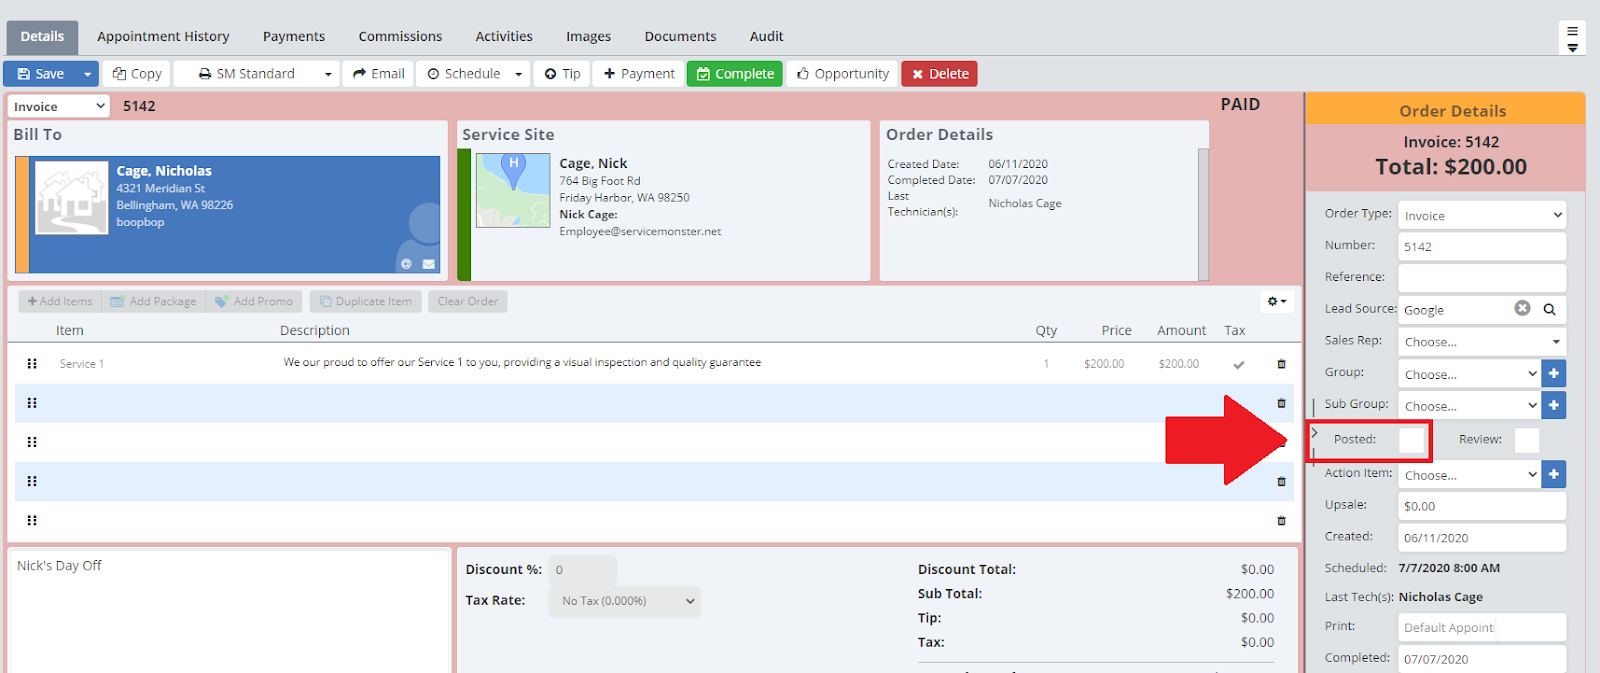
This will tell the system to not bring it over into QuickBooks.
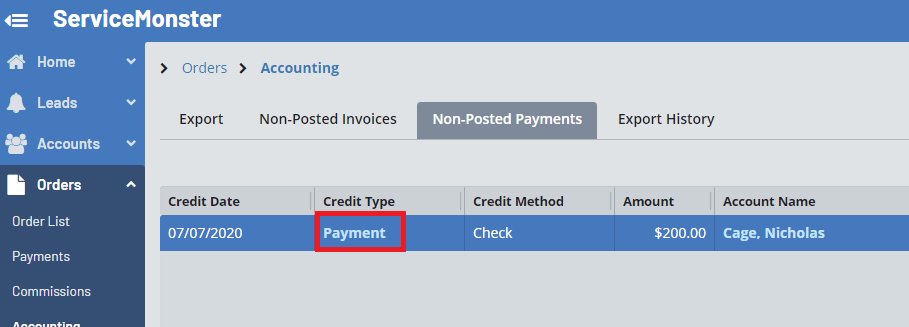
In Non-Posted Payments
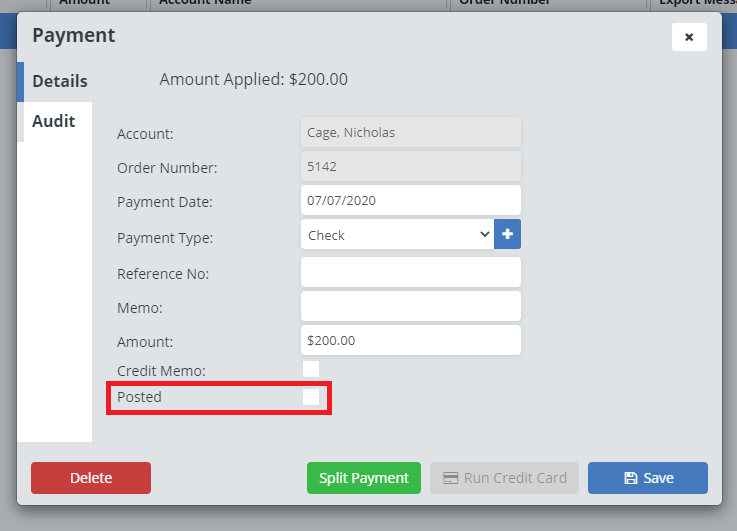
If there is a payment you don’t want to send to QuickBooks quite yet, select the word “Payment” under the column “Type”.
Check the “Posted” box and click “Save”.
Running The Web Connector
Make sure QuickBooks is open.
On your desktop, search for and open your previously downloaded web connector file.
The QuickBooks Web Connector will open:
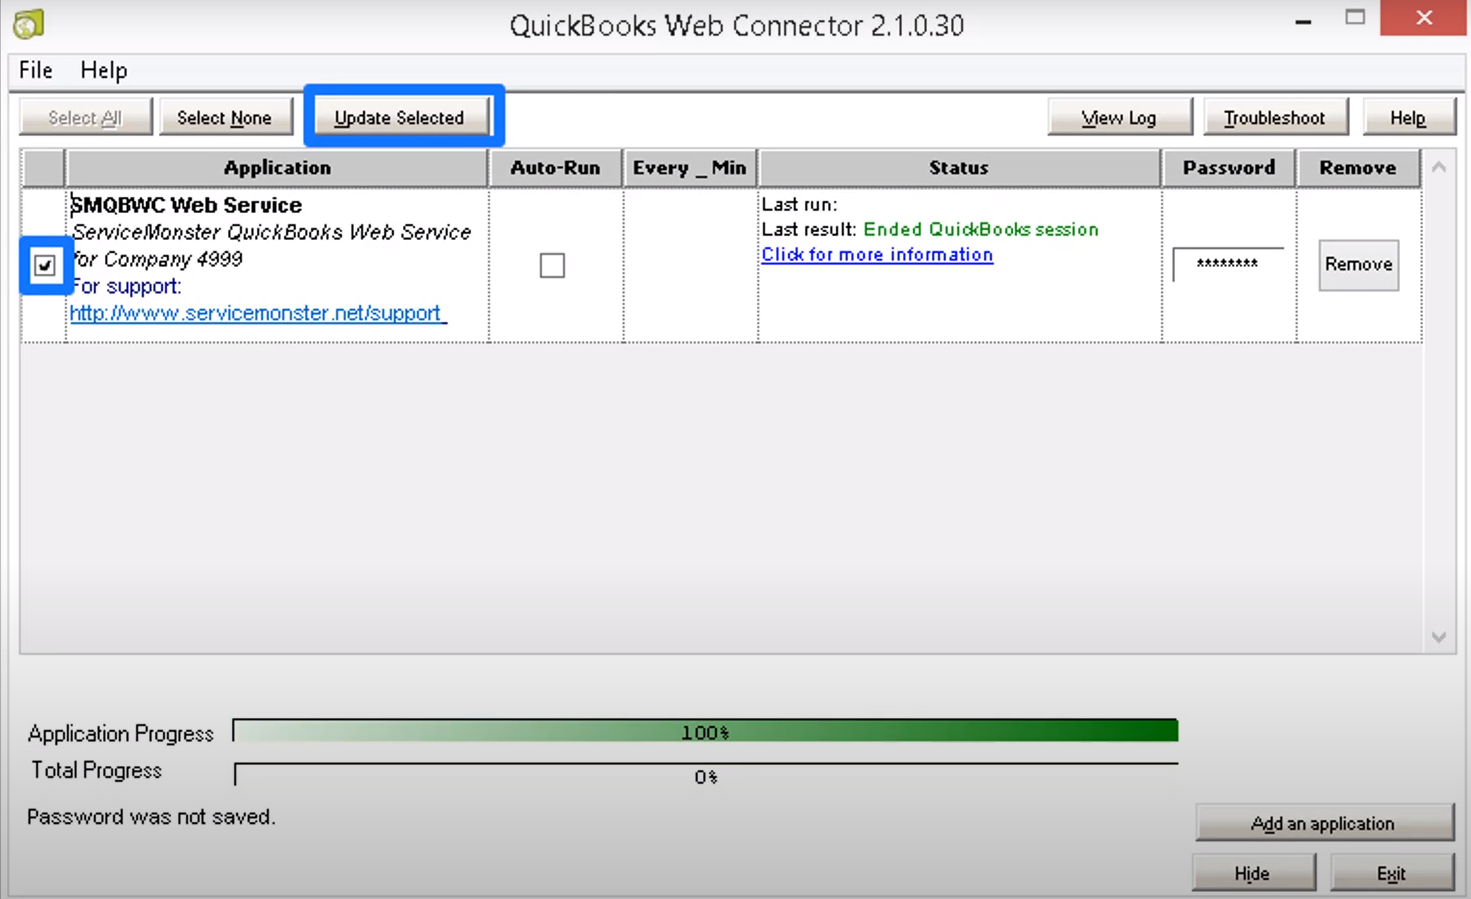
Click “Update Selected”
All your payments and invoices will seamlessly transfer to QuickBooks!
What’s being transferred to QuickBooks?
Accounts: The transfer will add to an existing account or create a new one if it doesn’t already exist
Account Information: Can include names, addresses, phone numbers, e-mail addresses, etc.
Invoices: Order numbers, billing addresses, references, shipping or site addresses, terms (due upon receipt, due in 30 days, etc.), tax rates, line-item details, discounts,
Applies Payments To Orders: Payment date, reference number, total amount, payment method, account association.
Line Items: Any new line items (Products or Services) created will be transferred over.
Tax Rates: Any new tax rates you use will be transferred over.
Assigning Classes in ServiceMonster
What QuickBooks distinguishes as “classes,” ServiceMonster distinguishes as “order group.” Make sure that you keep the name of your class and group the same in both QuickBooks and ServiceMonster. (Ex: If you name a class “Plants & Trees” in QuickBooks, be sure you name your group “Plants & Trees” in ServiceMonster.)
Go to the Marketplace and click on “QuickBooks”
Go into the “Configuration” tab
Check the box next to “Export the Invoice group field as the invoice class:”
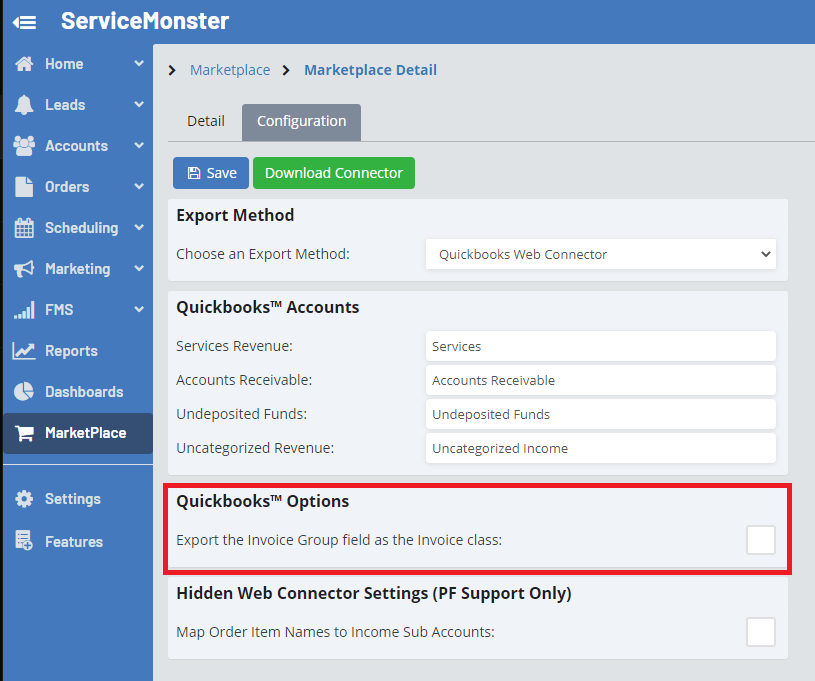
This enables ServiceMonster 6 to transfer your data to QuickBooks under a specific order group/class
Assigning Specific Order Groups
To assign an order to a group, go to the page for that order.

Find the “Group” and “Sub-Group” options on the right-hand side of the screen. Any groups will be brought over as a “class”, and the “Sub-Group” will be a “Sub-Class”.
To create new groups and subgroups, simply click on the blue “+” next to the list, type in the new option, then click the green checkmark.