
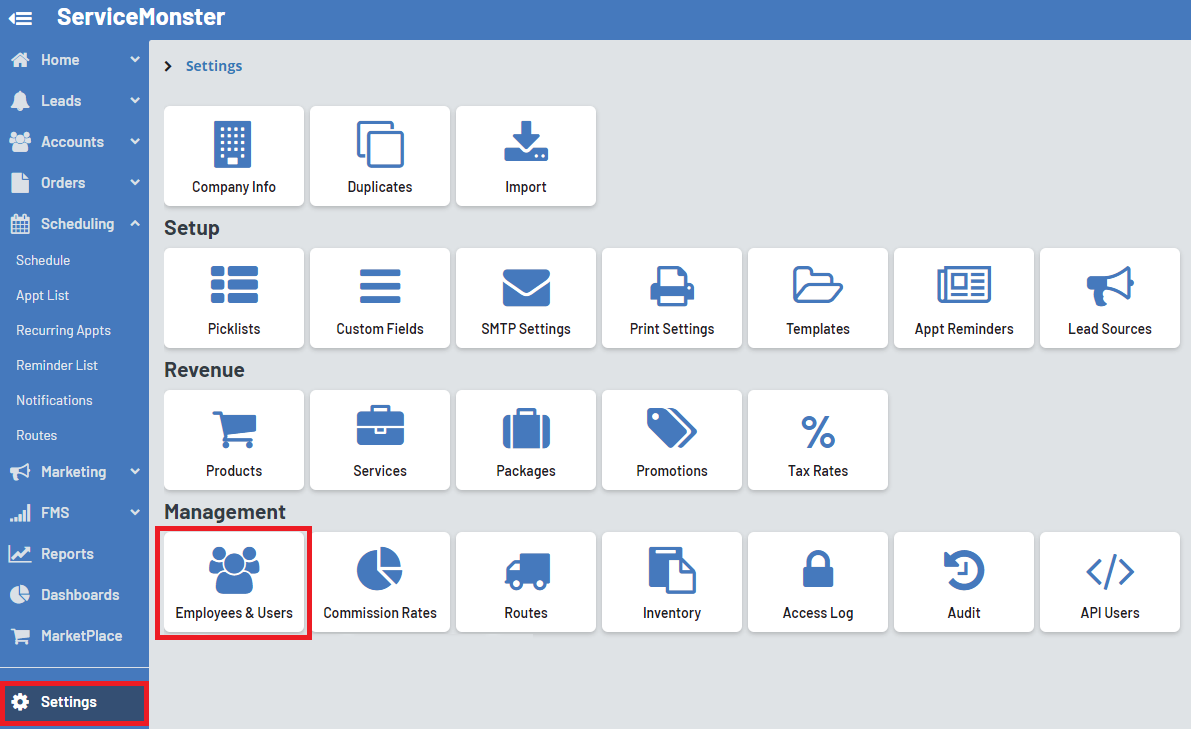
To find the Employees and users page, click on the settings icon at the bottom of the left-hand side menu, then click on the "Employees & Users" button.
Here you will be able to see a full list of your employees and users. To edit or view the details of a current employee or user simply click on their first name.
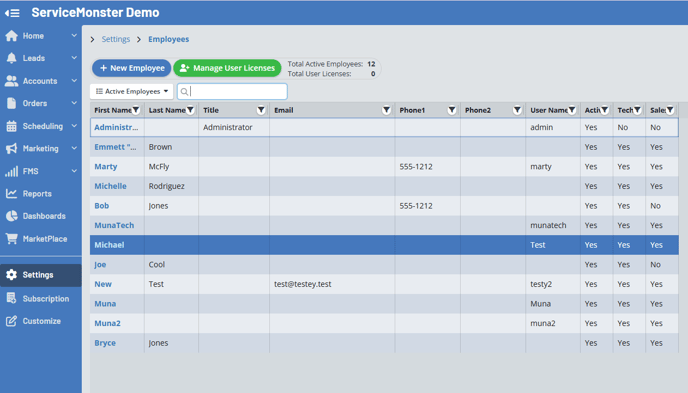
To add in a new employee, click on the "+ New Employee" button. If this is greyed out, you may be out of user licenses. Learn more here: SM Licenses
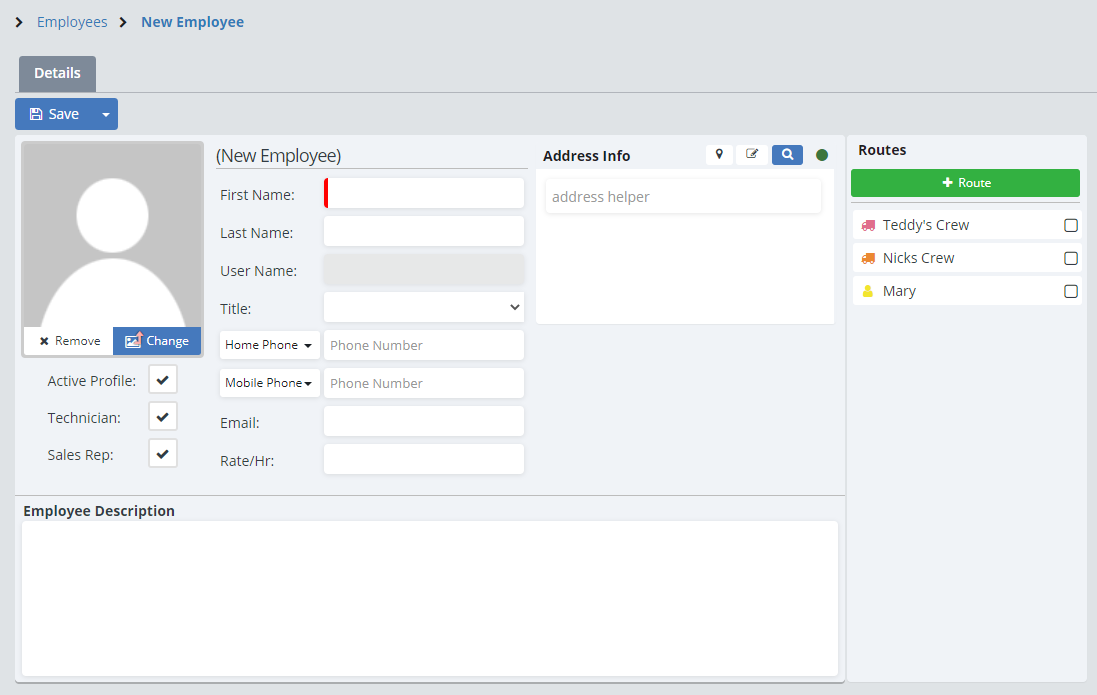
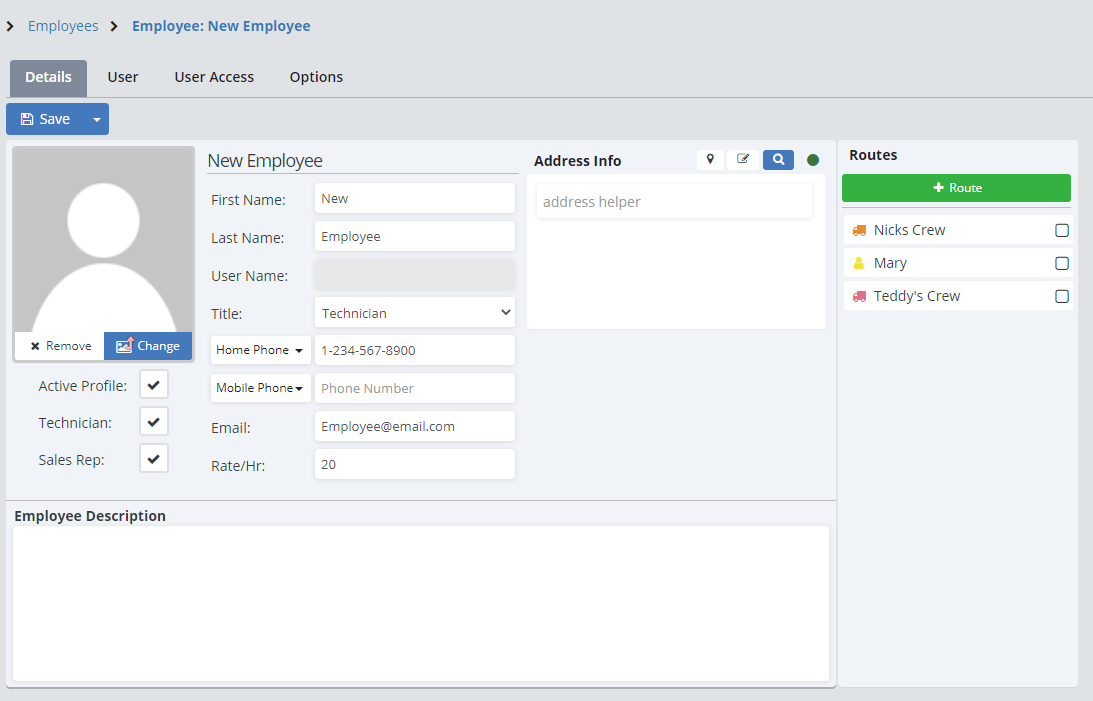
The blank new employee screen. Here you can create a new employee. We'll break down the various sections of the screen below!
Employee Profile/Type
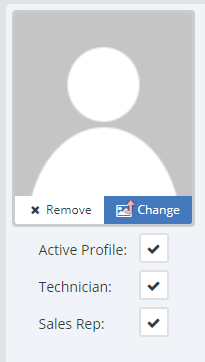
Photo: Click on the "Change" button to upload a photo. To remove a photo, click on the "Remove" button. This photo can be used on Email or SMS templates so clients can know who is working with them.
Active Profile: If they are an active employee or user you will want this box to be checked. If they at any point leave the company, you can uncheck this box to remove them from the active employee list. We do not have a "delete" feature for employees as we need their history to be accurate.
Technician: If they are a technician you will want to check this box.
Sales Rep: If they are a sales rep you will want to check this box. This will allow them to be an option for when you pick a sales rep for an order.
Employee Information
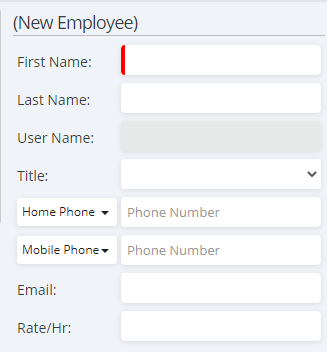
First Name: The first name of the user.
Last Name: The last name of the user.
User Name: Once you have created a user name for this employee, that will show up here.
Title: Add a title to the user's name. NOTE: This is NOT the user's permission level, just a label. The permission level is set on the User tab by an Administrator.
Home Phone: The home phone number associated with the user.
Mobile Phone: The mobile phone number associated with the user.
Email: The email address associated with the user. When emailing route packets, if a tech with an email address in the system is assigned to a route, this email will be used to send the route packet to.
Rate/Hr: The hourly rate of the employee. This information can be used for your own reporting purposes.
Employee Address
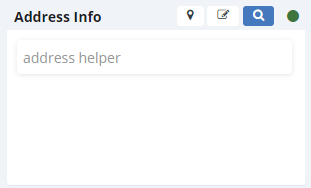
Address: Here you can enter that employee's address.
Assigned Routes
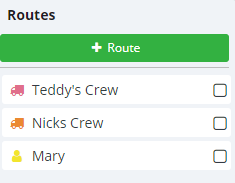
Routes: Here you can assign that employee to a preexisting route by simply checking the box next to the route name, or you can create a new route by clicking on the green "+ Route" button.
Employee Bio
Employee Description: Here you can add in a description of the user.
Once you have filled in all that information and click save, the page will update and four new tabs will appear, Details, User, User Access, and Options.
Details:
Here you can view your employee's details and make edits as needed.
User: (Viewable by Administrators only)
Here you can create the username and password for your employee to use when logging into ServiceMonster.
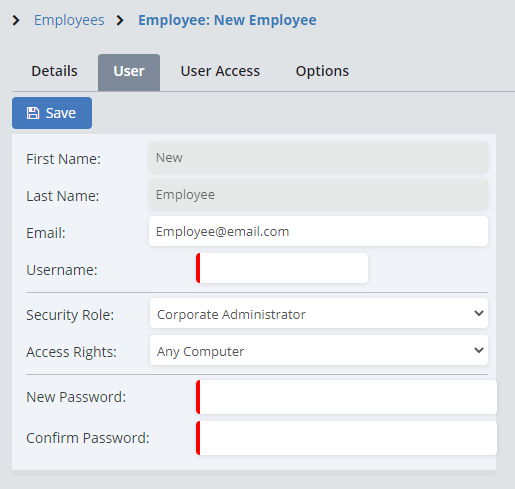
First Name: The first name of the employee will automatically be here.
Last Name: The last name of the employee
Email: The email address for the employee, this will be automatically filled in if you entered an email address on the details page. This email will be used for appointment reminders and route packets.
Username: Here you will enter the username of the employee, this is what they will use to sign into ServiceMonster with. You will not be able to change this later.
Security Role: Here you can choose the security role of the employee. That defines what they can or can not do or have access to within ServiceMonster. For details on what each Security Role can do, click here.
Access Rights: Set to Deny Access to prevent them from logging in.
New Password: Here you will enter the password the employee will use to log into ServiceMonster.
Passwords require: Minimum 6 character, 1 uppercase letter, 1 lowercase letter, 1 number
Confirm Password: Enter the same password as above.
Once you click "Save" their Username and Password will be set. You will be able to reset their password if needed, but the Username will stay the same.
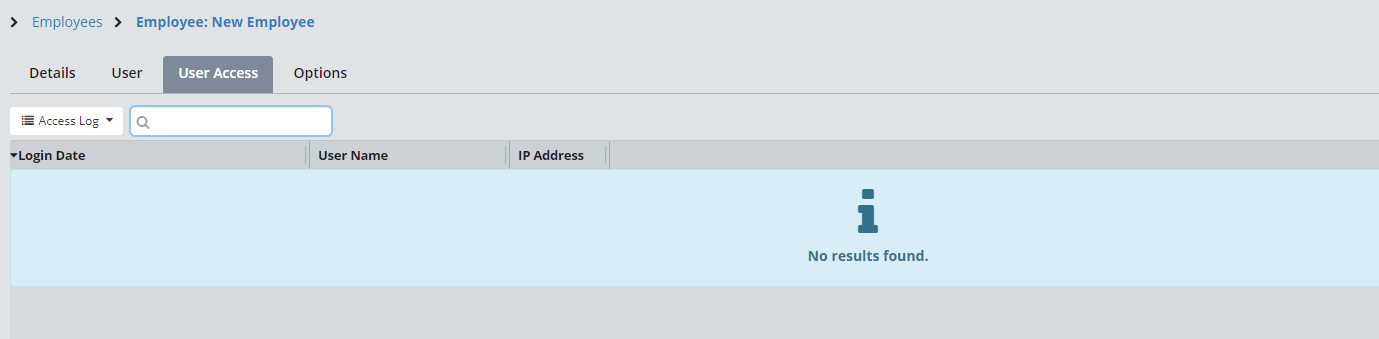
User Access:
Here you can view a log of your employee's logins for ServiceMonster 6.
Options:
Here you can adjust options with the employee, including appointment notification preferences and commissions.
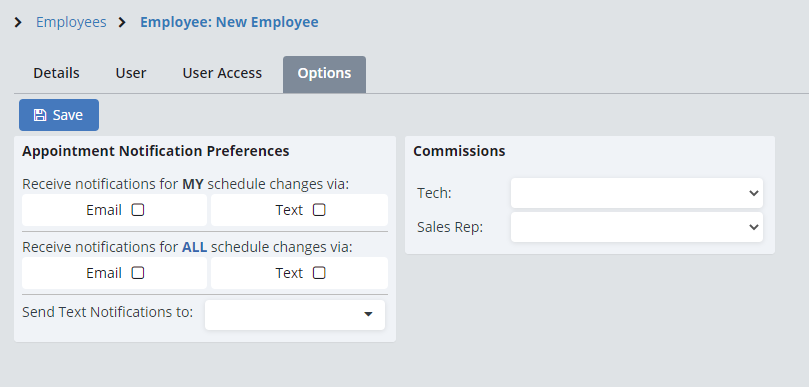
Appointment Notification Preferences:
Here you have the option to set up Appointment notifications for your employees, this will give them a reminder if appointments get scheduled or moved.
You will be able to choose one email and one text option, so either receiving both email and text notifications for "MY" (Just that technician) schedule changes, or "ALL" schedule changes, or for example text notifications for "MY" changes, but email notifications for "ALL" changes.
These notifications read as follows:
"ServiceMonster: Job Changed or New Job
Account: Account Name.
Job Date: The job date and time.
Technicians: The technicians assigned to the appointment."
Send Text Notifications To: In this drop down-menu you can pick from the phone numbers you entered into the employee's details page.
Commissions: Here you can choose what commissions will be assigned to this employee. You can pick a Tech commission, and/or a Sales Rep Commission. To learn about setting up commissions, click here.