
Click here for general info on Drip Campaigns.
Click on a link to hop to a specific section on this page:
Jump To Selecting Your Audience
Jump To Setting Up The Campaign
Adding the “What”: Call, Mail, Email, or Export
Just To How Do I Turn On A Drip Campaign?
Jump To How do I turn off a Drip Campaign?
Selecting Your Audience

Creating the right audience for the campaign is an important step. This is where you can filter out any clients you do not want to include in the campaign.
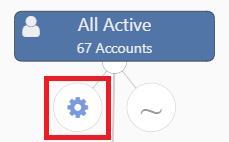
When you start to set up a drip campaign, your audience is the dark blue box that is already on the screen. You can open up the editor by clicking on the box, and then the gear icon that appears underneath.
Here you can view the filters being applied on the left, and a preview of the audience included on the right.
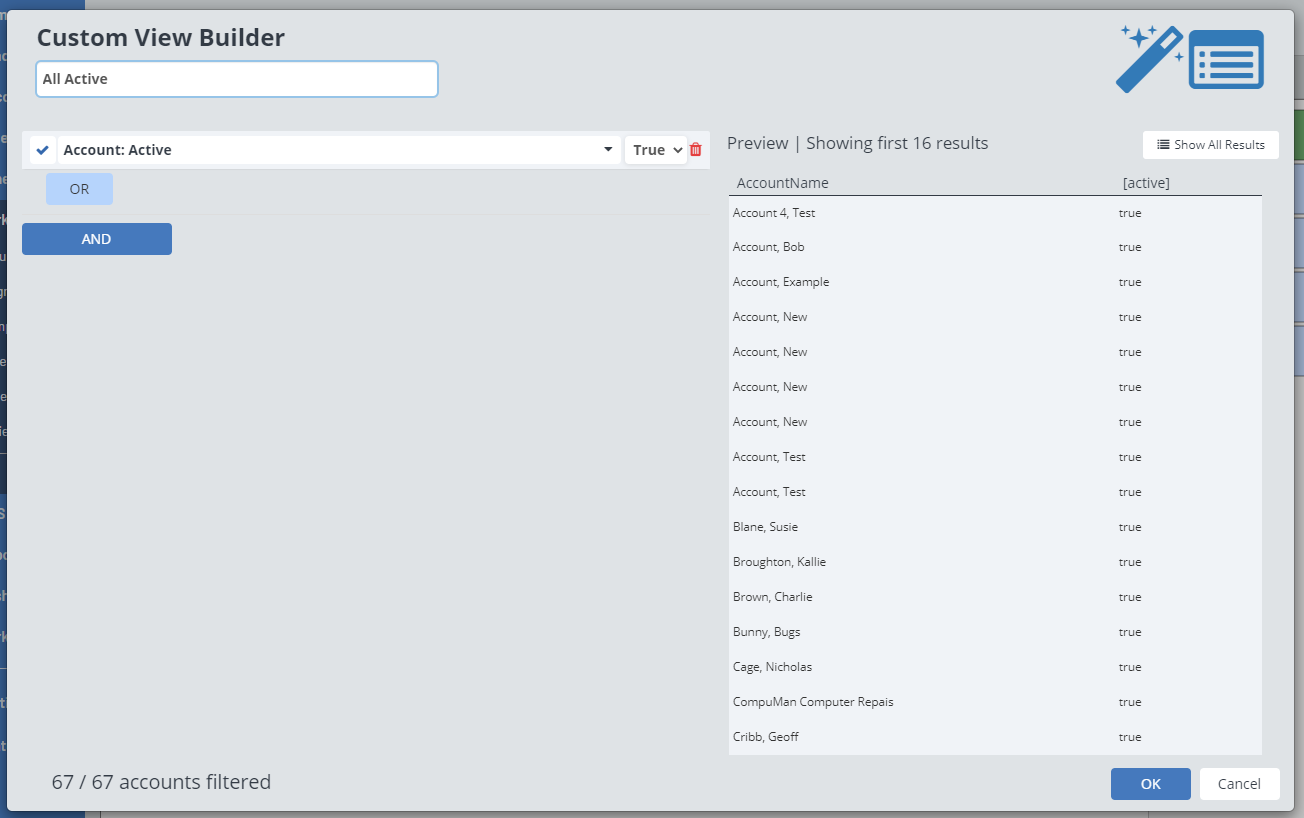
Campaigns automatically include the filter Account: Active set as True, which means we are just including active accounts. You can add in more filters by clicking on the “Or” or “And” button.
Click here to learn more about filters, how they work, and a full list of all marketing filters and what they mean.
Things to consider
Because you only start with a filter for active accounts, you will want to make sure to filter out anyone you don’t want to be included. Some important filters include:
Account: Do Not Contact
Some of your accounts may have their phone, email, or mail address marked as “Do Not Contact”. We want to make sure we are being respectful of any clients who do not want to receive marketing materials.

Depending on the type of campaign you are running, you will want to include the Do Not Contact filter for email, phone, or mail. This filter will be set as “False”, because we do not want to include accounts that are marked as Do No Contact.
Account: Phone/Email is NotBlank
If you are sending out an email or doing a phone call, you will want to make sure the accounts you are contacting have an email address or a phone number.
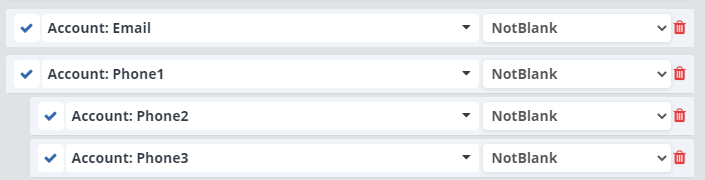
For email, you can use Account:Email set as NotBlank.
For phone, you will want to use Account: Phone1 set as NotBlank and use the “Or” button to add in filters for Phone2 and Phone3
Commercial vs. Residential Accounts
You can choose to only contact Commercial or Residential accounts using the Account: Commercial filter.

If you want to reach commercial accounts, set this filter as “True”. If you want to reach residential accounts set this filter as “False”.
Profile Filters:
Profile filters are filters created using custom fields. Learn more about creating custom fields by clicking here.
Examples:
Filters for an Email Client retention campaign for residential accounts.
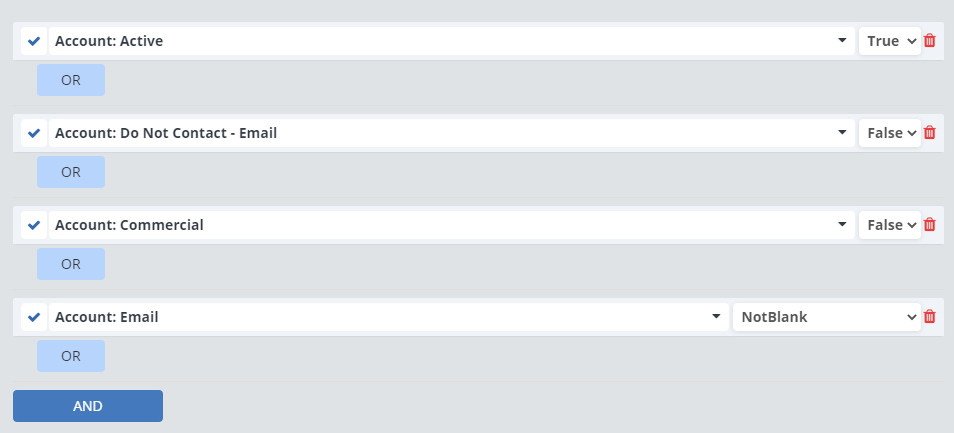
These filters are set up to include only active, residential accounts that have an email address and are not marked as “Do Not Contact”.
Filters for a combination Email and Phone campaign:
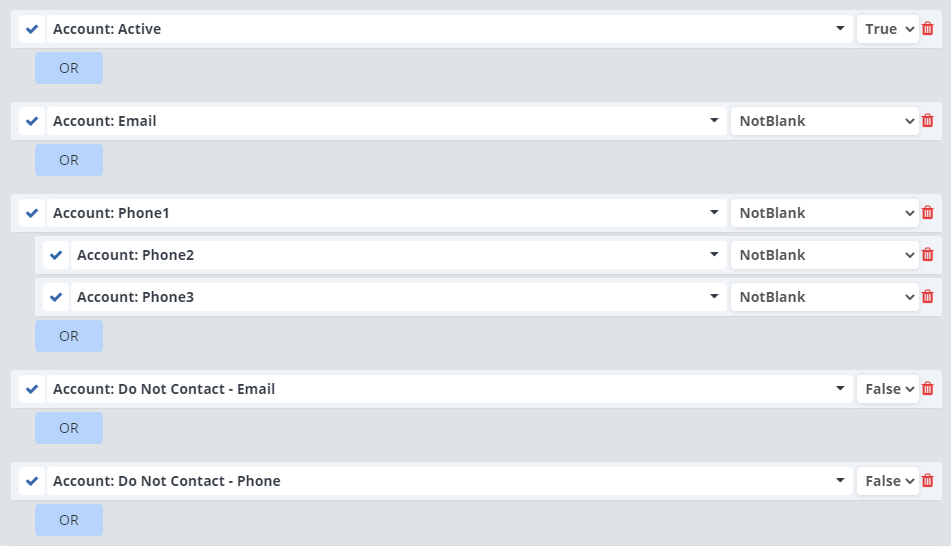
These filters are set to look at all active accounts with an email address and at least one phone number, and filters out do not contact accounts for email and phone.
Setting Up The Campaign
Once you have created your audience, you can start setting up your campaigns. Click and drag a green “Campaign” box onto the area around your audience.
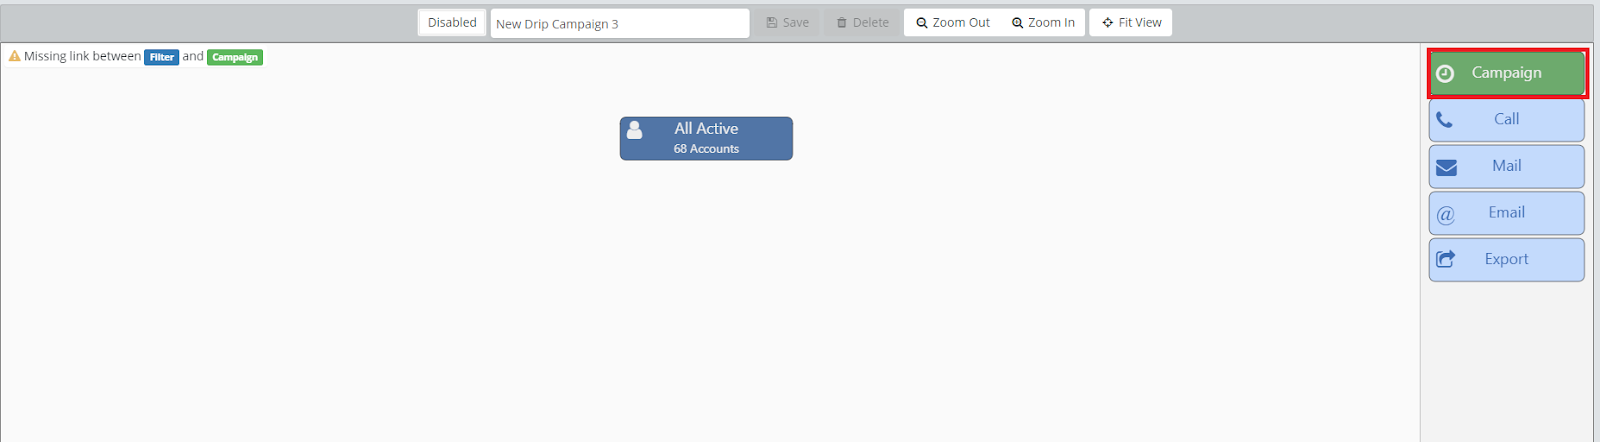
The two will automatically connect, and a window will open to start setting up the conditions for the campaign.
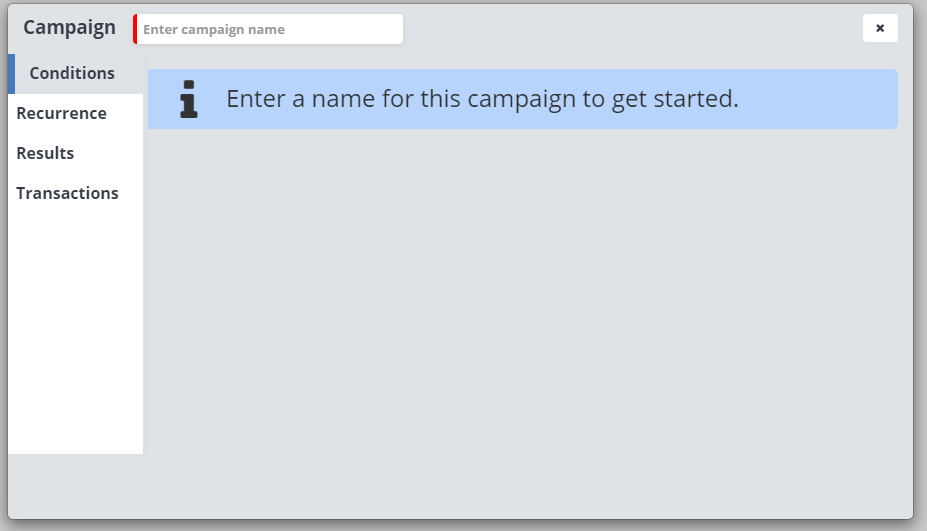
Give the campaign a name, then you will be able to begin adding filters by clicking on the “And” button.
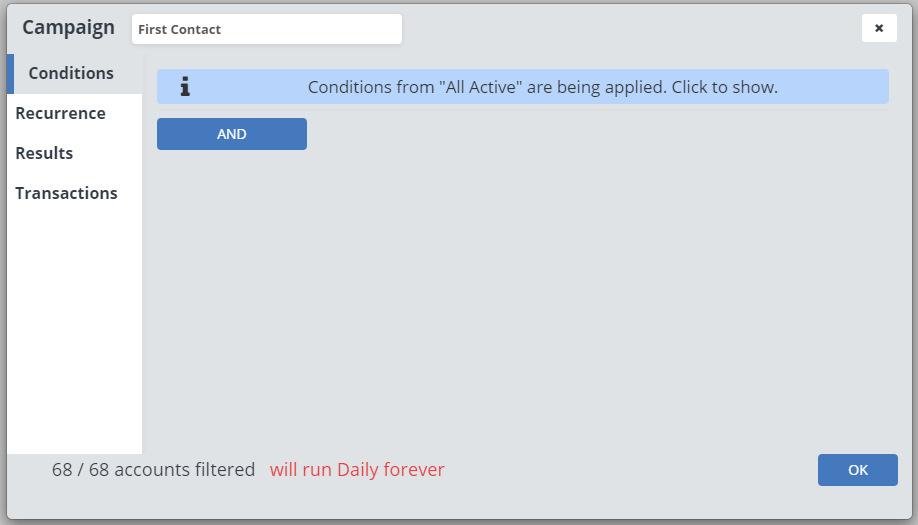
These filters define who will receive this email, call, or mail and when.
Filter Examples:
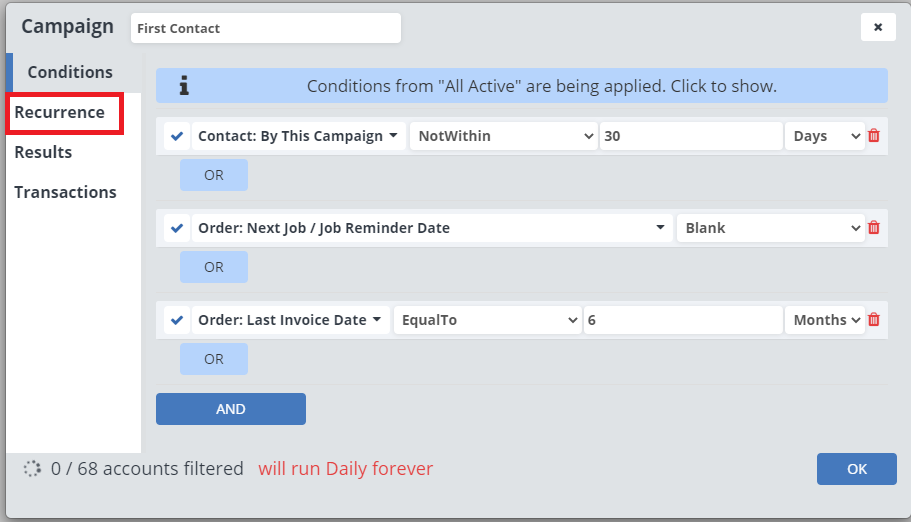
Order: Next Job/Job Reminder Date
This looks at when the next appointment is scheduled for this client. You can also set this to “Blank” if you want to only reach out to clients who don’t have an appointment scheduled. Or set it “EqualTo” and pick a specific amount of days, months, or years this should send before their next appointment.

Order: Last Invoice Date
This filter looks at when the last invoice on the account was finished. You can set it to “EqualTo” and pick a specific number of days, months, or years since their last invoice was finished, or set it to “Blank” if you want to reach out to accounts that have never had an invoice.

Contact: By This Campaign
This filter is very important. This filter prevents this campaign from reaching out to the same clients multiple times. We typically recommend setting it as “NotWithin” “30” “Days” which means no one will receive the same marketing more than once a month.

Recurrence
Click on the “Recurrence” tab to view the recurrence settings.
Here you can set how often this campaign will run, when it will start, and when it will end.
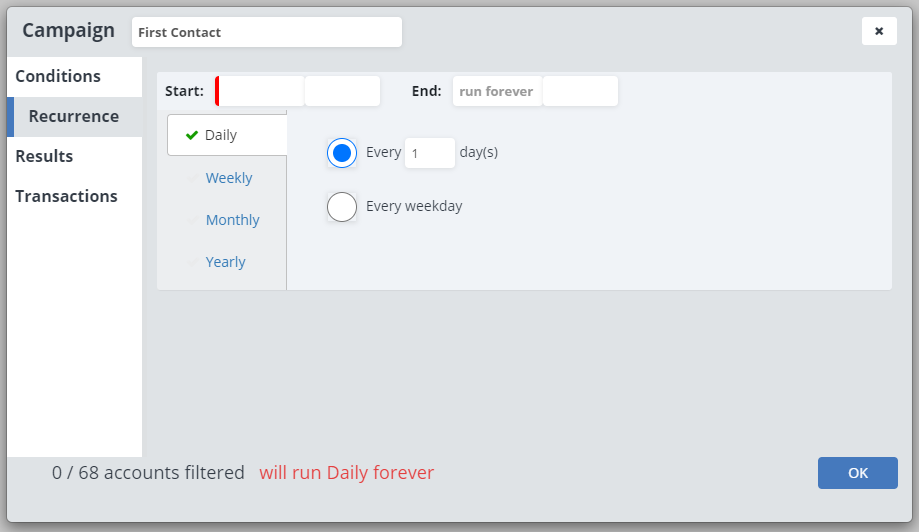
Start: Select the day this campaign will start on, and the time it will run at. This is the time the email will send, the call activity will be created, or the letter will be generated.
End: This is automatically set to run forever, but you can pick a specific end day and time the campaign will end on if you want.
You have four options for recurrence, Daily, Weekly, Monthly, or Yearly.
Daily

Here you can pick for it to run every day (Select Every 1 Day(s)), every number of days, or every week day.
Weekly
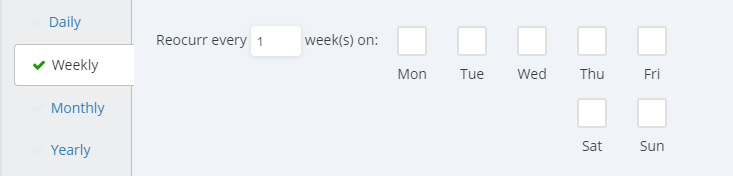
If you want the campaign to only run on specific days of the week, or only run every few weeks, you can set that up with the weekly option.
Monthly
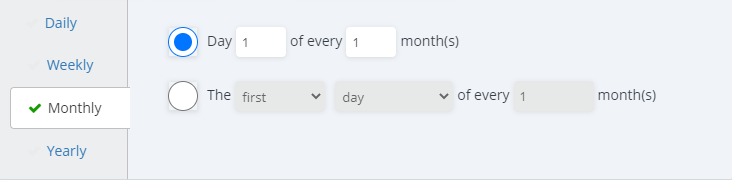
You can choose which day of the month the campaign will run on, either by the day of the month, or by weekday or weekend. You can also select for it to only run once every few months here.
Yearly
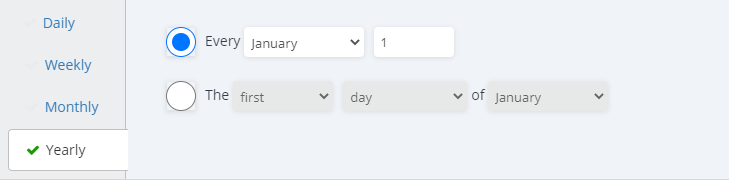
Here you can set up a yearly campaign, selecting the day it should run on.
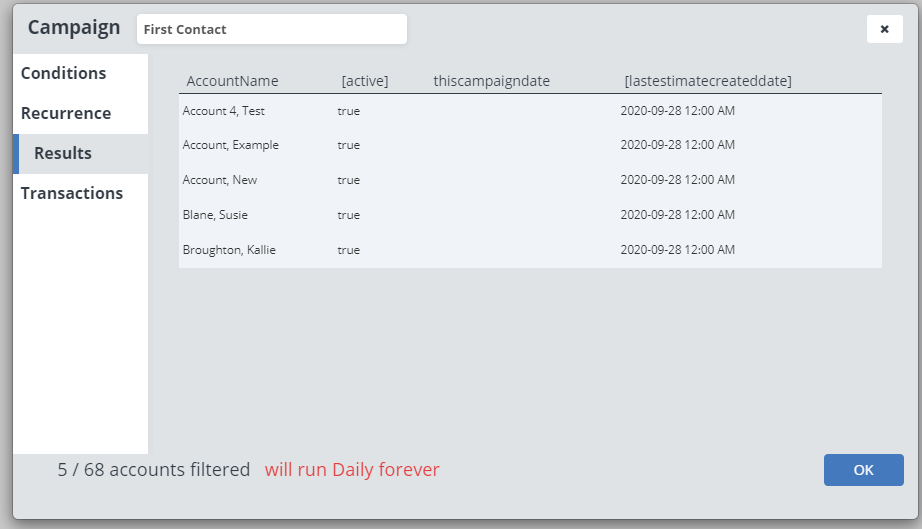
Results
In the results tab, you will be able to see any accounts that will be included the next time this campaign runs.
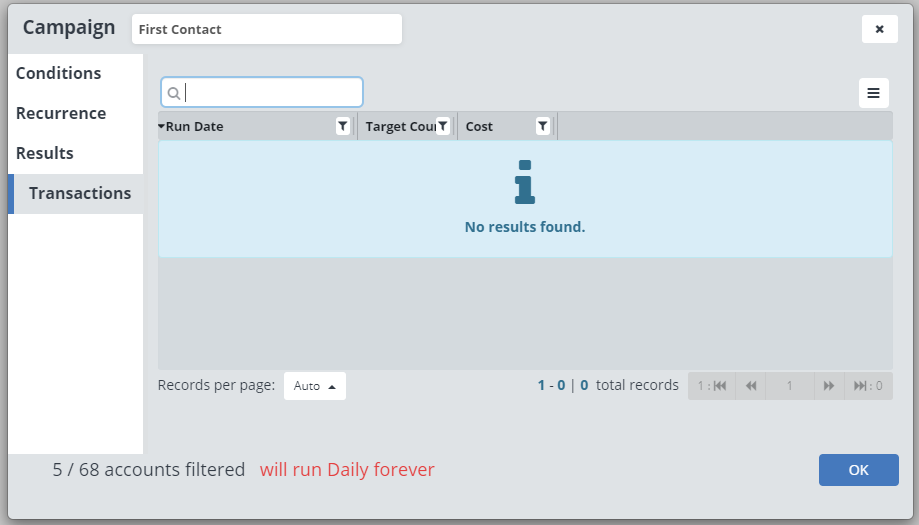
Transactions
In the transactions tab you will be able to view information about previous times this campaign has ran, including who was included.
Adding The “What”: Call, Mail, Email, or Export?
Next, drag and drop in the light blue box for the type of campaign you want under the green box, they will automatically connect.

Depending on the type of campaign you want, you will have different options to edit.
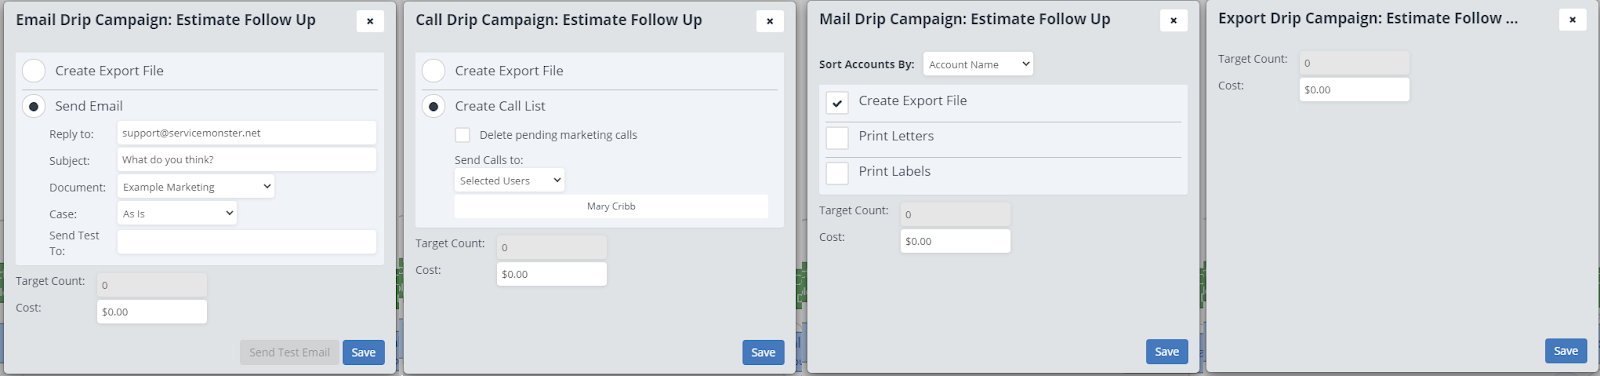
For email campaigns you can edit the following details.
Reply To: The email address it will look like the emails are being sent from and the email that clients can reply to.
Subject: The subject line for the email.
Document: The Marketing Template that will be sent out.
Case: The case style for the email, either As Is, UPPERCASE, or Mixed case.
Send Test To: Here you can add in an email address the test email will be sent to.
Target Count: The number of clients who are being sent this email
Cost: This is an optional box where you can enter in your cost information about a campaign, this is helpful for if you are running campaigns outside of ServiceMonster that have an associated cost.
Call
For call campaigns you can edit the following details
Delete pending marketing calls: This will help to clear out your activities and remove past marketing calls that have not been completed.
Call Date: Choose the date the call should be done on.
Send Call to: You can either select All Users, or specify specific users in ServiceMonster who should be handling the calls.
Letters
For letter campaigns you can edit the following details
Print Letters:
Document: If you want to Print Letters, you will need to choose the Marketing Template it will use here
Case Style: As is, UPPERCASE, or Mixed Case
Print Labels:
Label Types: What type of labels you are printing at.
Start At: Which label it will start printing at (In case you are using a previously used label sheet)
Case: Change the case option
Addressee: Choose how the letter will address the recipient.
How Do I Start Running The Campaign?
Once you have at least one of each type of box on the campaign (dark blue, green, and light blue), you can save the campaign and start running it. Save the campaign by clicking on the green “Save” button.
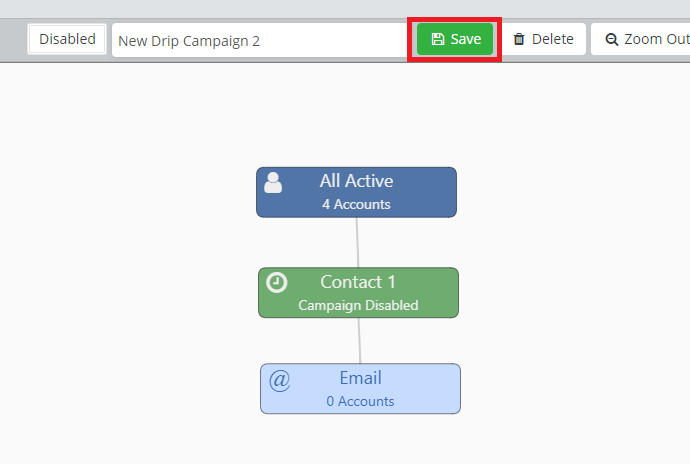
To start running the campaign, click on the “Disabled” button.
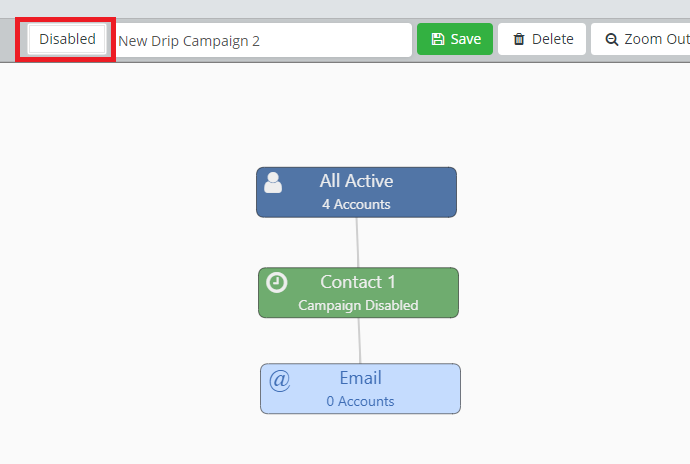
It will change to say “Enabled” and will turn green.
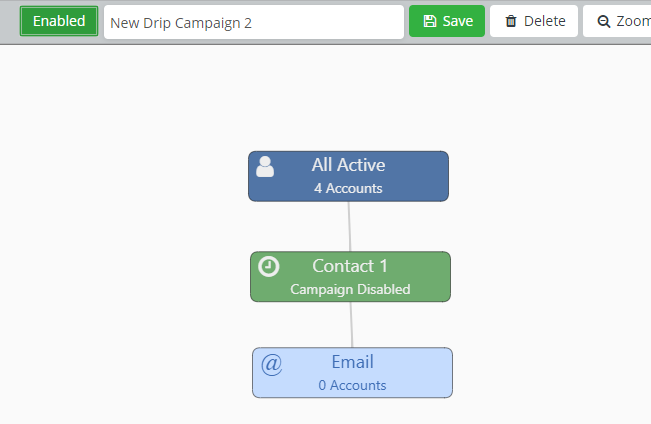
Click on “Save” one more time to save this change, and your campaign is ready to run!
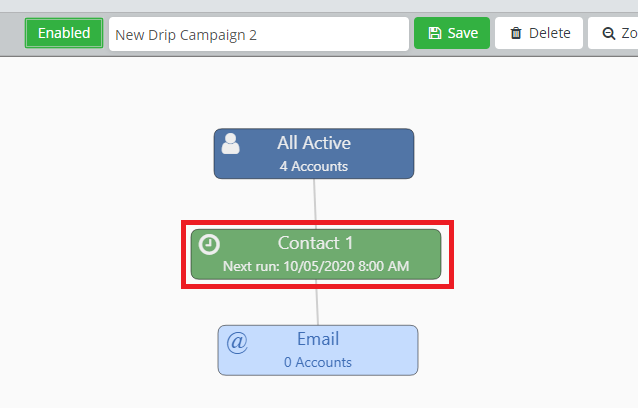
You will be able to see the date and time of the next time each campaign (green box) will run.
How Do I Turn Off A Drip Campaign?
To turn a campaign off again, simply click on the “Enabled” button so it says “Disabled” and click save to turn the drip campaign off.